App Builder sin código
Desarrollo de aplicaciones
Enterprise Apps
Recursos
Inscríbete  

Building an App from Scratch Without Coding

In this 'How to Create an App for Your Business' guide, 4 simple, easy-to-follow steps show you how to create an app for the web, iOS, and Android platforms. And then, run your business operations effectively when your app takes care of customer management, order handling, and it streamlines your internal processes. 

Building an app from scratch using a DIY app maker has changed app-building trends and continues to get better, and simplifies the custom app development process. This post helps you build your iOS and Android apps to bring your idea to life without a project manager, industry experts, knowledge of native development, or any programming languages.

When you want to create a mobile app for your business, whether you choose a high-priced app builder or a free app builder, picking up the right one might be challenging. But free signups and trials make the process faster, cut down on your market research, and easy compared to choosing an app development agency, or hiring mobile app developers to build apps.

Above all, you will end up learning how to create your eCommerce mobile app in quite a few app building platforms before choosing the best one for your business to move forward with.

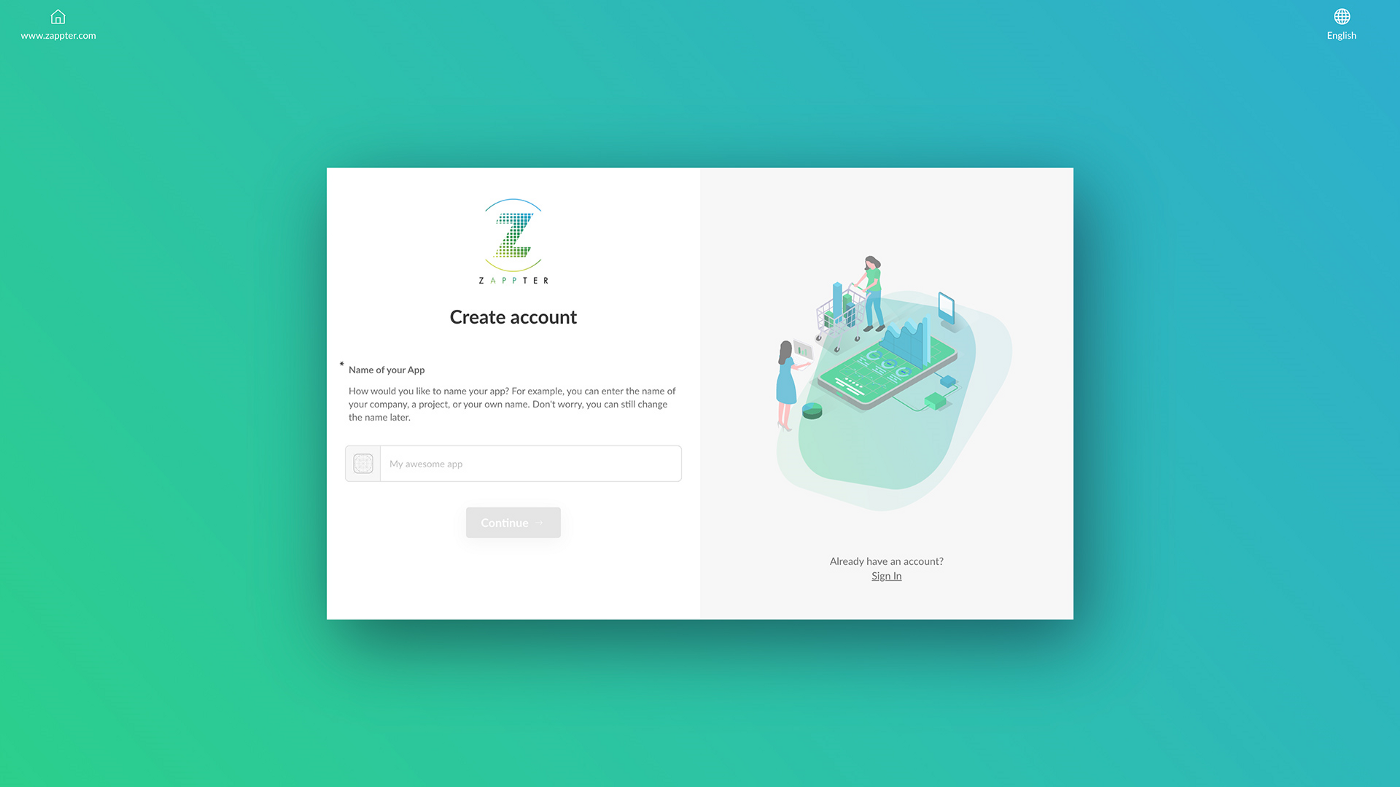
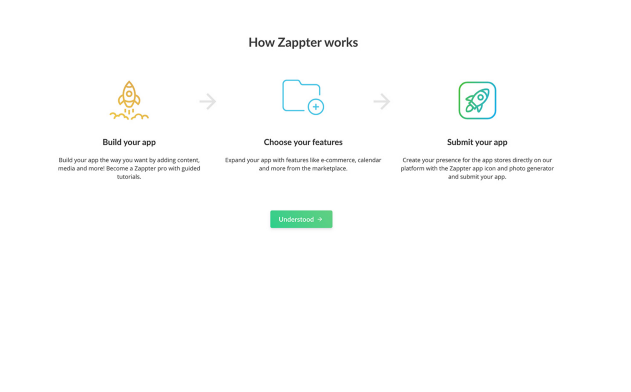
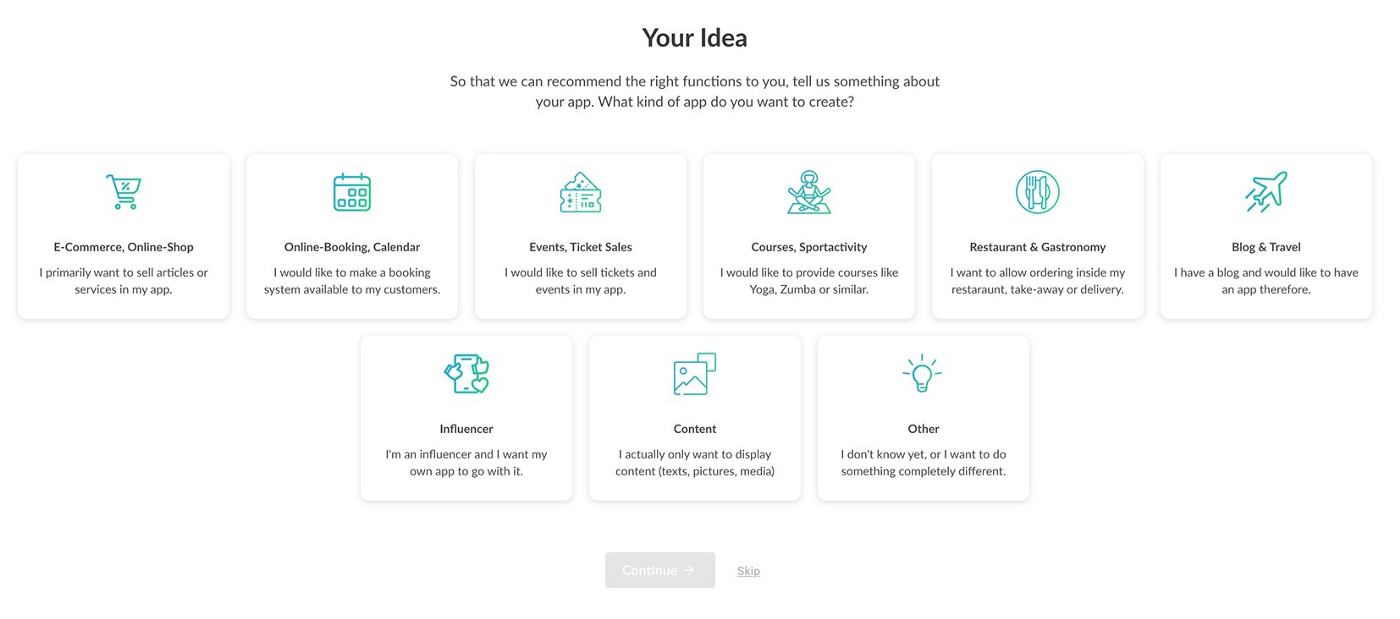
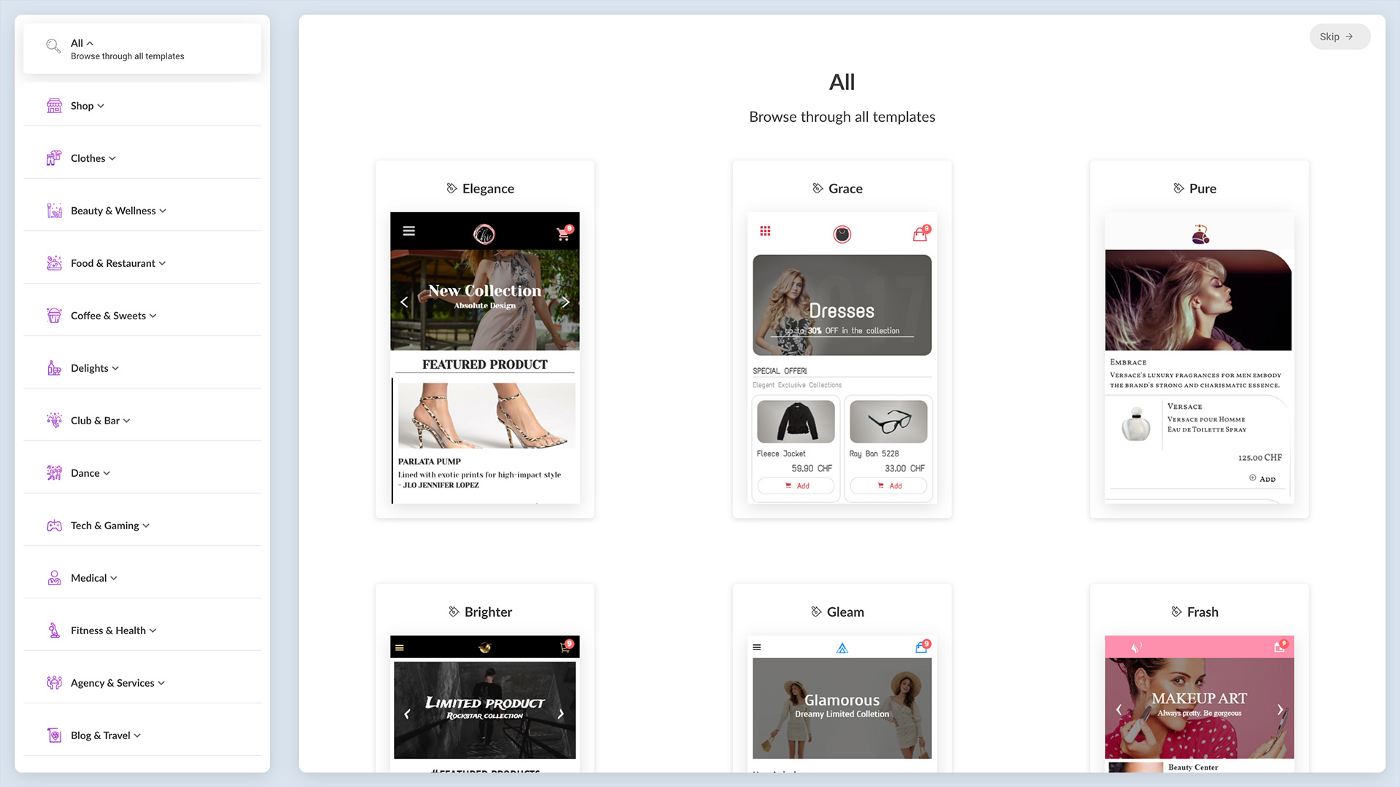
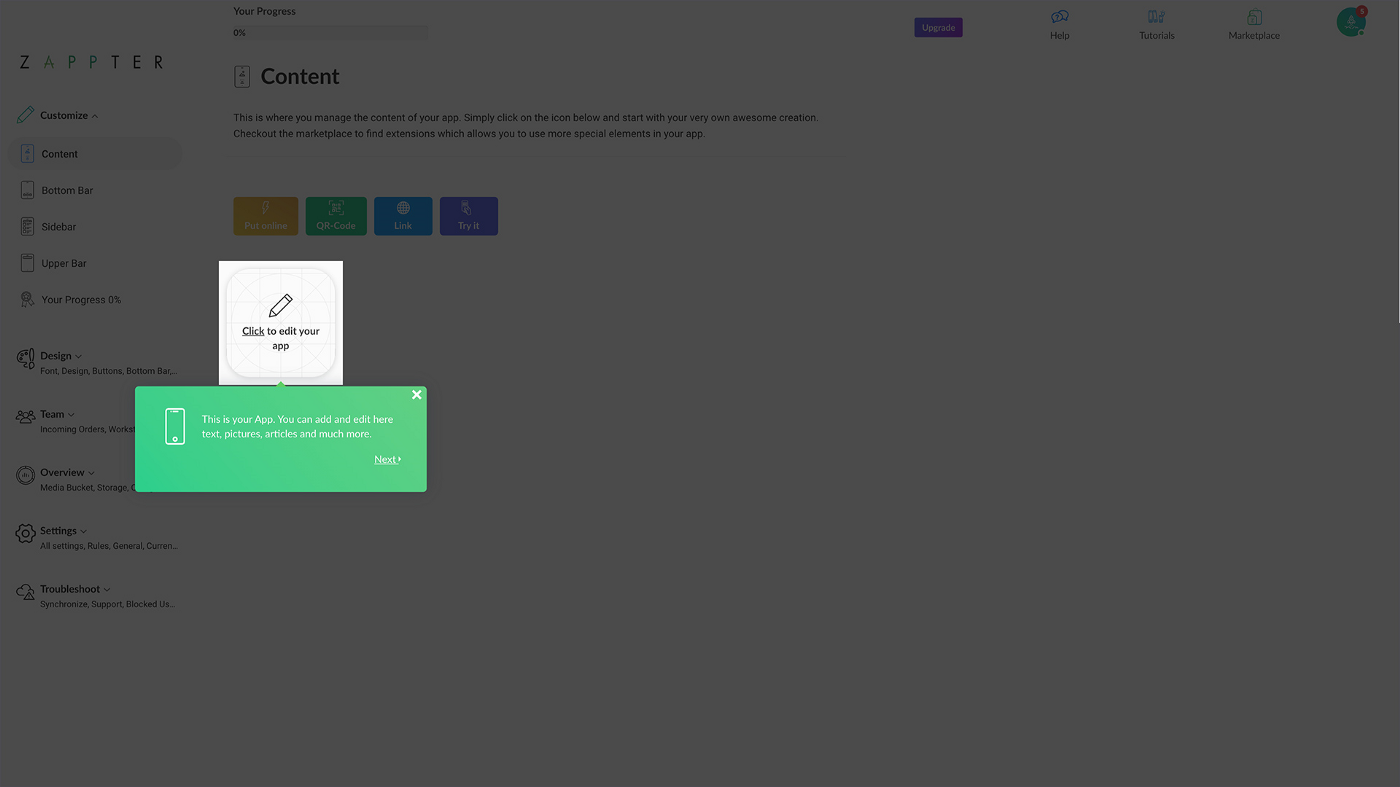
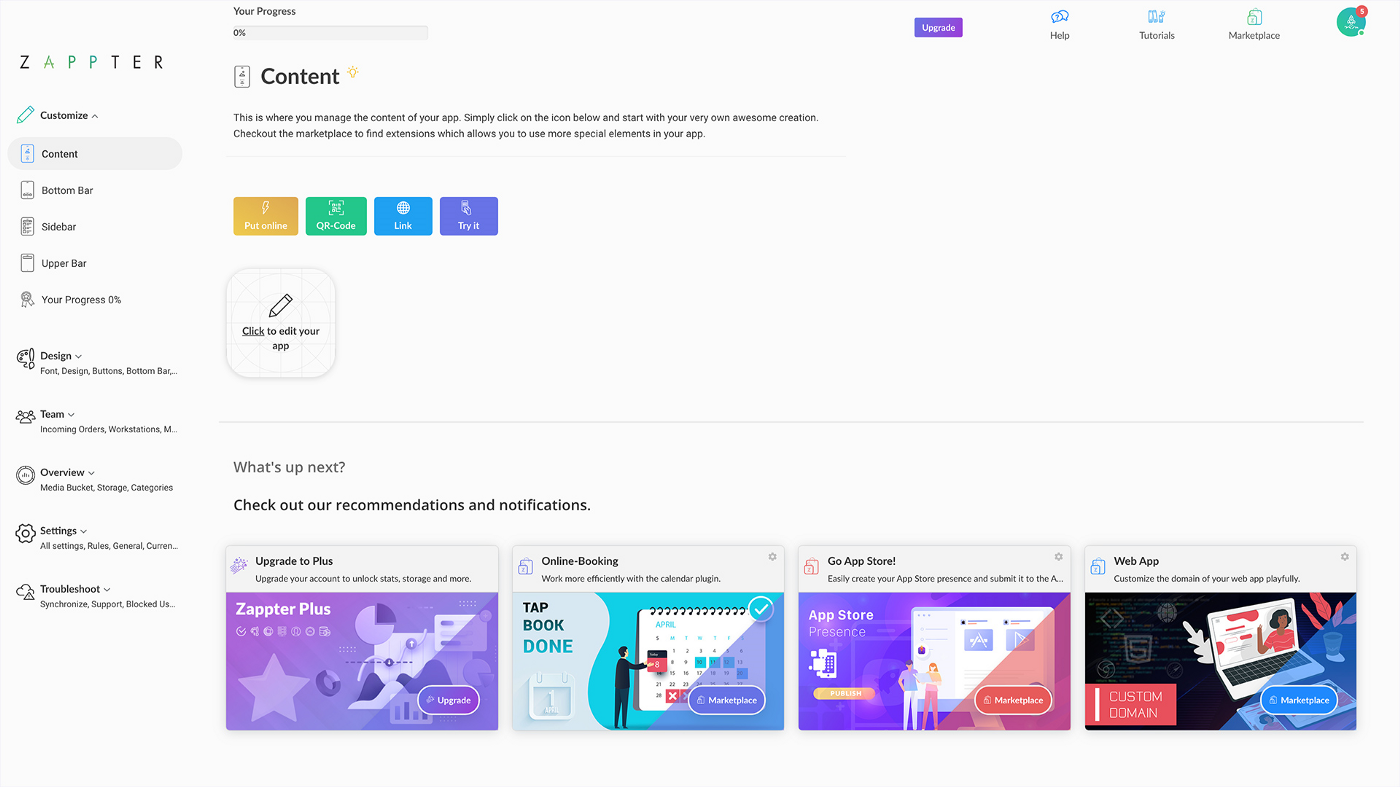
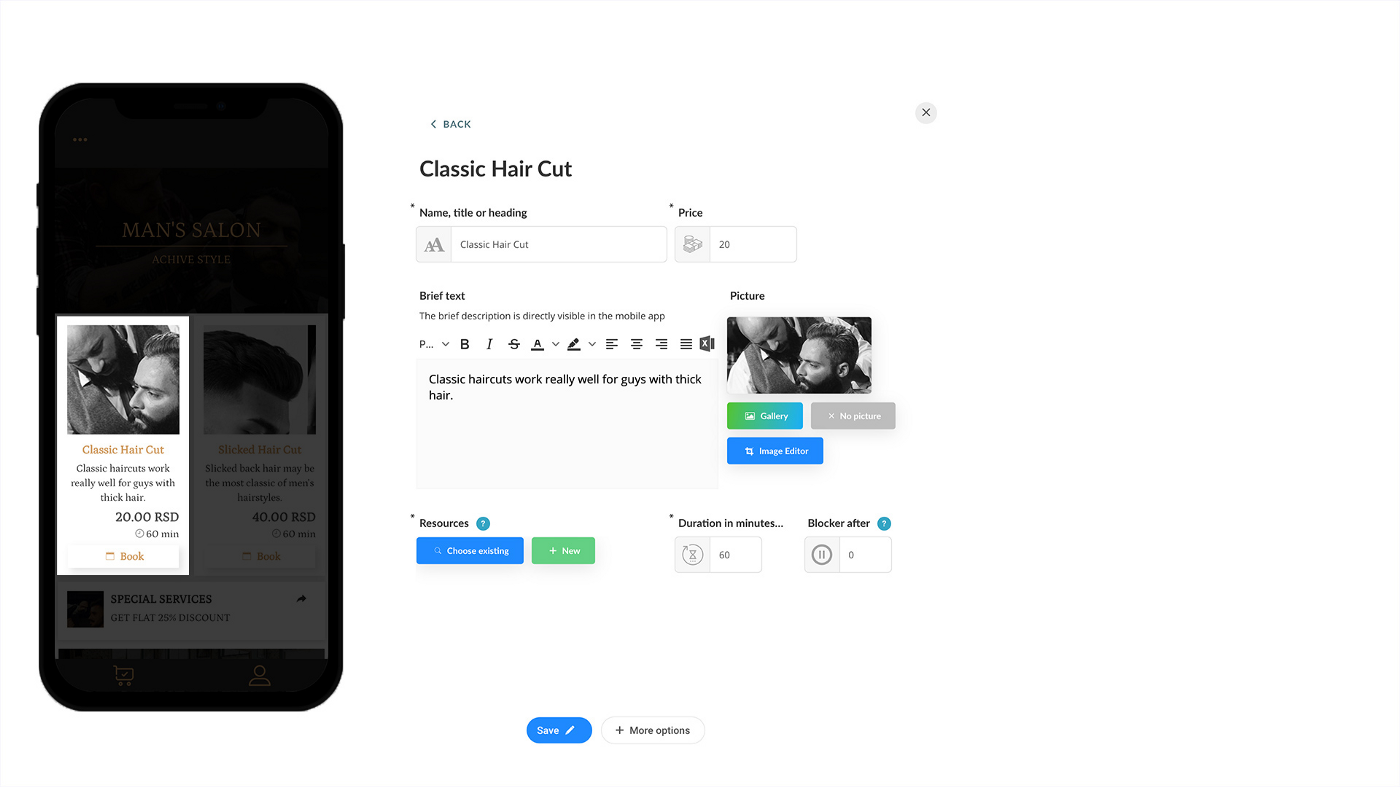
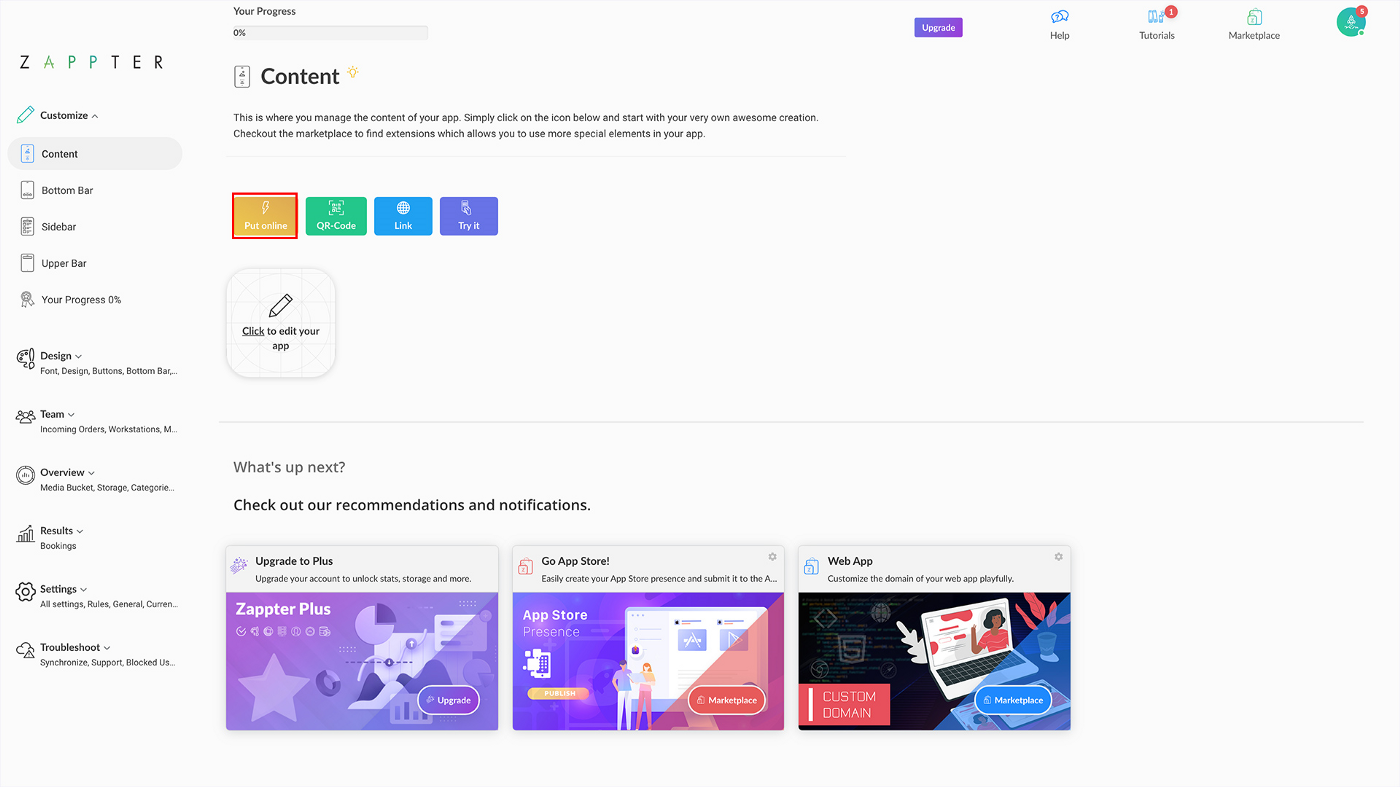
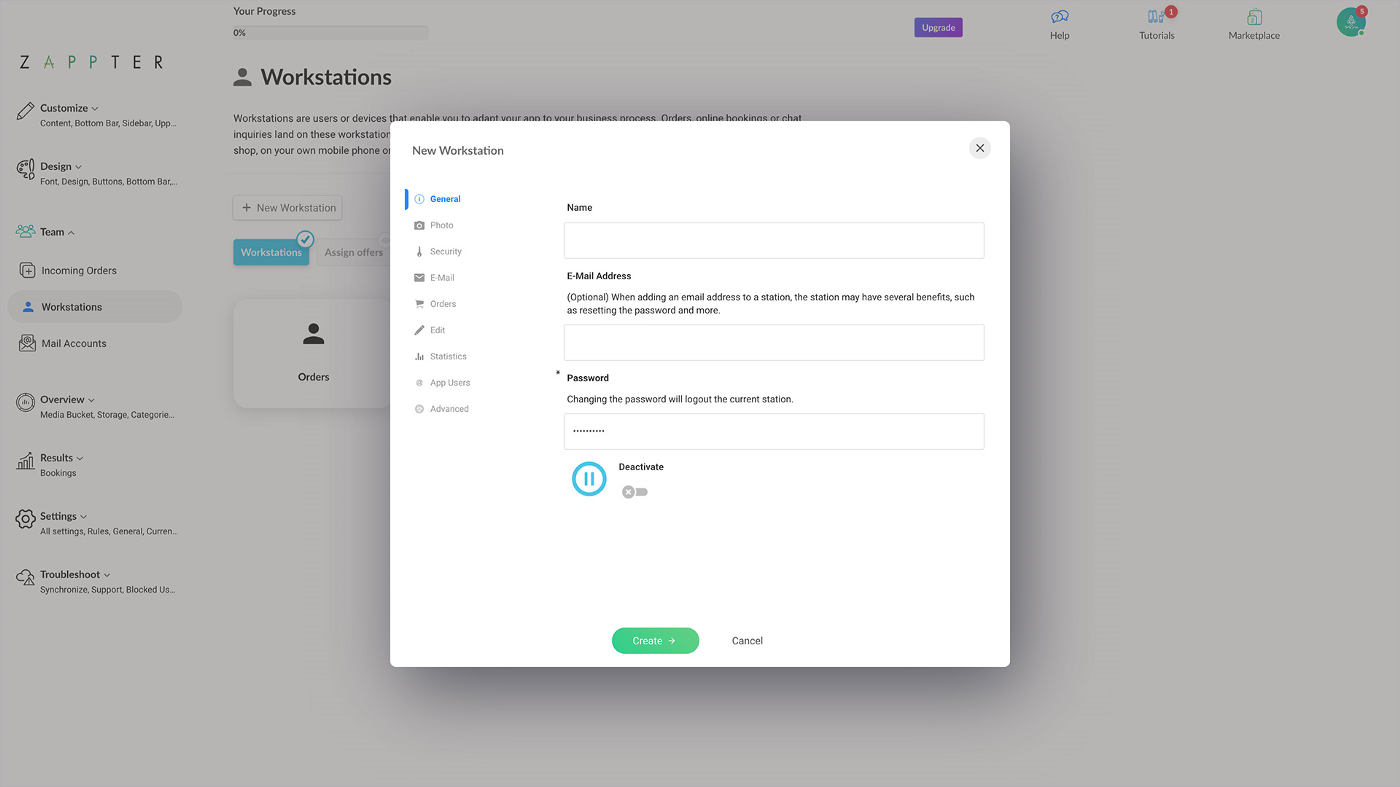
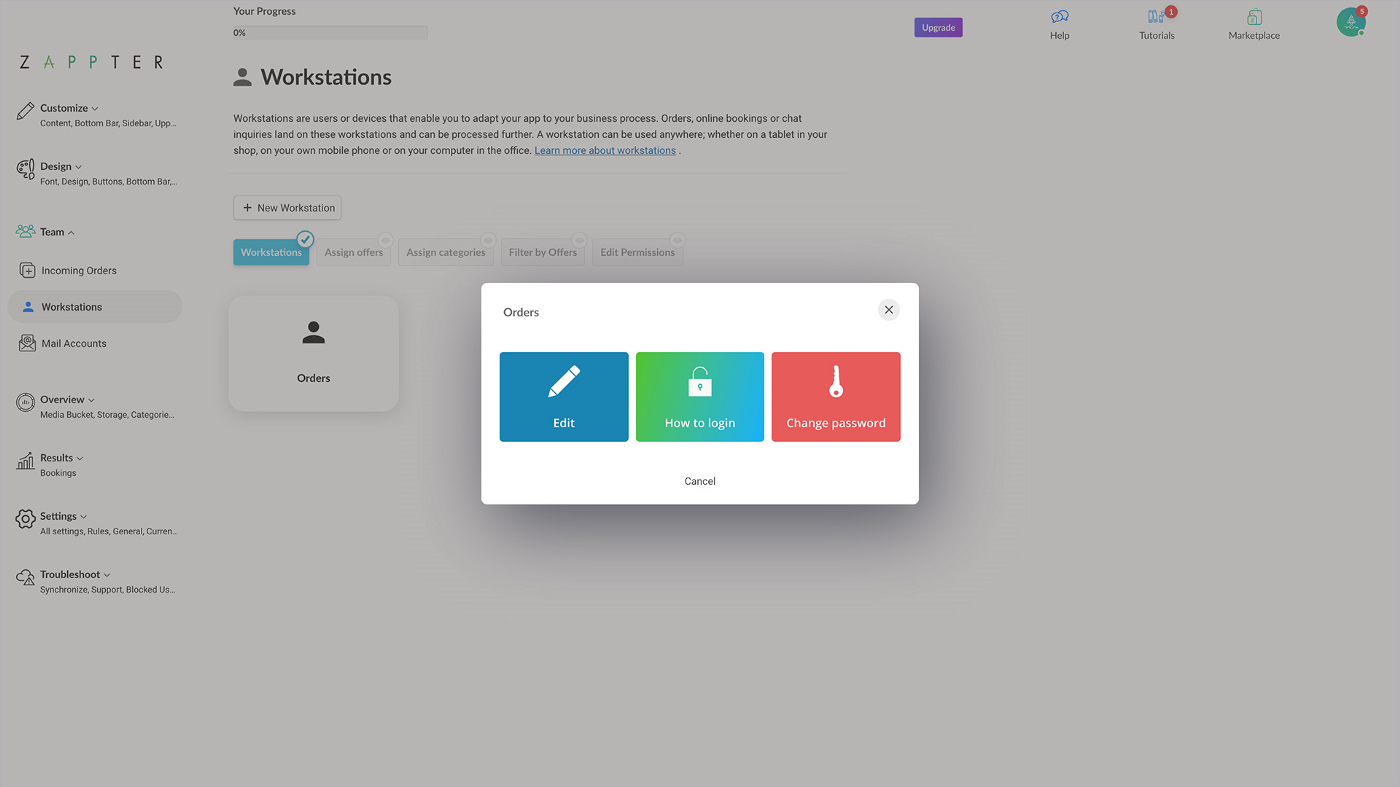
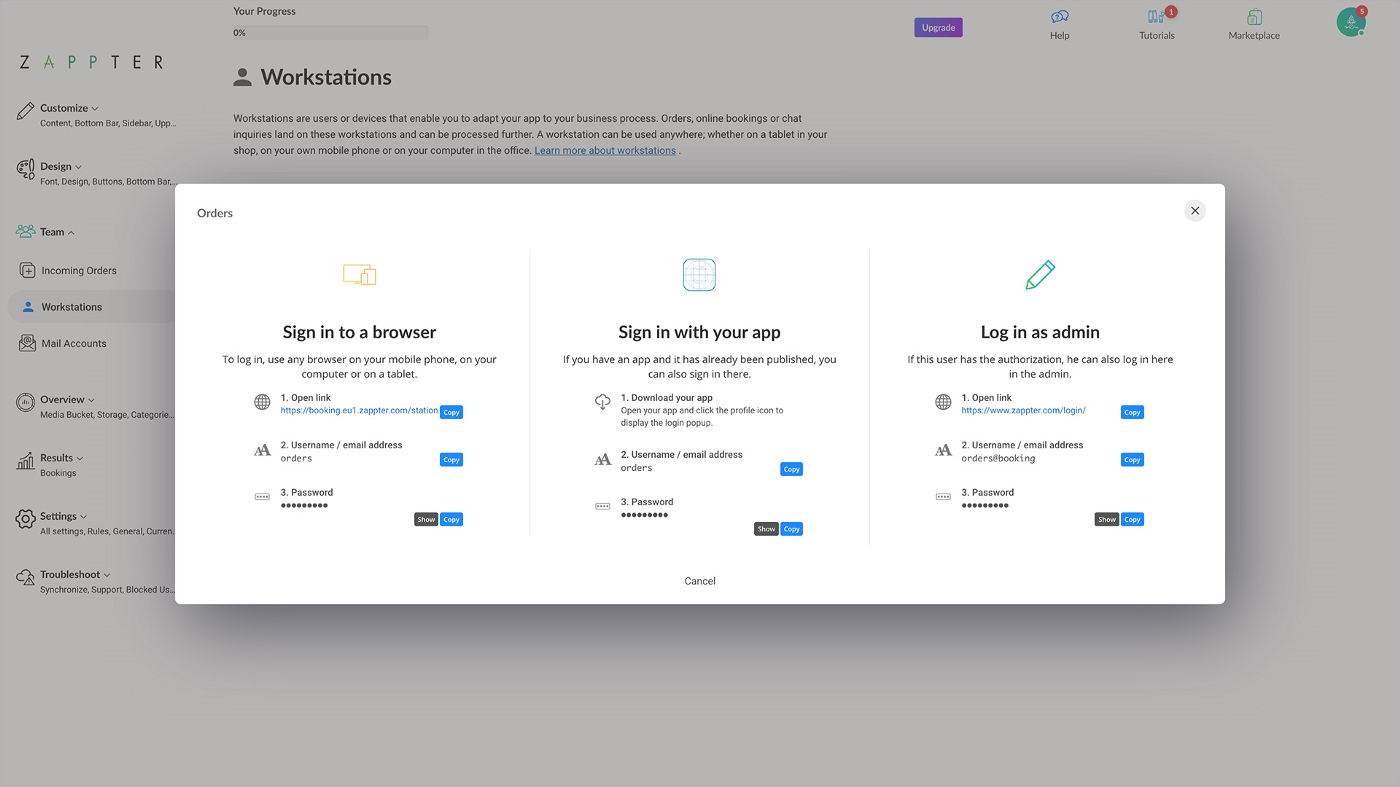
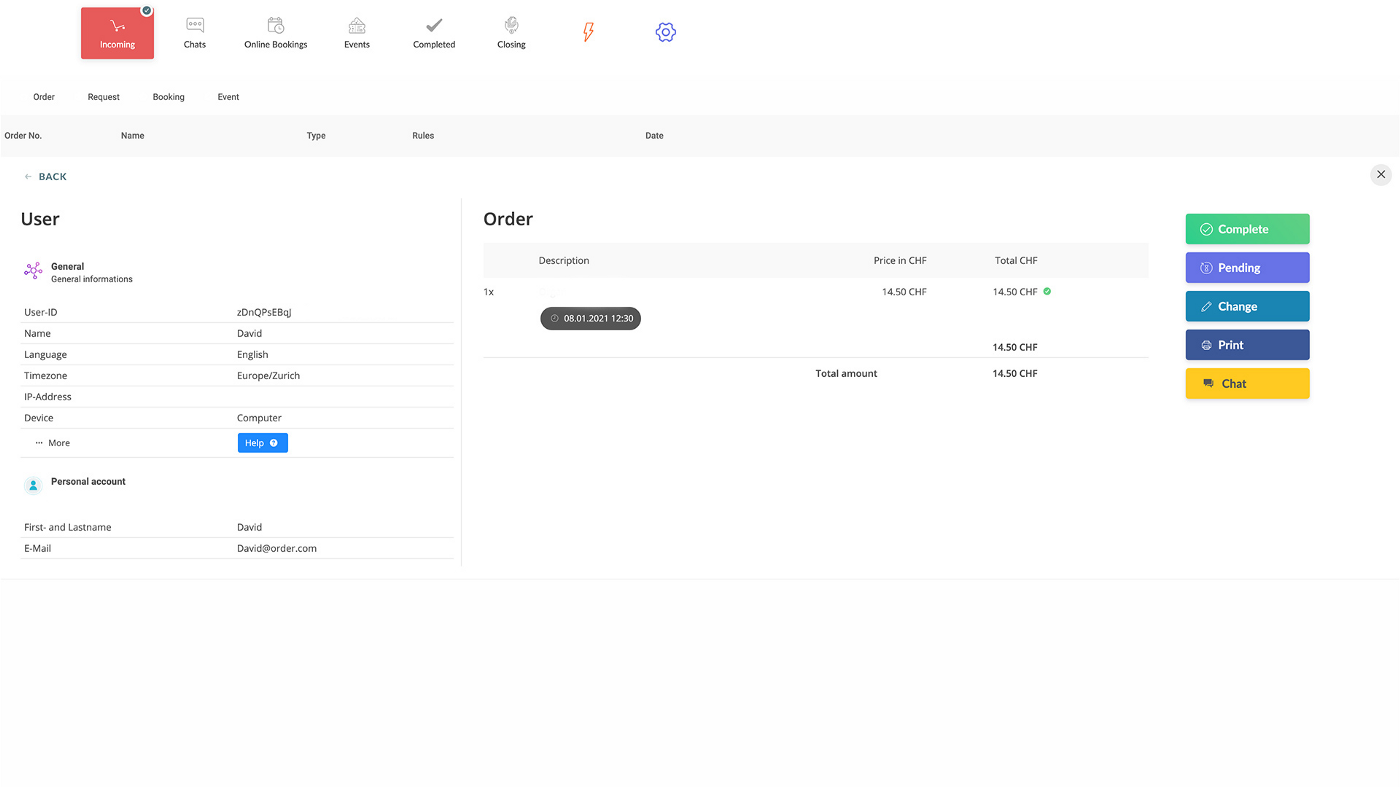
Note: This  'How to Create an App from Scratch' guide is not intended to assist you pick app-building tool, but it guides you through creating your app using Zappter app builder platform.
App design, pluggable features, affordability, and the ability to turn your ideas into instant reality are common benefits in app creation using any app builder.

However, connecting to your running business model to boost revenue and continue to act as your marketing channel needs a few extra capabilities, that are truly the fortes you can expect if you choose the right app builder. 
Only a few app creators go beyond being just an app builder; with your app published, they can help you streamline your entire business operations. 

The app builder is designed to be friendly, business-focused, and ensure the enduring distinctness of your brand through lots of pluggable features to keep your user experiences (UX) at the top and help your business reach its true revenue potentials.

So, let us try to create an app with these simple quick steps to building apps and see how it feels like to build your first app from scratch. 
Building block: 4-step approach to create your mobile app, connect with your business, build your audience, and see your sales growth. 

How to create an app from scratch - step by step (iOS app, Android app, & web app):

1

Sign-up free, no credit cards. Quick wizard collects your brand information.

2

Design your app, create content, and go live. Read step-by-step instructions. 

3

Manage your customer orders coming in from your app using smart workstations.

4

Marketing your app, target, retarget, and outreach to convert with a ton of features freely available.

1. Sign up 
2. Create app content 
3. Publish on app stores 
4. Utilize built-in tools & develop your business.
If your aim is to create multiple mobile applications for all your stores, you only need to create your single app using the above-outlined steps (detailed steps below), then simply add the Zappter's Multi-store plugin to add as many apps as you want to support your businesses.

Each app can use different content, design themes, separate insights, but users administration can be scattered among your different stores or manage them centrally.

1. Sign up With App Builder 

The signup process is inspiring and simple. A well-researched design is truly a welcoming experience for any user wanting to build an app. You must try it yourself, it’s absolutely free. 
What strikes anyone about the sign-up is, you only have to keyboard input your app name, email, and password. Yet, you end up being another competent user in the app builder at the end of the registration process. How? 
The app builder is powerful but simple! Apart from that, Zappter’s sign-up that comprises of three tasks that ensure a smooth and well-ordered onboarding experience for you, trying to bring your app ideas into a reality: 
  1. Setting up your basic information. 
  2. Choosing a template or no-template for your app design.  
  3. Learning the basics with the product tour of the app builder.

Step #1. Set up Your Basic Information 

Where do you begin? Visit Zappter.com and click on any one of the Get Started buttons. 
The process takes you through a few screens starting with entering your app name or the brand, which will become your progressive web app (hybrid app) URL when you have completed building your app.
image.png 590.61 KB
 
Other information it collects through the consecutive screens of the app builder signup wizard during the stage are: 
  • Email & password that will become your username and the password to log in to edit your app design. 
  • Zappter's newsletter opt-in, terms acceptance, followed by choosing your time zone, locality, and upload your business logo (logo design can be any size).
And, in the end, it confirms your basic information collection completion. 
 
image.png 128.49 KB
 
Congratulations! you’re nearly half-way through your signup and app building process. 

Step #2. Choose an App Design Template 

Where do you begin? When you click on the Continue in the previous screen, the wizard continues with informative screens, questionnaire screens, and the app design catalog discussed below. 
Pass through informative screens, click to answer the questionnaire, and select a template or skip template selection to complete this step. 
If you choose not to select a template, your app is created with the default user interface of Zappter, and you can continue to complete adding your content. However, at anytime later, you can add a template or change the template if you have chosen one already.
Informative screens, intended to share some useful information very briefly. Move through the screens clicking Understood
For your reference, below are the information shared through the screens: 
  • How Zappter works?
  • What is the Marketplace?
  • Benefits with your own app.
It starts with the below screen: 
 
image.png 35.63 KB
 
Questionnaire screens, intended to collect data to simplify your app-building experience by pointing to your app-specific features, determine the type of app, and send useful, relevant info in future newsletters to you. 
Go through each of the point-and-click screens to complete your inputs: 
  • Your Idea
  • App Store
  • Your Skills
It starts with the below screen. You can improve your app design, idea, and content at a later stage also.
image.png 202.53 KB
 

App Design Template 

App design or app design templates, there are plenty of stunning, readily available app designs to choose from, and you can browse by categories and choose the one that best fits your business if you intend to use one of these designs developed by the best mobile app designers. 
You can Skip at this screen to go without a design and use the standard UI. 
image.png 515.76 KB
 
  • You can choose a free or premium top app design that works best for your eCommerce app, branding, and design needs.
  • You can also choose to go with the ‘No Template’ option by Skipping this screen and use the standard UI, which is also sleek and clean.

How to design an app? 

The ‘No template’ option is best when your design and branding demands are unique; because, you can customize an app’s UI to any extreme and turn it into a whole new design for your brand, or craft it to match your existing brand. However, it might be ideal at a later time, when you have explored Zappter’s robust app design capabilities that offer intense customization options to go any levels of design granularity. 
Hats off! You’re more than half-way through your sign-up. 

 Step #3. Learn the Basics of the App Building Software With the Product Tour 

Where do you begin? As you complete the app design template section, a carefully crafted laconic product tour comes up. It walks you through adding content to your app and publishing it on user devices, followed by guiding you on live previewing the app on the builder’s built-in simulator to ensure your app gives the intended look and feel of it. 
image.png 183.05 KB
 Congratulations! You signed up successfully, and your app is ready to take off. 
 
image.png 543.86 KB
 
 Your next task is to add your content. 

2. Create Content [app UI design] 

Now that you’re done with sign-up and prepared your app with a stunning template, or decided to go ‘no-template,’ your app is nearly ready to go live. It is time to focus on putting your content strategy to work. 
Creating your content is this easy: 
  1. edit your app design,
  2. add your UI elements,
  3. set their basic settings,
  4. and, put online to publish on the user devices and start selling, and get user feedback.

Step #1. Edit Your App [design] 

Where do you begin? When the product tour completes, it leaves you on the below screen to create your content. Click on, Click to edit your app button to start adding your content. 
In case you’re elsewhere, here is how to get to this screen: Login to your admin with user credentials created during the sign-up. Then use the menus, Customize > Content
image.png 543.86 KB

Step #2. Add Your Element 

Now you’ve landed on the content creator filled with UI elements on the left, waiting to make your content awesome. 
 
image.png 110.89 KB
 
A sample with app content created. 
You see all the different classes of elements available. Expand a class (just like how Content and text class has been expanded in the picture) to see what it has to offer you. 
Click on an element inside the class to add to your content, and move on to the next step to check out how you can set its characteristics. 

Step #3. Enter Basic Settings 

As your element is being added to the content, next it prompts for you to set its basic attributes: 
image.png 269.4 KB
When you have completed these simple, unmistakable fields, you can hit Create to finish adding your UI element to the content. 
But wait, there is more when you need to do more with the element you just added; click on the + More options to get an idea: 
image.png 373.85 KB
With most of the elements, you wouldn’t bother; for some, you can set various settings here to shape up and get in line with your needs or business rules such as inapp purchases, selling rules, etc. 
Perfect, now you know how easy it is to add your content, the next task is to make your new content available on users’ devices. Move on to the next step. 

Step #4. Put Your App Online to Publish on User Devices 

Now you should be on the content creator and your new piece of content visible on the simulator - Click on the 'Try It' button to test your app. Hit on the < Back at the top-left. 
All you need to do is smash that Put online button to publish your changes on the users’ devices and start selling your products and services. 
image.png 475.87 KB
Web App Link: Your users can access your app via its Web App URL until it’s available on Google or Apple app stores. Click on your profile menu at the top-right. Your link is under Your Web-App Link. 
Awesome! It’s how easy it is to add your content and begin to sell.

3. Manage Your Customer Orders 

Your content is stunning, your app is awesome, and your users are converting; what is your next task? 

What are workstations in Zappter, briefly?

The workstations act as terminals that receive your customer orders, and communication your customer might initiate through your app pre/post orders.

You can create any number of workstations and assign them to any pages that consist of your selling items, bookings, complimentary requests, event drop-in tickets. Then use any android devices, iOS devices, or web to log into managing them.

You can also organize your internal operations using different workstations for different sections of your business, for example, two separate workstations; one handling food sales and the other handling ticket sales.

Visit here to learn more about workstations.
Well, you need to set up and prepare your back-of-house to receive and process your customer orders, requests, and bookings. You handle these tasks using Workstations, and here is how to go about it: 
  1. Create workstations (one or more as you require).
  2. Manage your orders in the workstations.

Step #1. Create Workstations 

Where do you begin? Login to your admin with user credentials created during the sign-up. Then use the menus, Team> Workstations. Hit on + New Workstation
image.png 285.56 KB
You can give it a name, email, and password, and Create, which should be good to go with the rest of the default settings. 
If you’re an “I’m more curious” type, you can explore the tabs or read the guide on Understanding Workstations under Zappter Core Functions
Great! You’ve created your workstation and are ready to receive your customer orders; that’s going to be in the following section. 

Step #2. Manage Your Orders in the Workstations 

Where do you begin? Login to your admin with user credentials created during the sign-up. Then use the menus, Team> Workstations. Click on a workstation, then How to login to get the login info. 
image.png 282.71 KB
Here are the login options to the workstation. But you would use the first option until your app is published on an app store: 
image.png 317.84 KB
Once in, you can manage your orders, bookings, user requests, chat requests, and events. 
Accept, reject, change, print, chat with the customer, or anything an order taker does in a conventional setup, is interestingly easy to handle and with lots of fun. 
Read the guide on Understanding Workstations under Zappter Core Functions to learn the significant values the workstations can add to your daily operations. 
image.png 129.02 KB
Top efforts! You created an awesome app and set up your back-of-house with intelligent workstations to manage your everyday operations and e-commerce efficiently. 

4. Retarget, Outreach New Users & Convert into Buyers with Groundbreaking Features of the app builder 

You just created your mobile app from scratch and your final app is ready. Users can access the web app; what should you be targeting next? 
A clear marketing strategy or marketing plan. Because user engagement and downloads are critical to the success of any app launch, you need to tell your target users about your app and make it available on major app stores. 

  • App store optimization: How to make an app for iPhone? Or, how to make an Android app? IOS & Android App plugin has been developed to submit your app for publishing on Apple App Store and Google Play Store for iOS or android. Check it out in detail as it's one of the crucial parts of your app launch.

 
image.png 301.84 KB
 
Here are the other few plugins that add indispensable value to your app marketing strategies and customer engagement plans. 
  • Push-Notifications plugin needs no introduction as to when it comes to a mobile marketing topic, it’s hard to avoid talking about push notifications. Zappter has made it even more vital as you can schedule pushes from other crucial promotional areas in the platform. Check it out in detail.
  • CRM ‘My Customers’ plugin adds powerful customer relationship management features that you use for actionable insights, targeting, retargeting, and reaching out to existing and potential customers. It has several other supporting plugins to extend the features. Check it out in detail.
  • Landing Pages plugin is truly a showcase of the platform’s power. With this, create multiple unique contents and target different audience groups to promote, sell or serve. Check it out in detail.
  • Audio Player, Inline Video, and Video plugins can turn your app ideas about ‘video maker app’ or ‘music maker app’ into an instant reality. Check it out here
  • Here are few other plugins to check out for your marketing endeavors: Tawk Chat, HubSpot Chat, SendGrid, MailChimp, Promotions, App Banner
We discussed more plugins in this section. Check Installing Plugins under Zappter Core Functions documentation to understand, subscribe, unsubscribe plugins. 
There are more plugins, features, and astonishing app designs to stand out in a crowded competition. So don’t forget to visit our Marketplace and explore everything Zappter has to offer you. 

Frequently Asked Questions

I want to create an app where do I start?

This post is all about the same topic you're questioning. Please go through the step 1 of this guide that explains every detail to creating your mobile app.

Why should I use Zappter platform for building my app?

Zappter has been in the app business for years. It launched its app builder early this year, after several years of research & development. Zappter has studied a few of the leading competitor products on the market to bring in new features and toss out what's not needed for business-focused mobile apps.

Result? Improved UX for our B2B customers & their app users.

How much does it cost to make an app?

If you want to sell your items online (eCommerce app) or try to take customer bookings, there is a subscription fee for an e-commerce plugin or reservations plugin, depending on your need. If you're not a commercial, it doesn't cost you anything since you don't need to use any business plugins.

How to create an app for Android?

With Zappter, you need to do is to install the iOS & Android App plugin. This plugin installs an assistant that guides you through the process of preparing your submission data for App Store and Google Play. This plugin focuses only on these two major app stores, and there is a separate section for a guided collection of submission data for Play Store (Android).

How to create an app for iPhone?

With Zappter, you need to do is to install the iOS & Android App plugin. This plugin installs an assistant that guides you through the process of preparing your submission data for App Store and Google Play. This plugin focuses only on these two major app stores, and there is a separate section for a guided collection of submission data for App Store (iOS). 

I am running an online store. I want to create an app, where do I start?

It's the exact similar steps as described above. Depending on your business type and requirement, you might need to use certain different plugins to support the basic business operation or enhance your business model. Please check this page that discusses setting up online stores.

Where can I learn how to build an iPhone app for a real estate?

Please visit this page where we discuss different sample app that you can use in real-life: www.zappter.com/z/en-us/drag-and-drop-app-builder/