Enabling your users to tick any of your app UI element. Below steps guide you set a desired icon and enable adding 'checks' to each UI element.
Setting your icon:
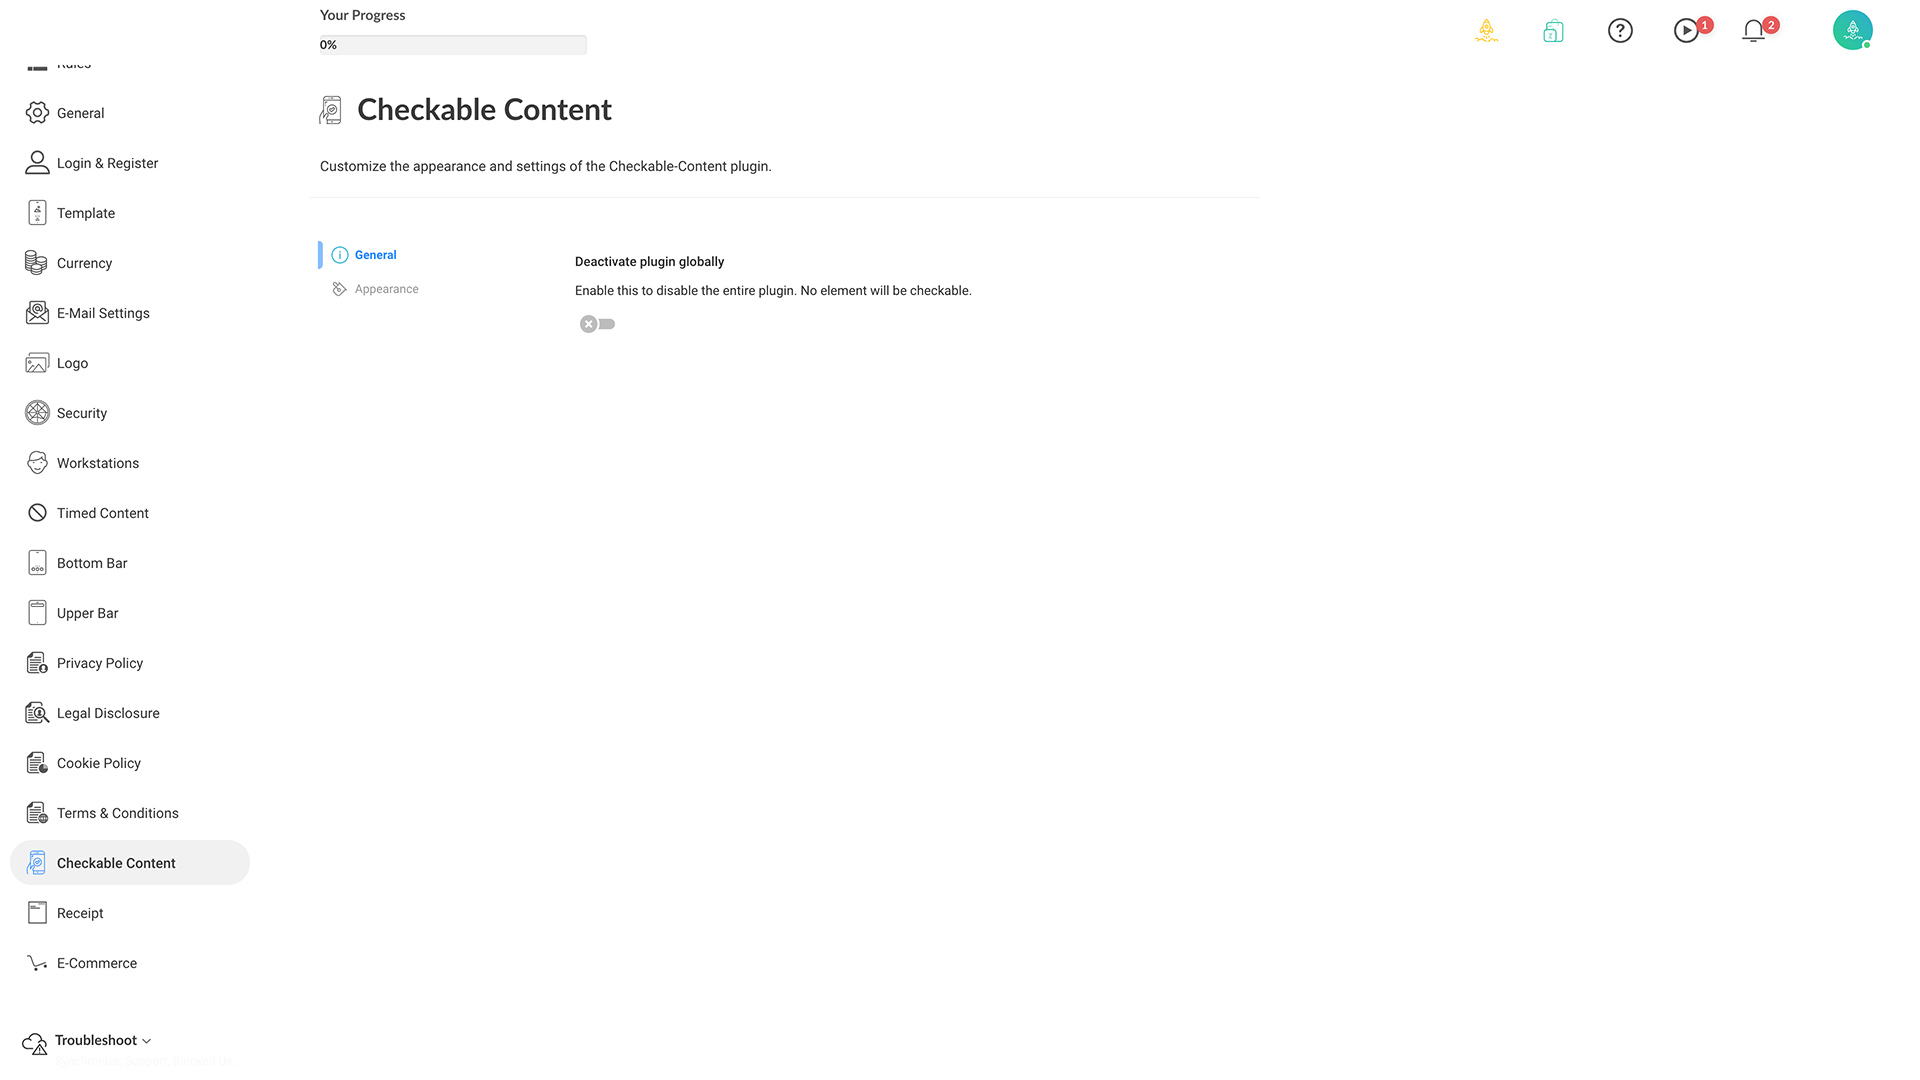
1. Admin > Settings > Checkable Content. 'The general' tab appears by default, use it to enable or disable this feature.
image.png171.78 KB
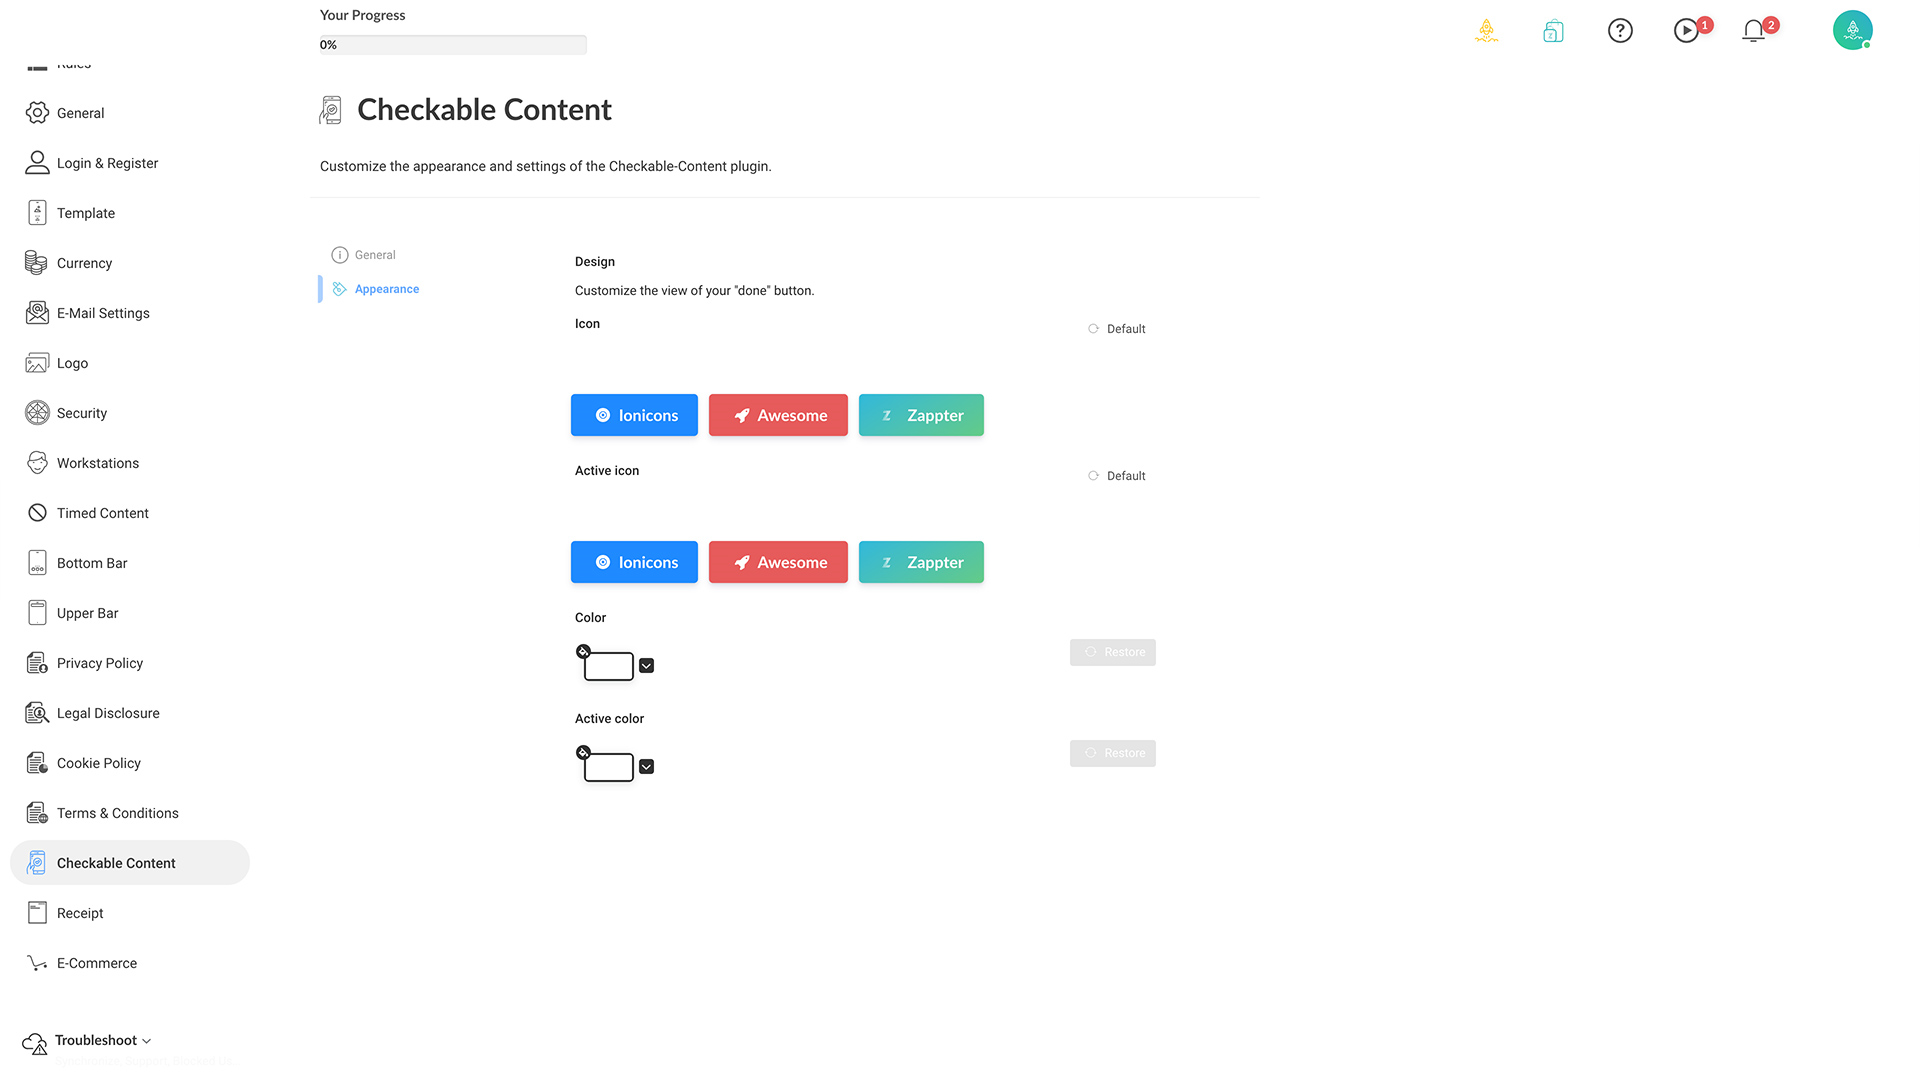
2. Move on to the 'Appearance' tab and choose the icon to associate with this feature. It's the icon that appears next to your items/element on your app. And save the changes.
image.png239.12 KB
Adding checkable option:
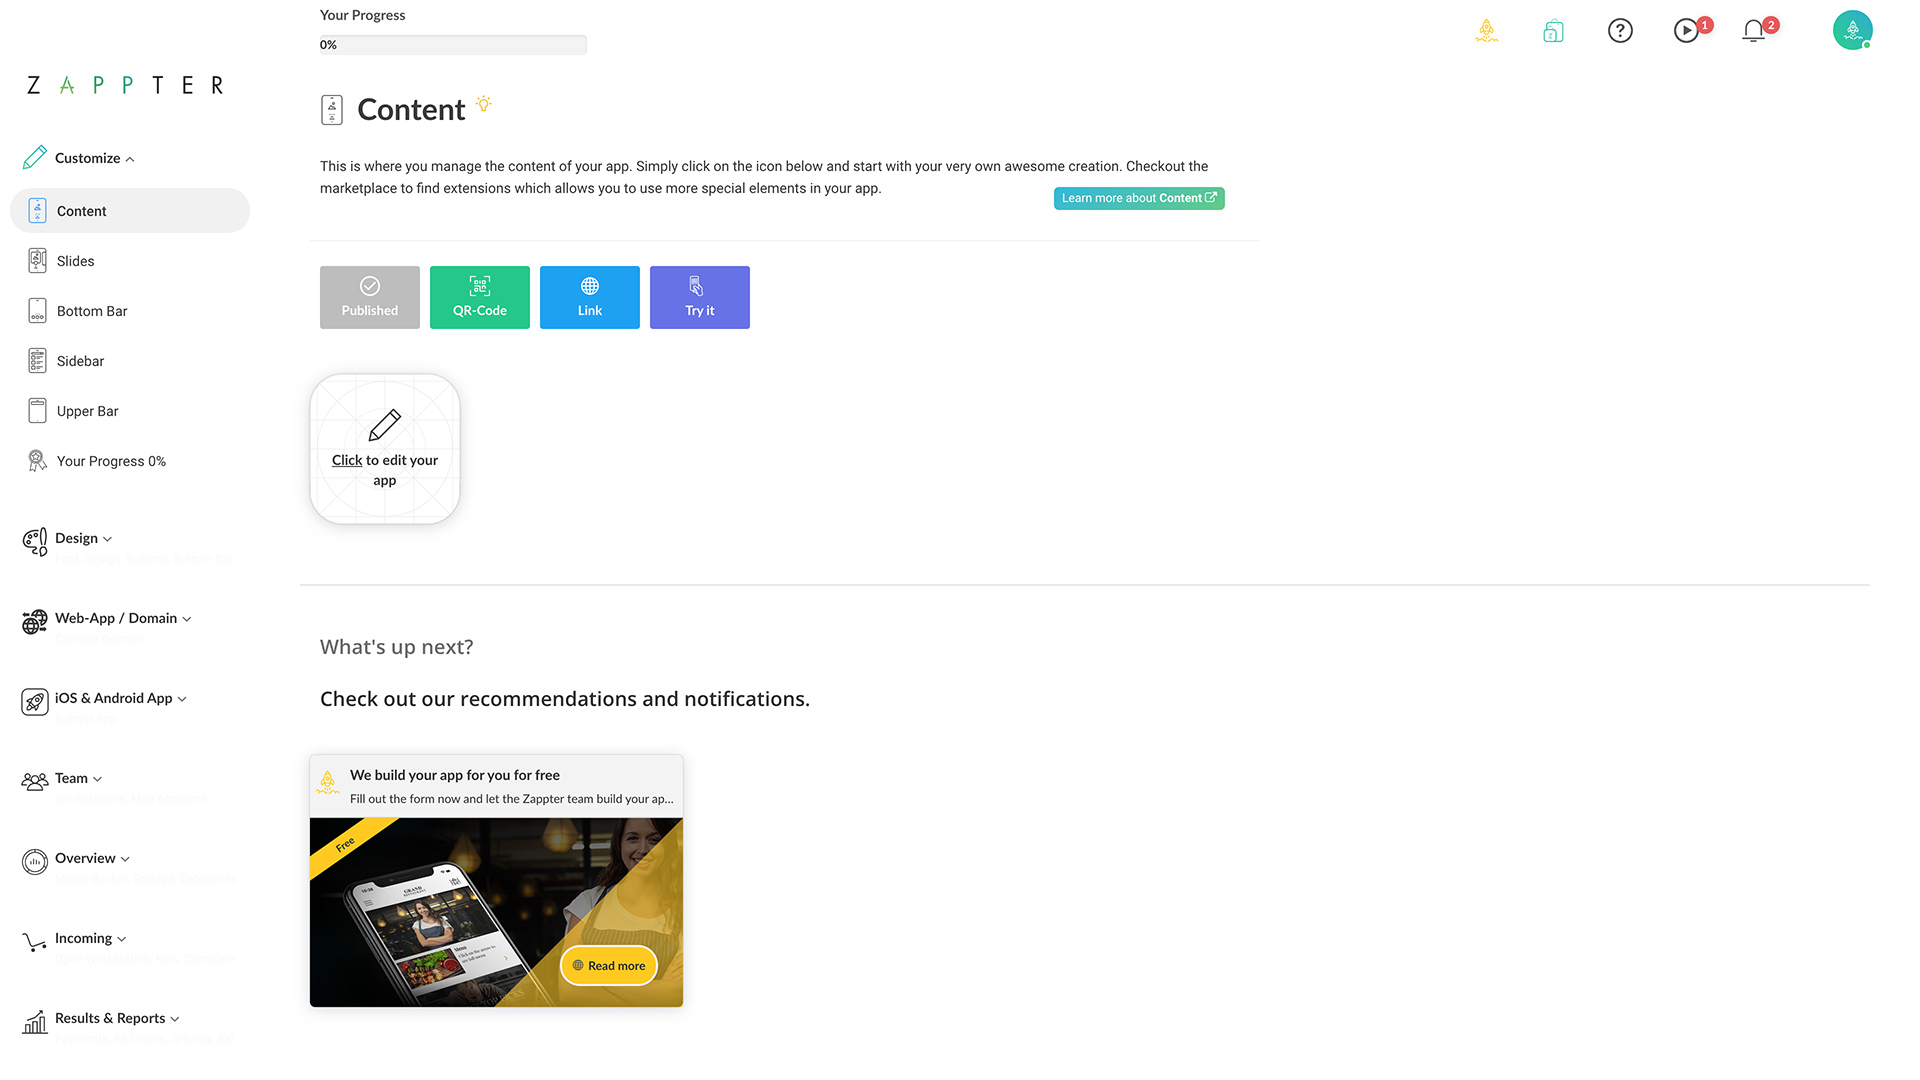
1. Admin > Customize > Content. Click to edit your app.
image.png418.93 KB
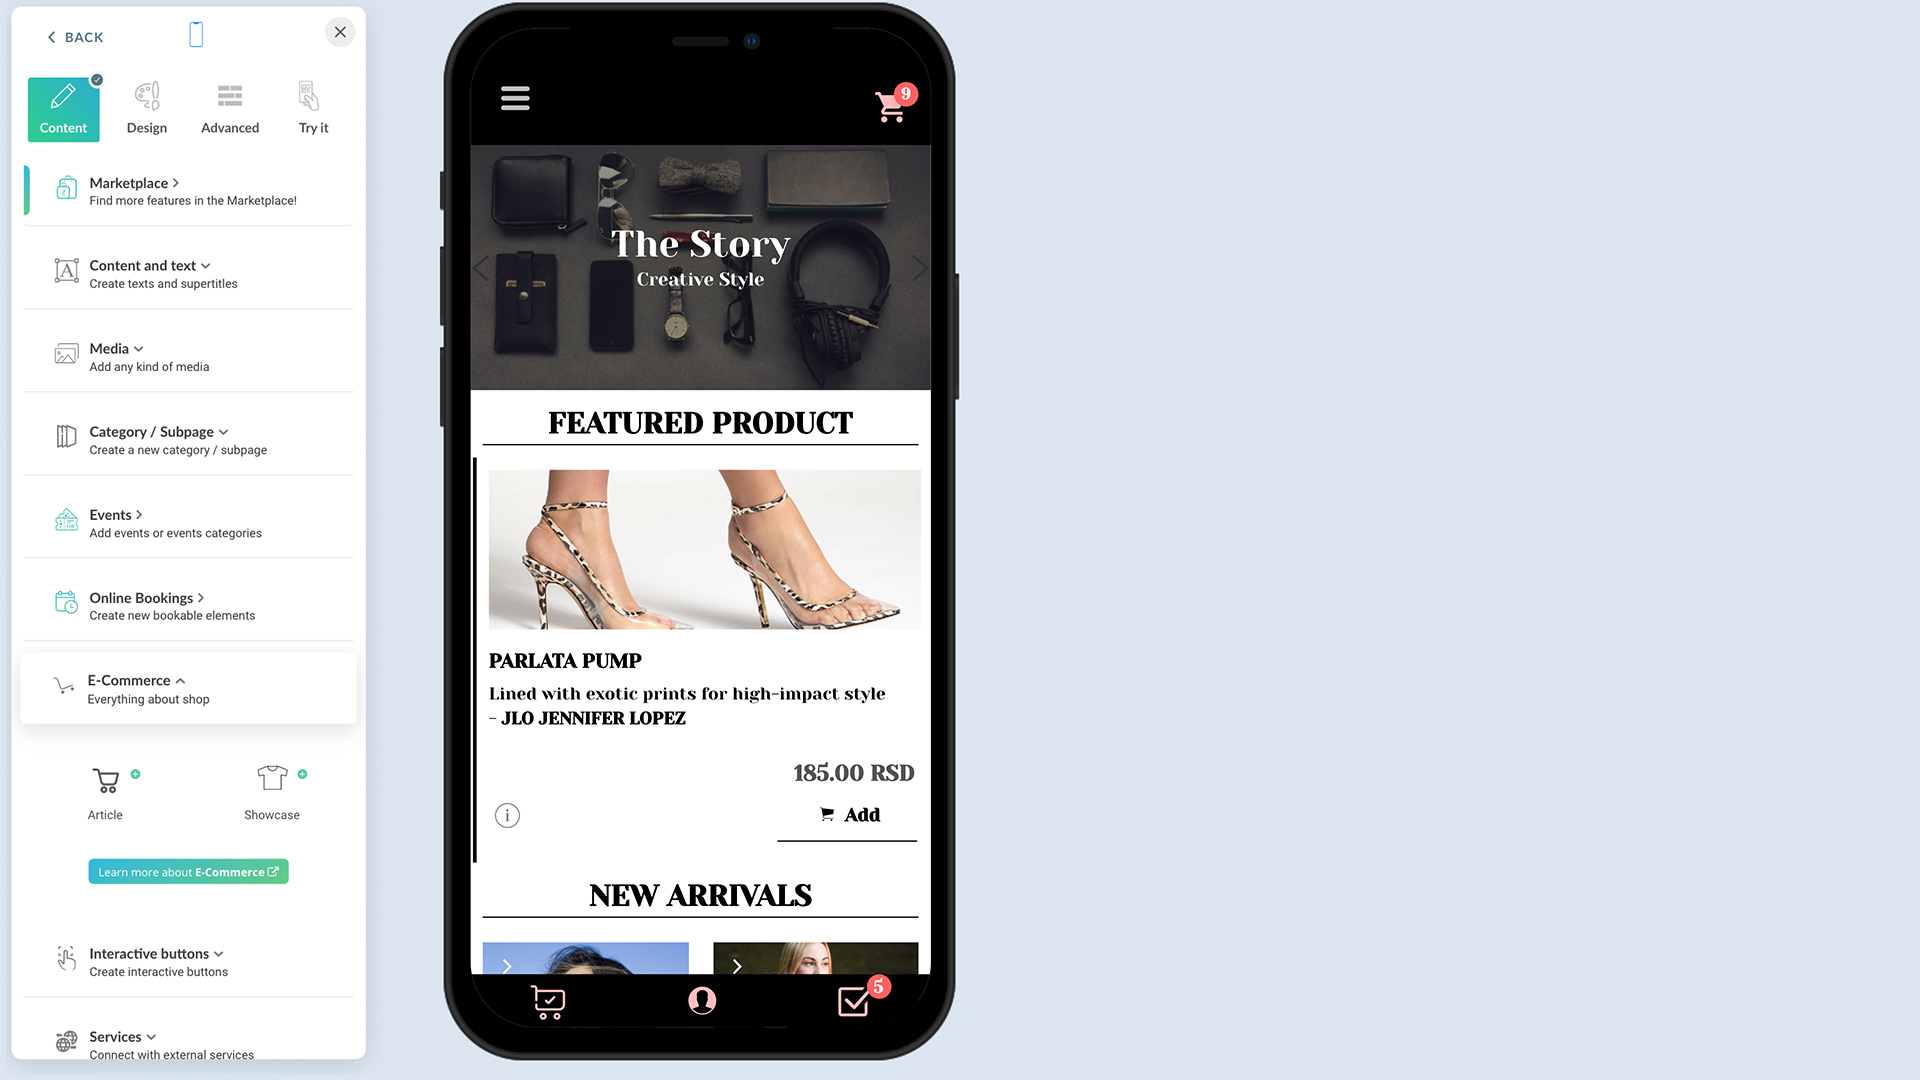
2. Click on any of the elements on your content, for which you need to add the check.
image.png657.68 KB
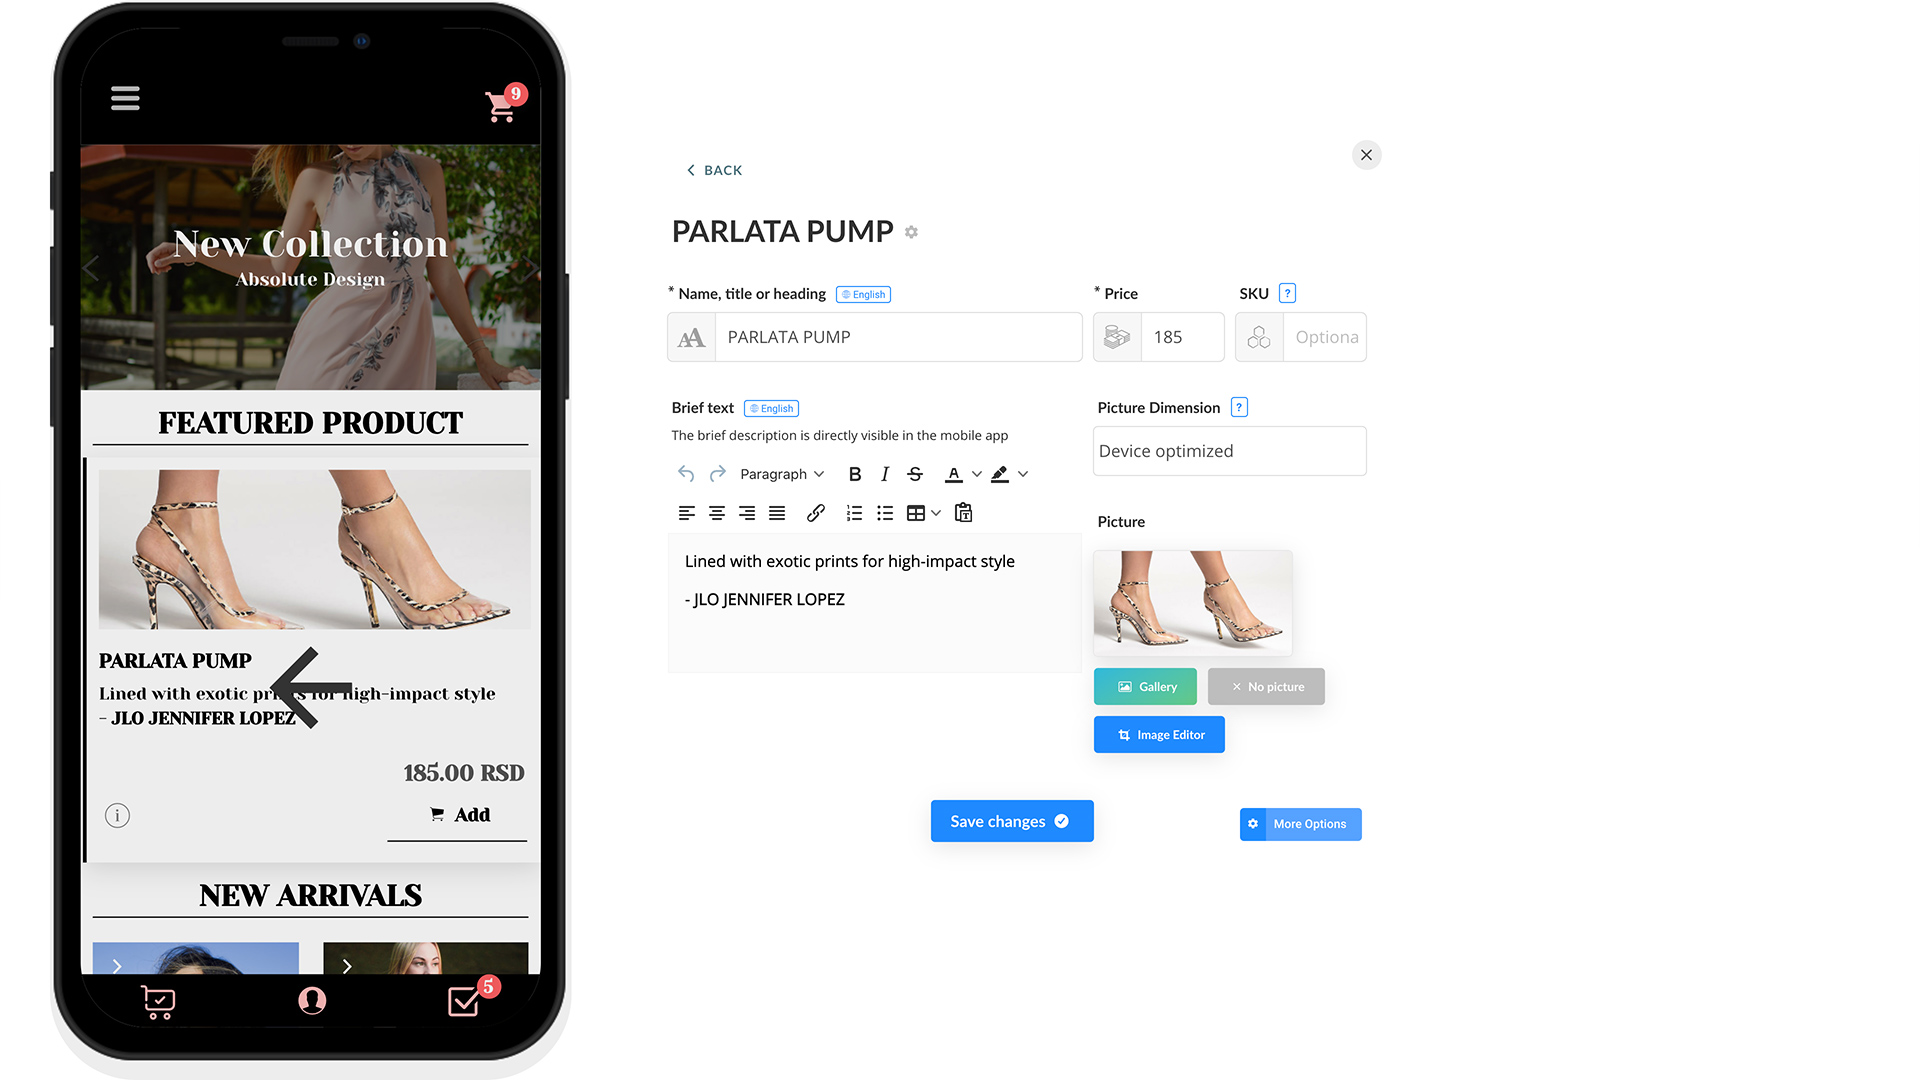
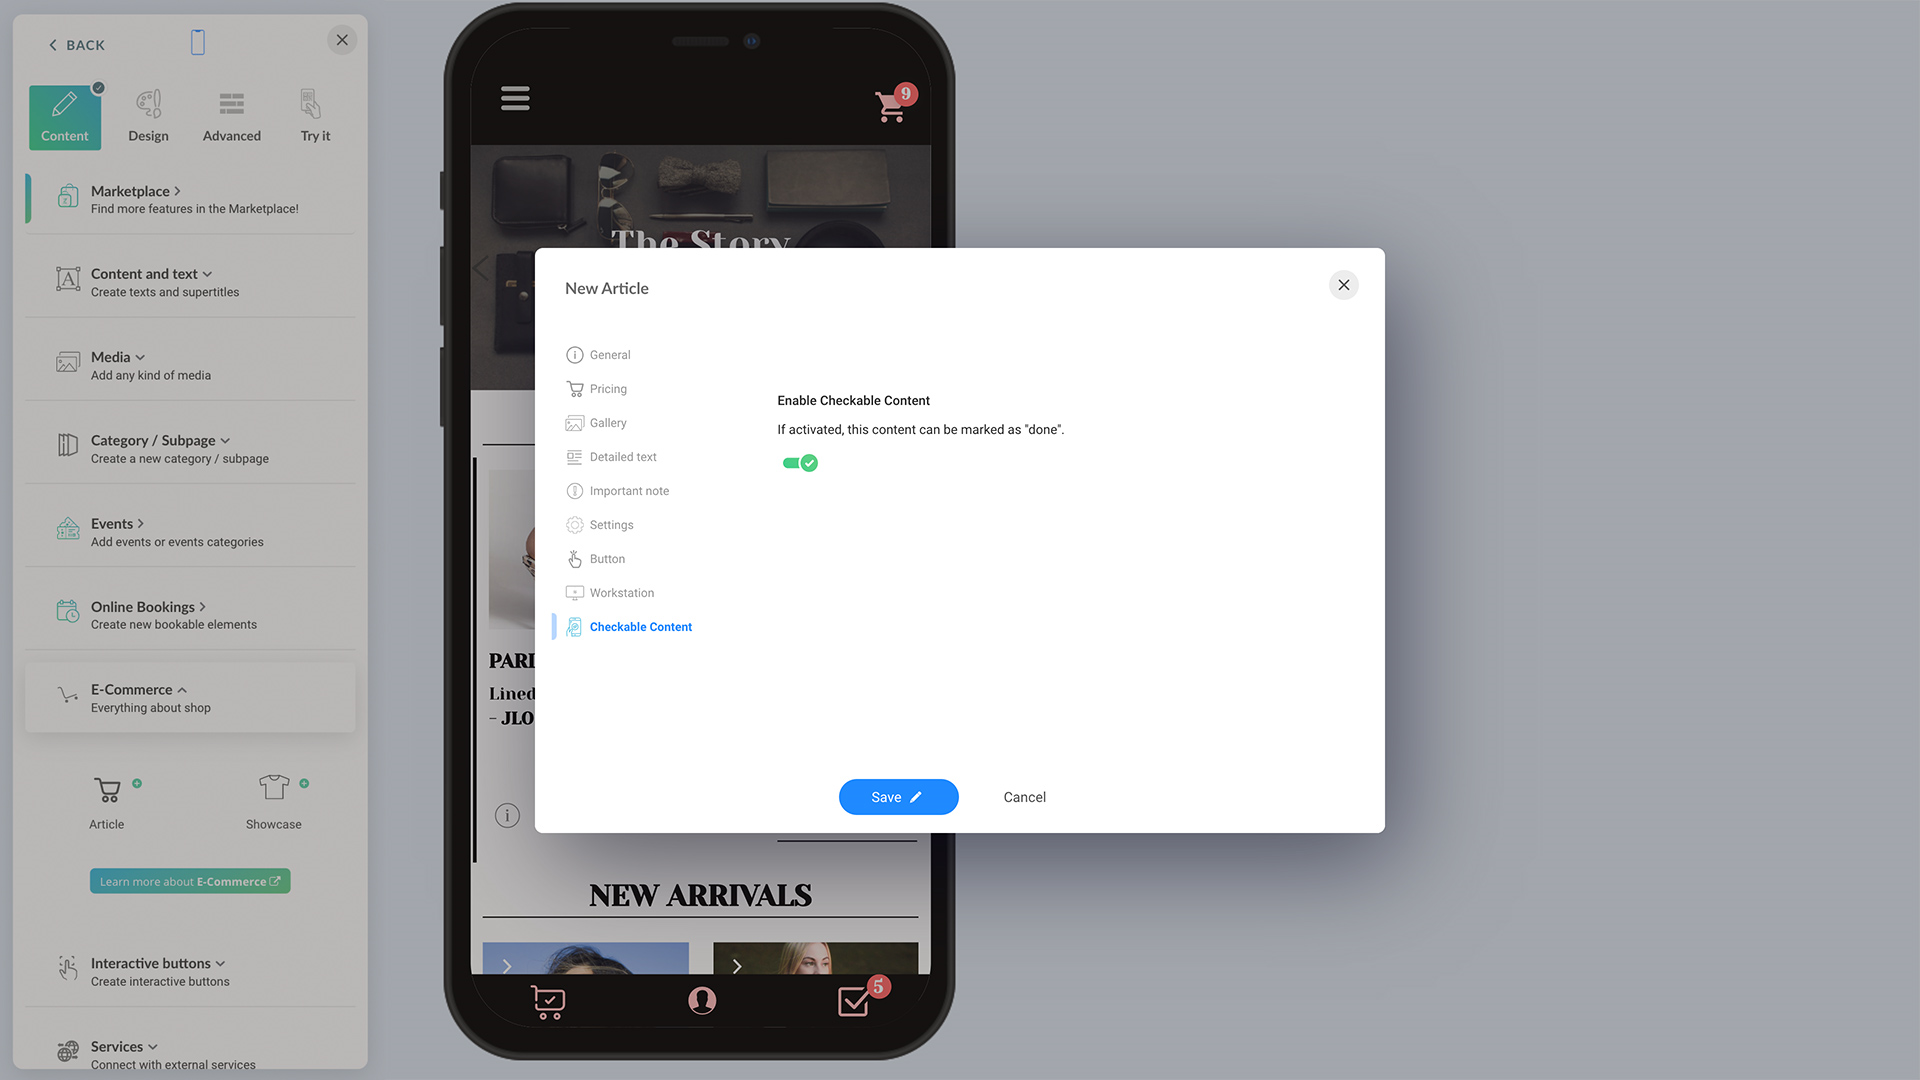
3. When the element's setup screen opens up, click on the 'More Options' button.
image.png791.53 KB
4. Move on to the 'Checkable Content' tab. Then activate the 'Enable Checkable Content' to add the check.