When you work with one of the core business plugins such as E-Commerce, Reservations & Bookings, Landing Pages, or Event Drop-in, you have an option to set up your receipt stationery and its behavior. This section discusses steps to configure your receipts.
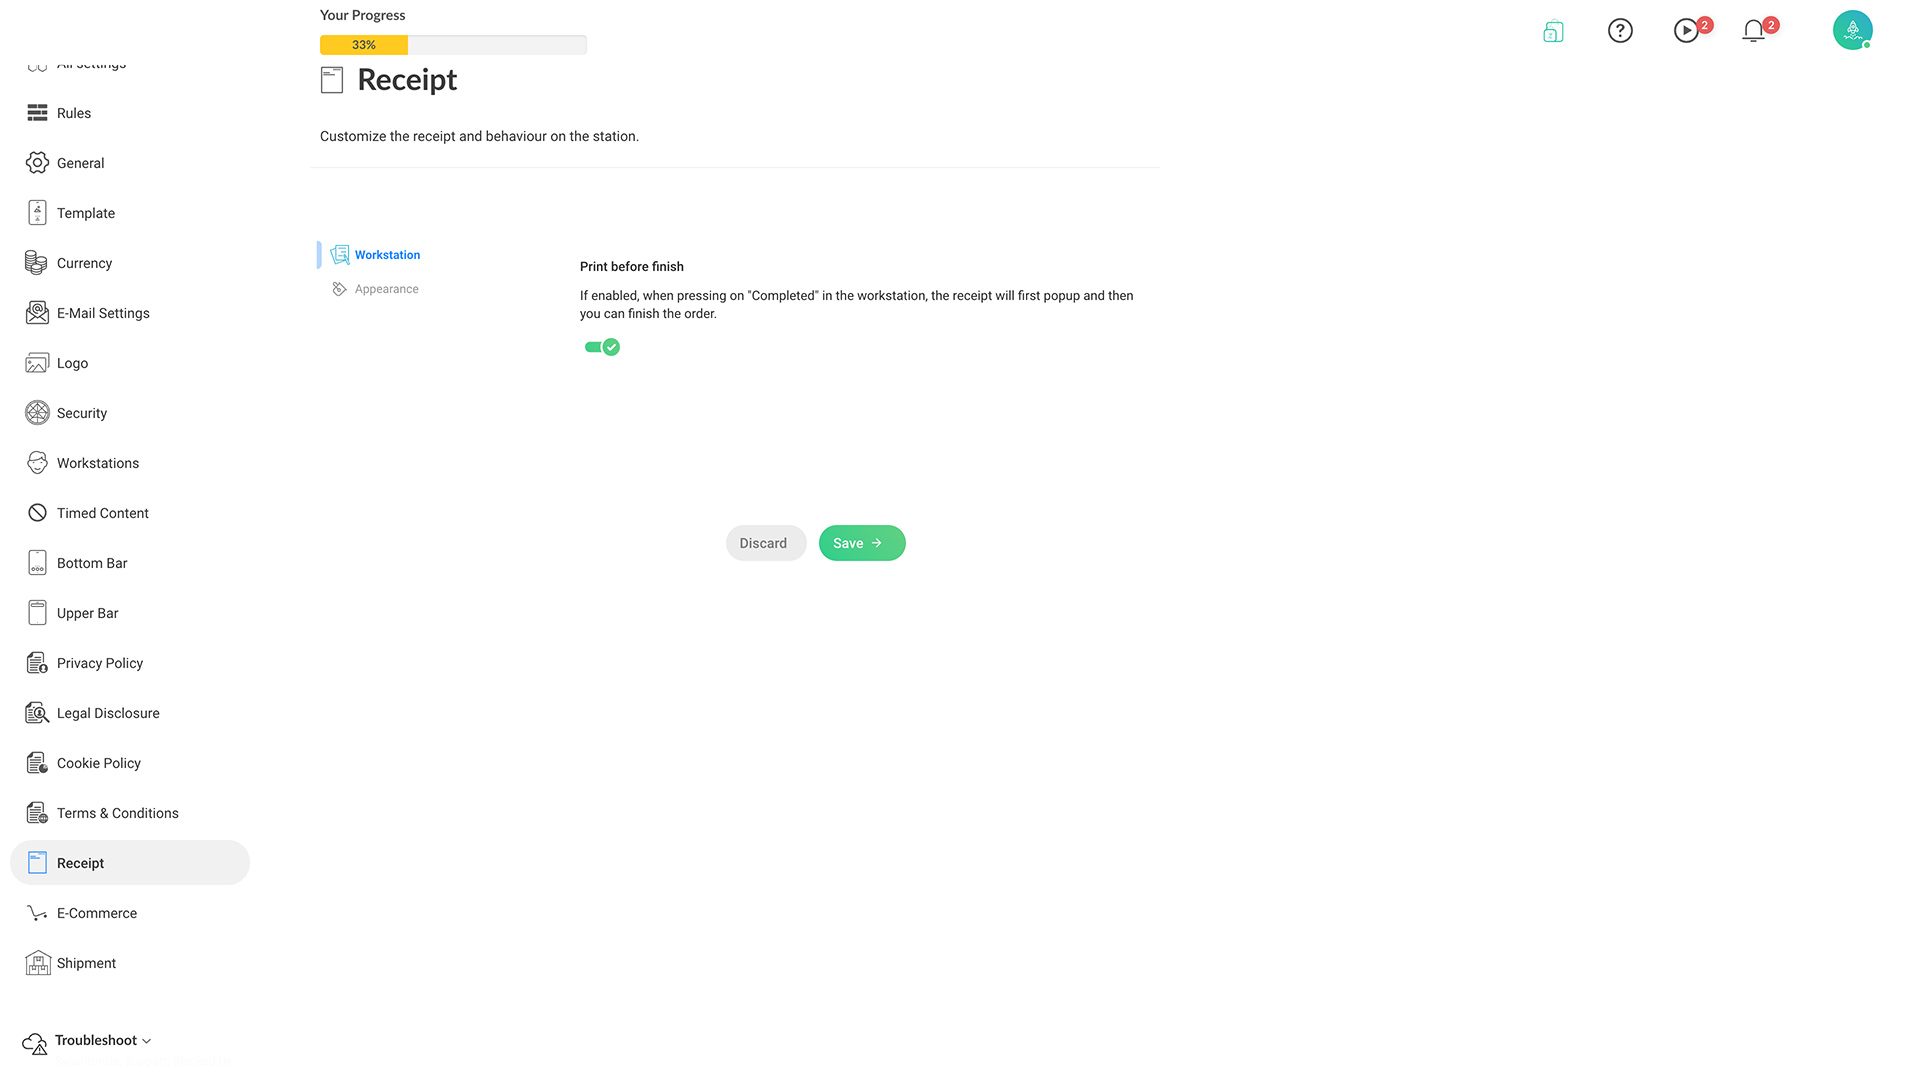
1. Admin > Settings > Receipts. The following setup screen opens with the 'Workstation' tab selected.
image.png170.81 KB
Print before finish: If you enable this option, the receipt shows to print before completing the order
image.png182.08 KB
To understand more about workstations, logging in, and handling your orders, check out 'Understanding Workstations' in the Zappter Core User Guides.
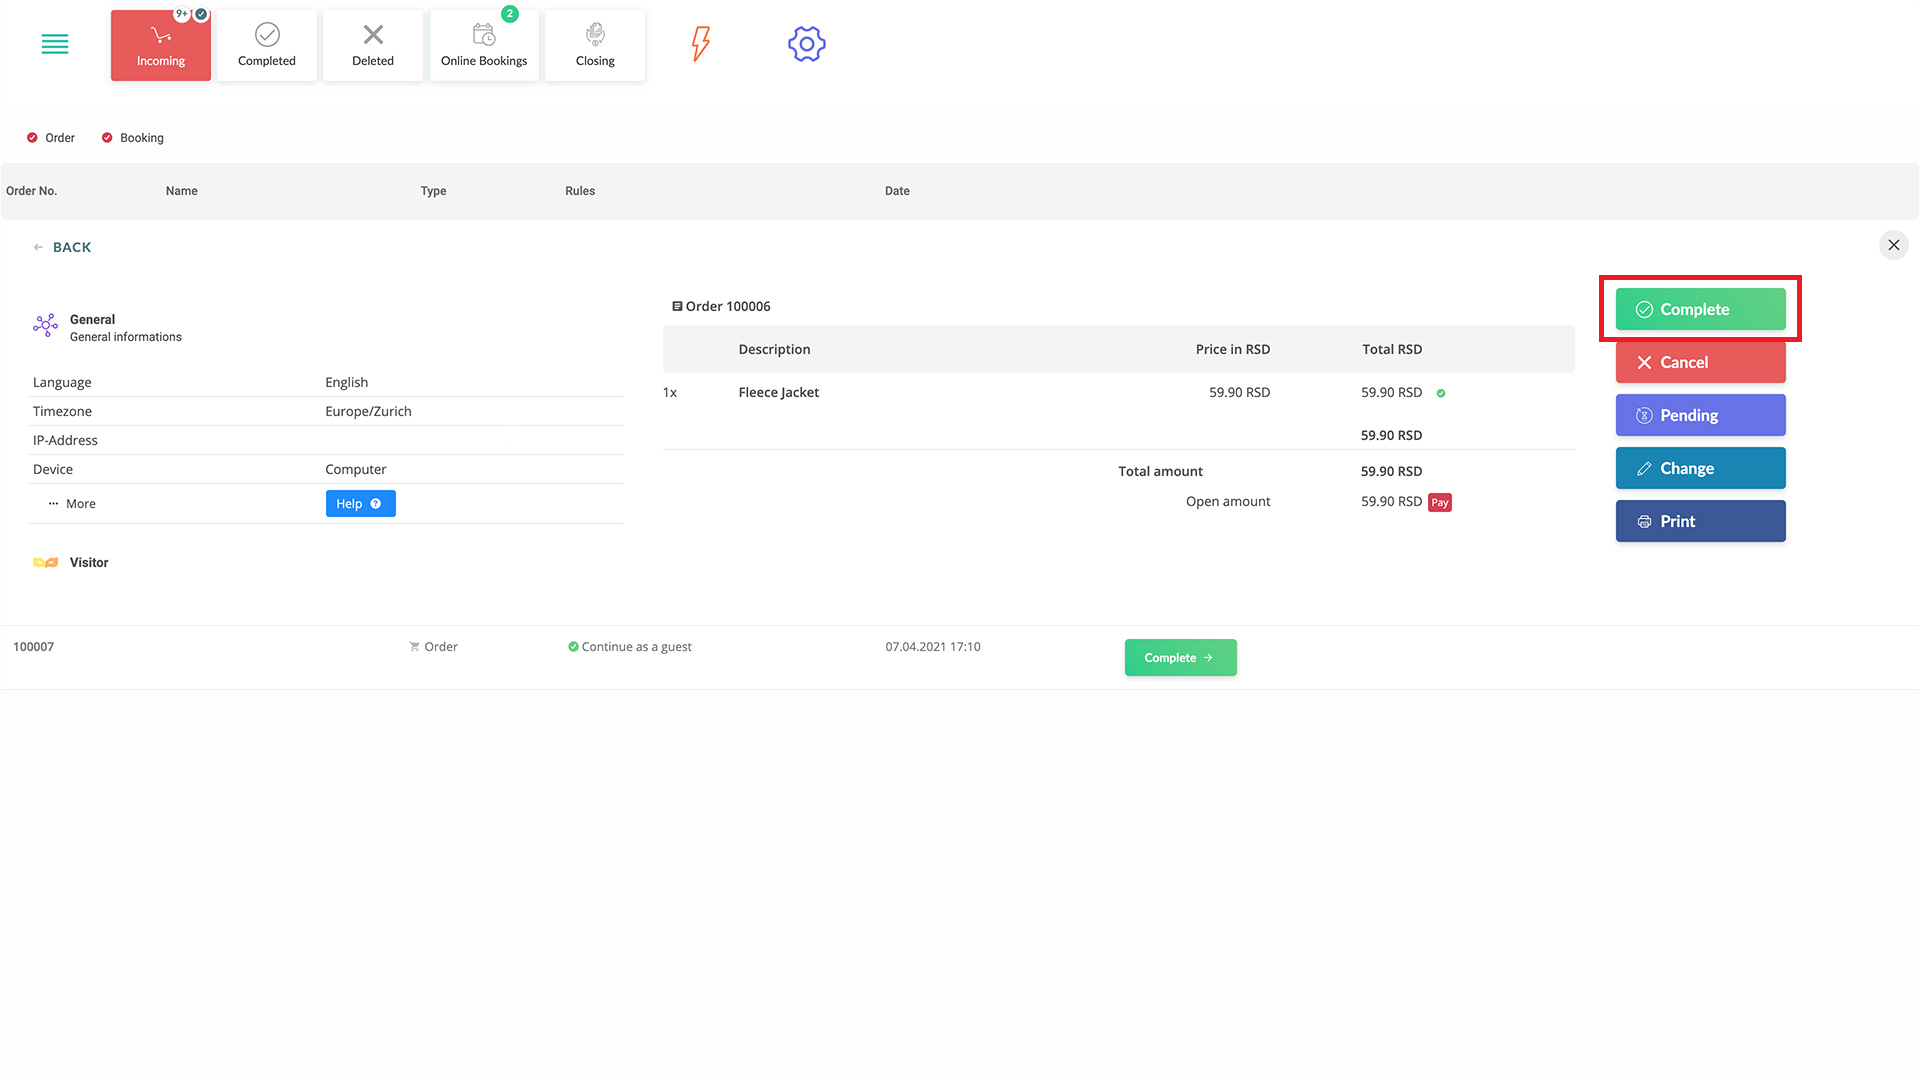
Workstation option you choose to complete the order:
image.png209.02 KB
2. Move on to the 'Appearance' tab to adjust your receipt texts.
image.png223.05 KB
Custom Receipt Footer: Customize your receipt's footer text
Custom Receipt Footer Left: Custom footer left text
Custom Receipt Footer Center: The custom center text in the footer
Custom Receipt Footer Right: And, the custom footer right text