To enable automatic updates of entitlements based on user subscriptions, you must setup webhooks. The webhooks will be sent to Zappter and update the user subscription status whenever there is an automatic prolongation or the user decides to cancel the subscription.
Obtaining your webhook url
To obtain the webhook link that can be used for both App Store Connect and Google Play Console, follow these steps:
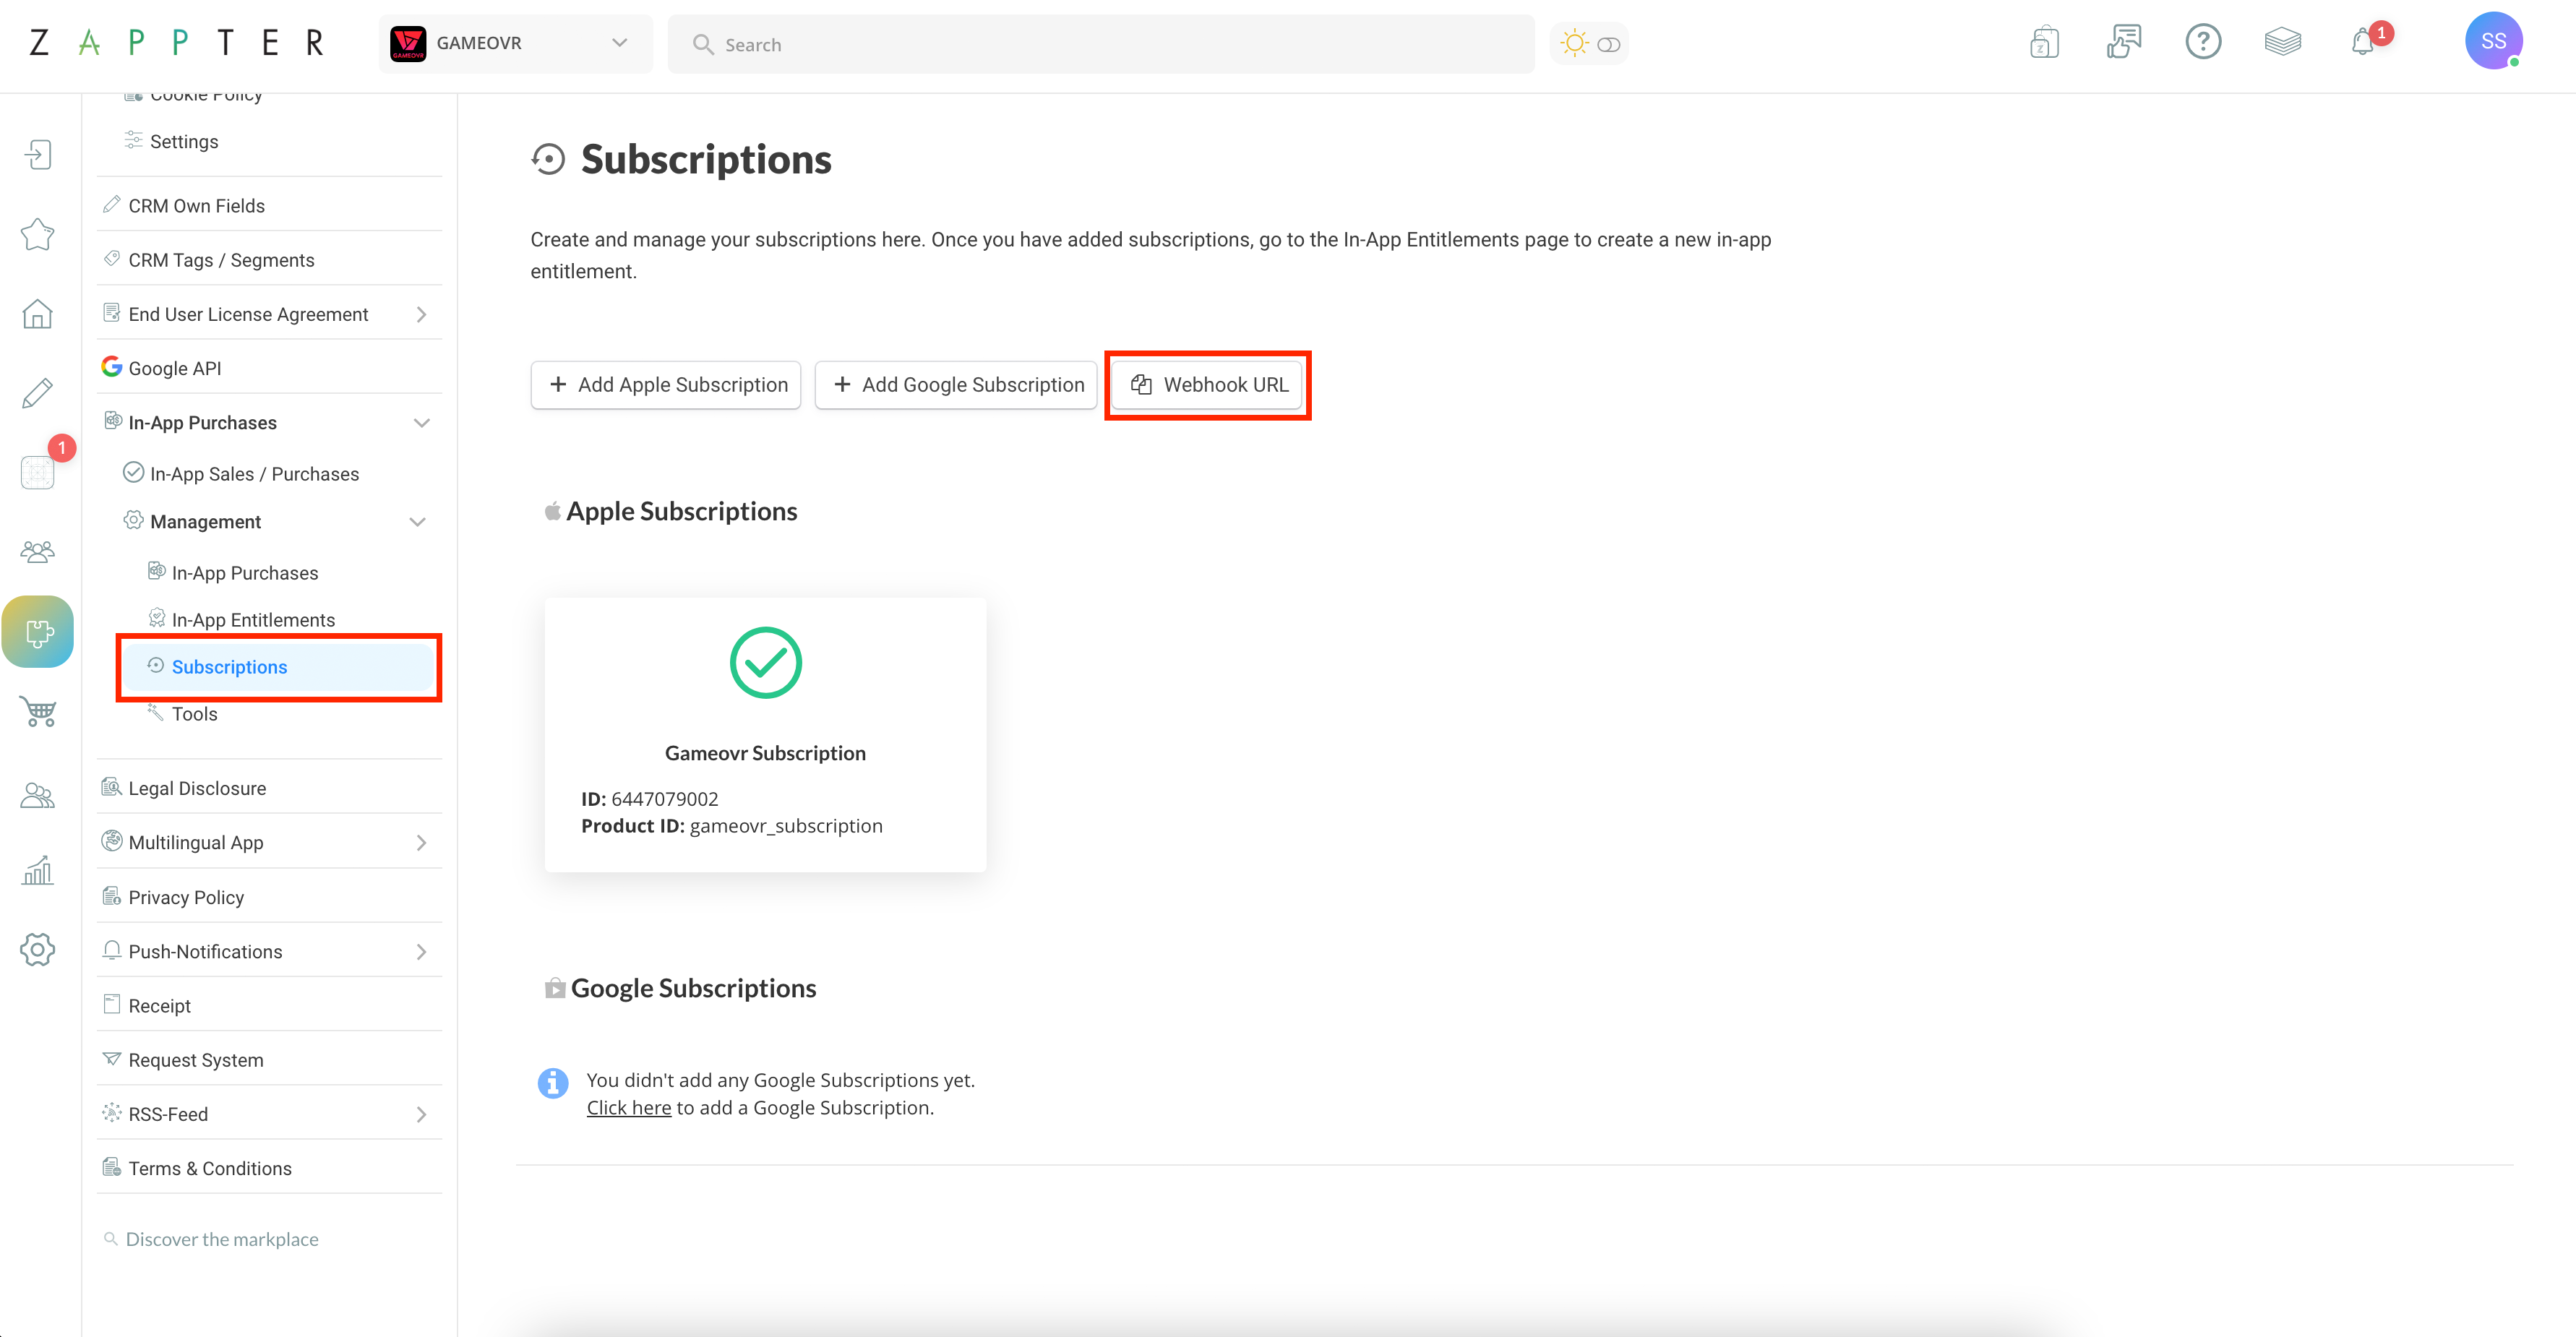
1. Go to Zappter and navigate to In-App Purchases > Management > Subscriptions. Then click on "Webhook URL":
image.png501.86 KB
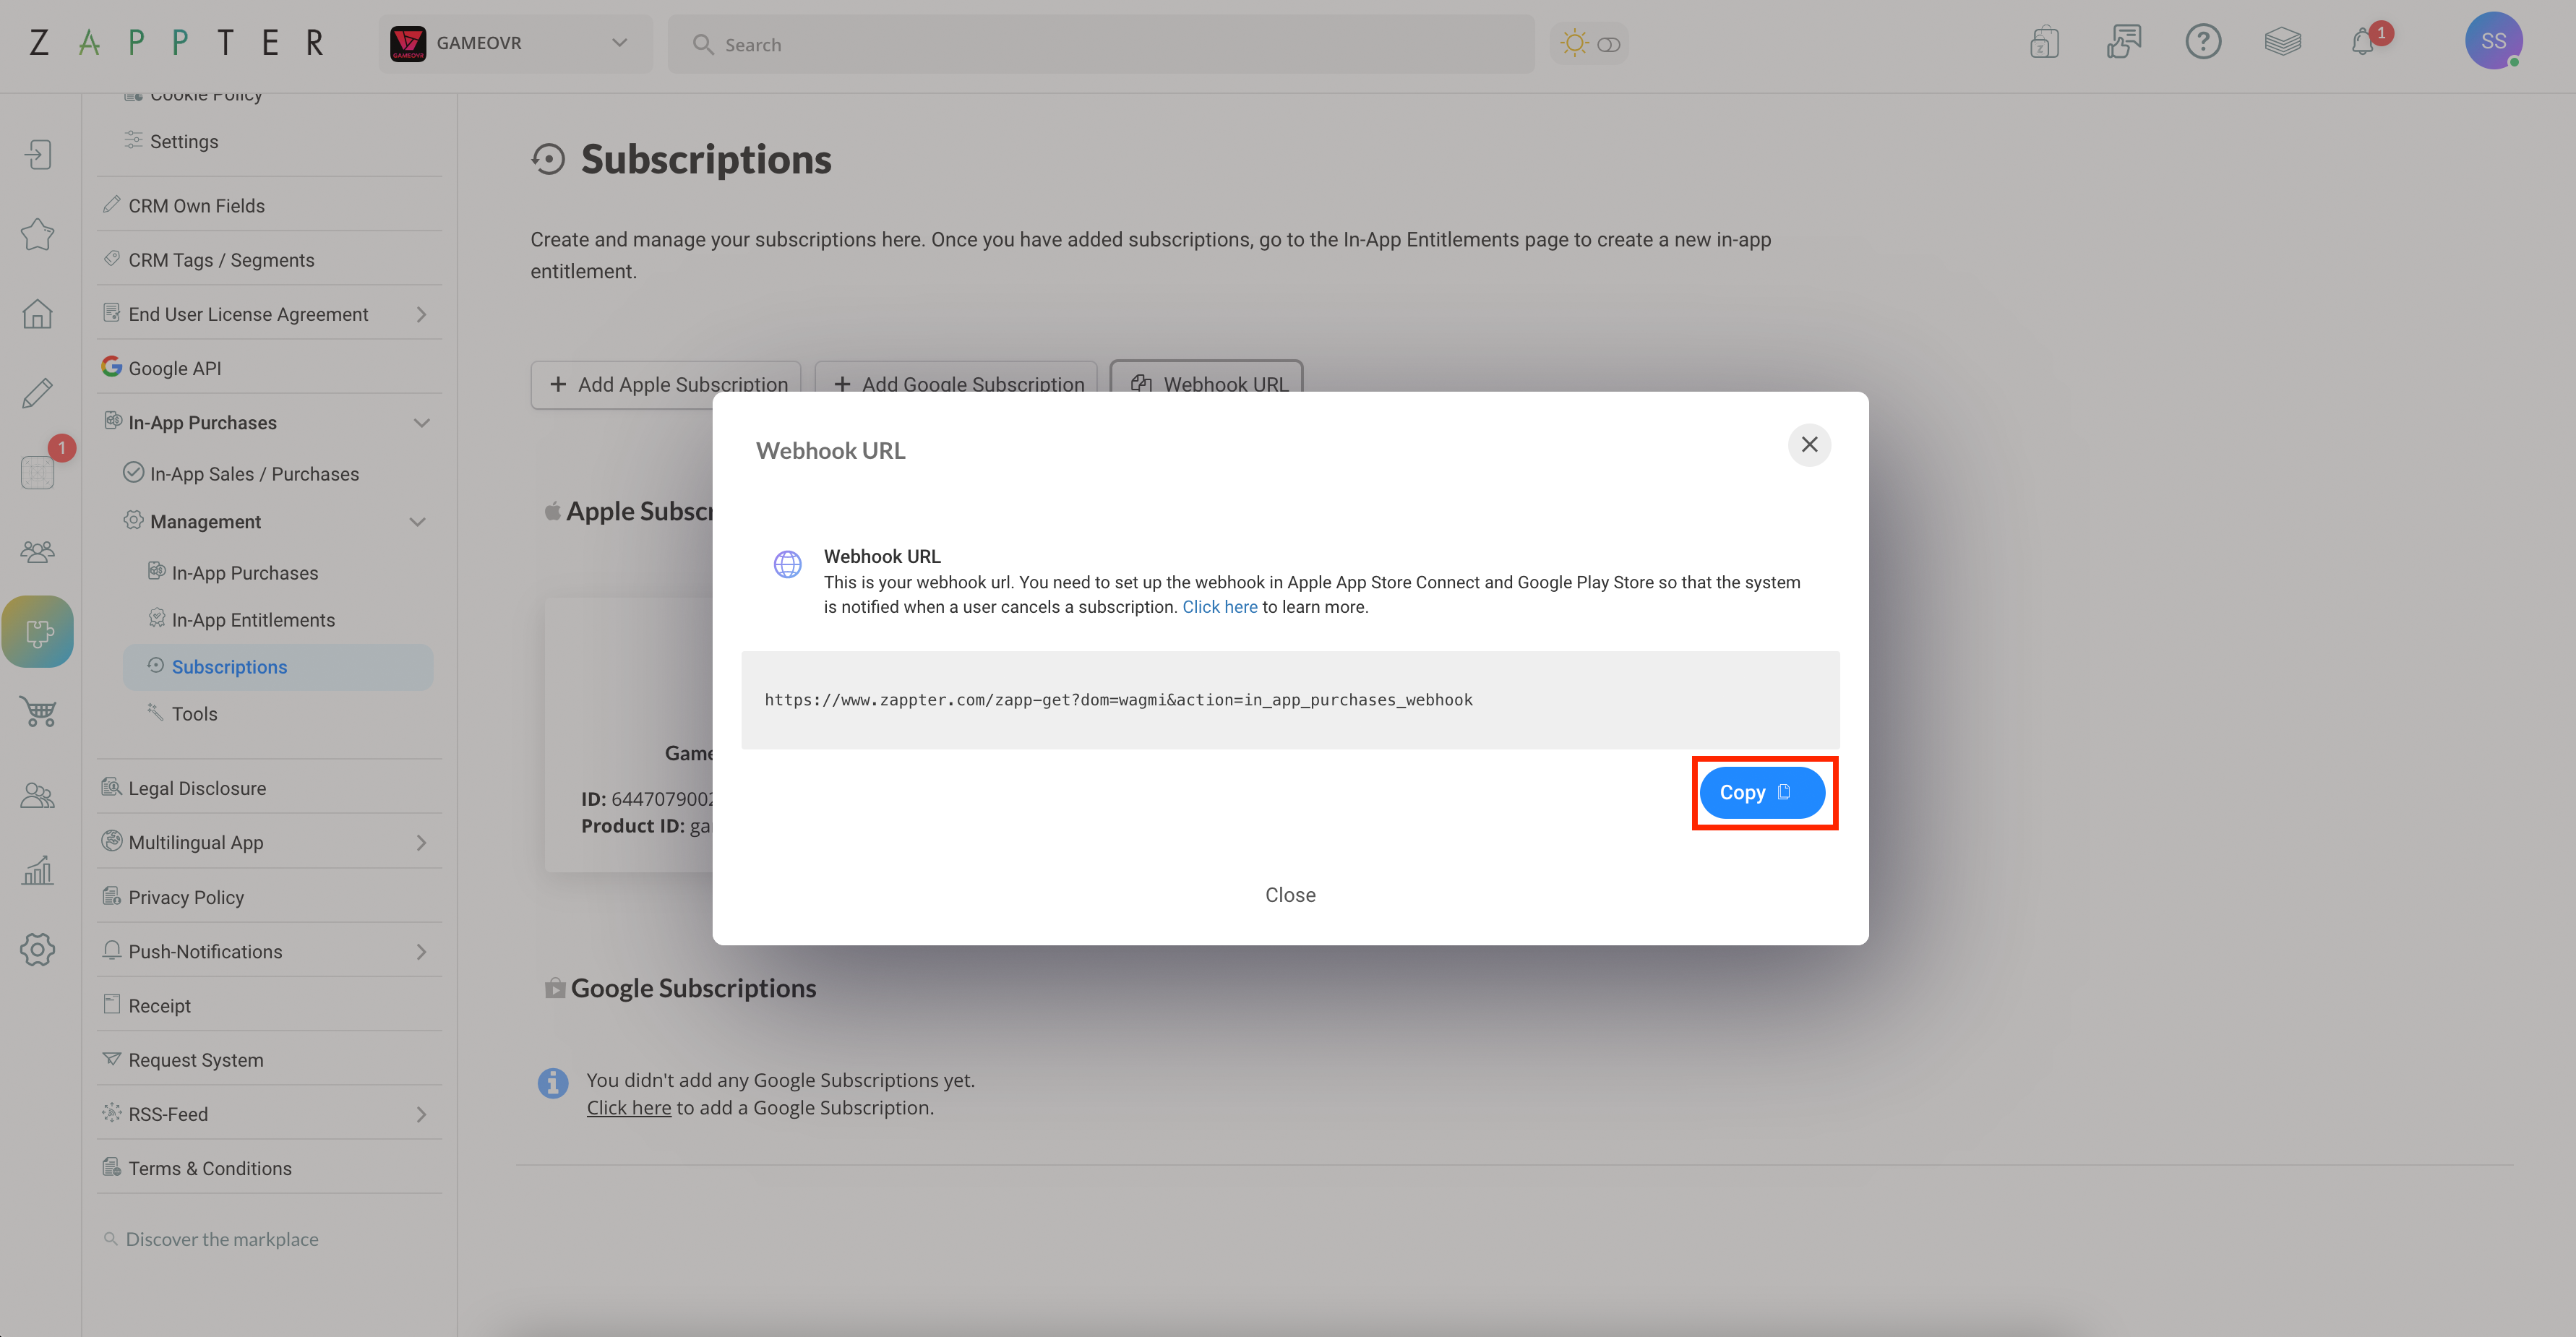
2. A popup will appear with your personal webhook link. Copy the link and follow the steps below to configure the webhook in the Apple App Store Connect and Google Play Store.
2. Select the project associated with your app. Then search for "Pub/Sub" in the top search bar and click on the first search result.
image.png626.96 KB
3. Click on "Create topic" at the top of the page
image.png455.36 KB
4. Set the ID for your topic and leave all other fields unchanged. Click on "Create topic".
image.png439.78 KB
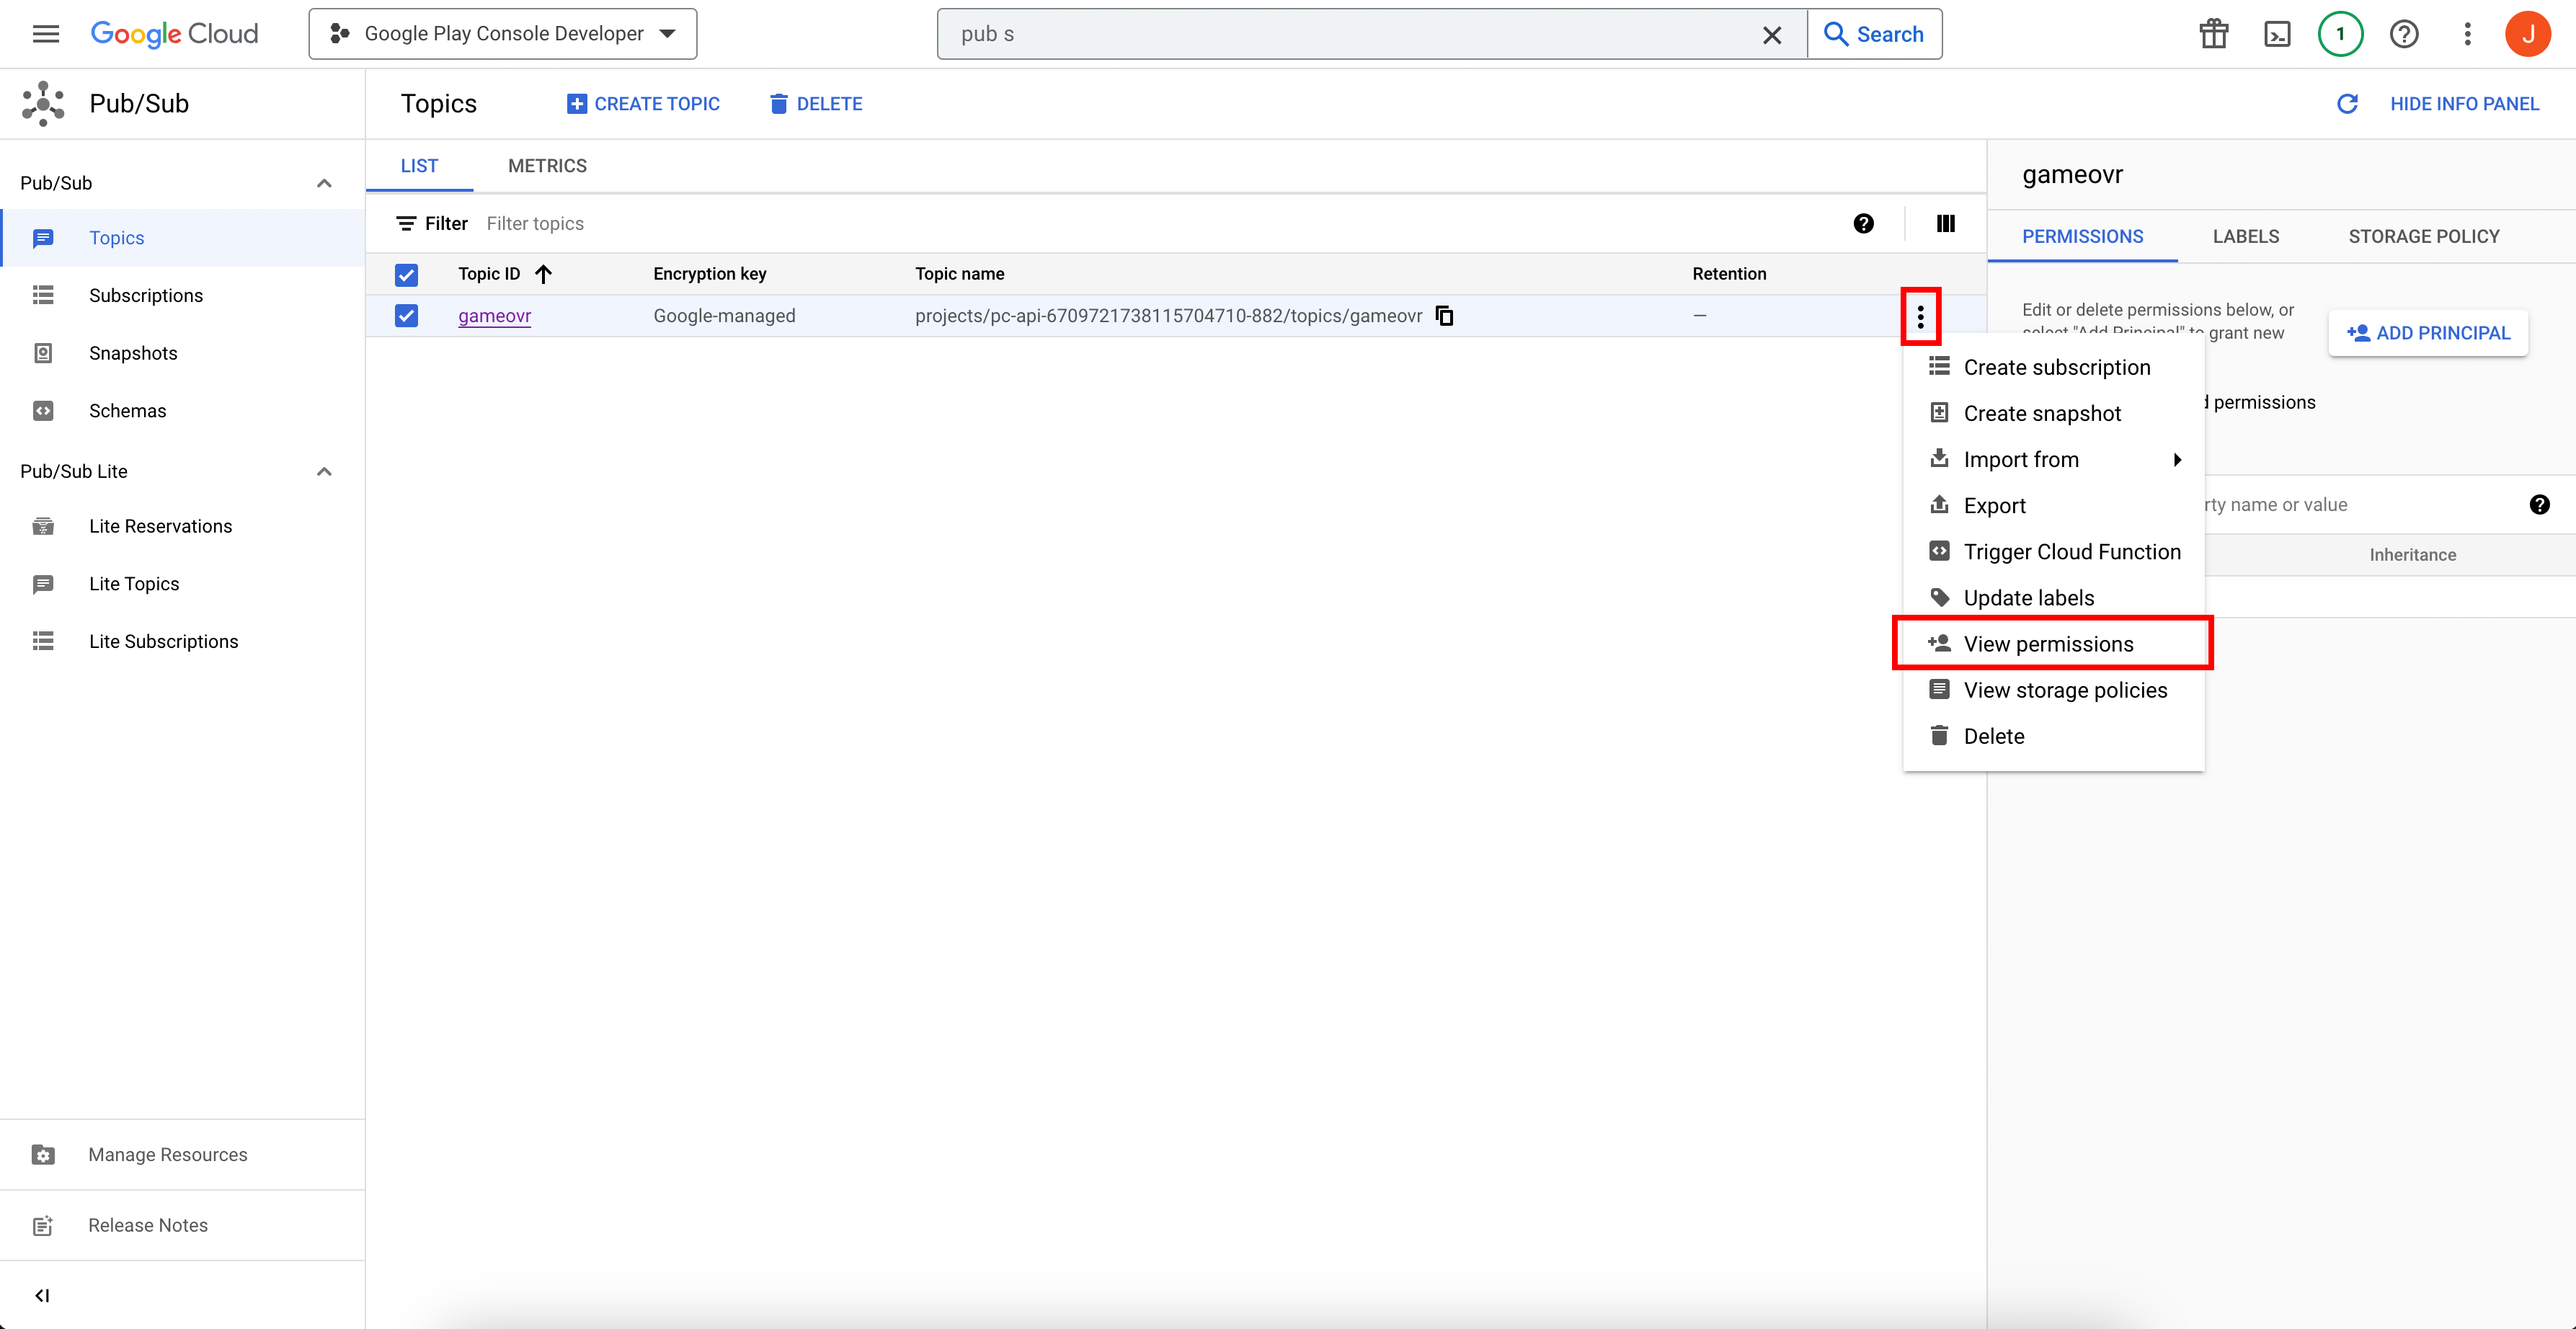
5. Click on the three dots on the right side, then click on "View permissions"
image.png620.08 KB
6. Click on "Add Principal" on the right side
image.png601.52 KB
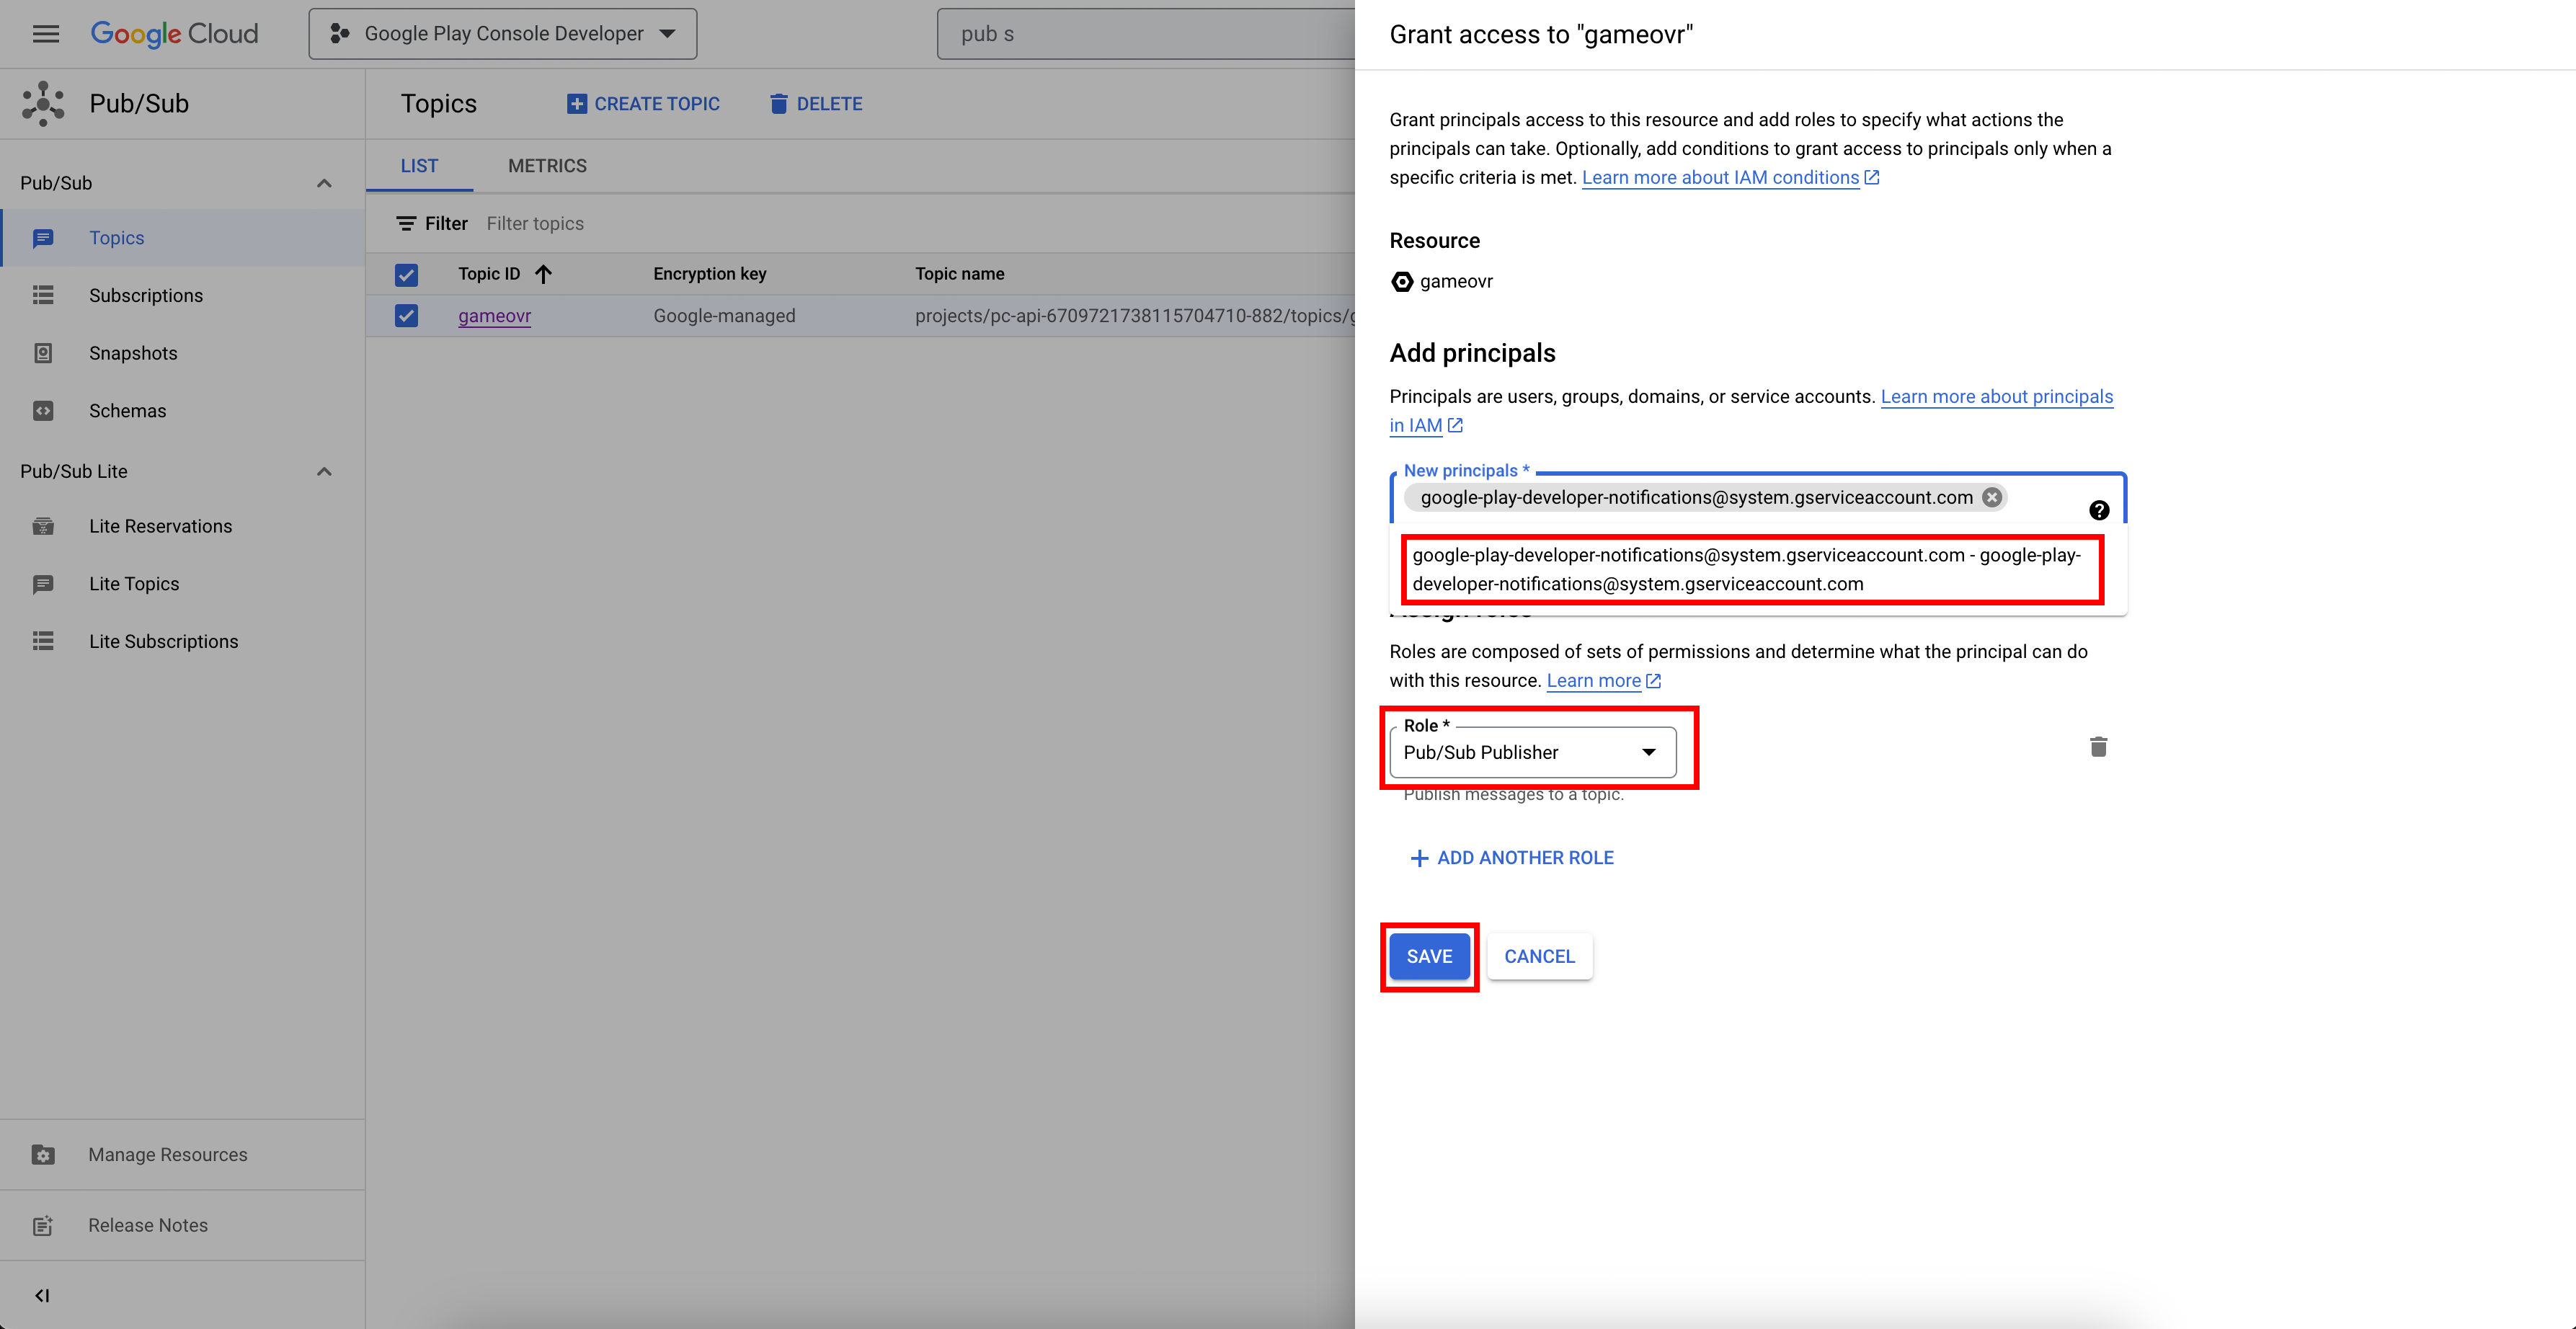
7. In the field "New principals" enter the following: google-play-developer-notifications@system.gserviceaccount.com - Once entered, select the it from the suggested dropdown value under the field. In the "Role" field, search for "Pub/Sub Publisher" and select it. Confirm this step by clicking on "Save".
image.png608.58 KB
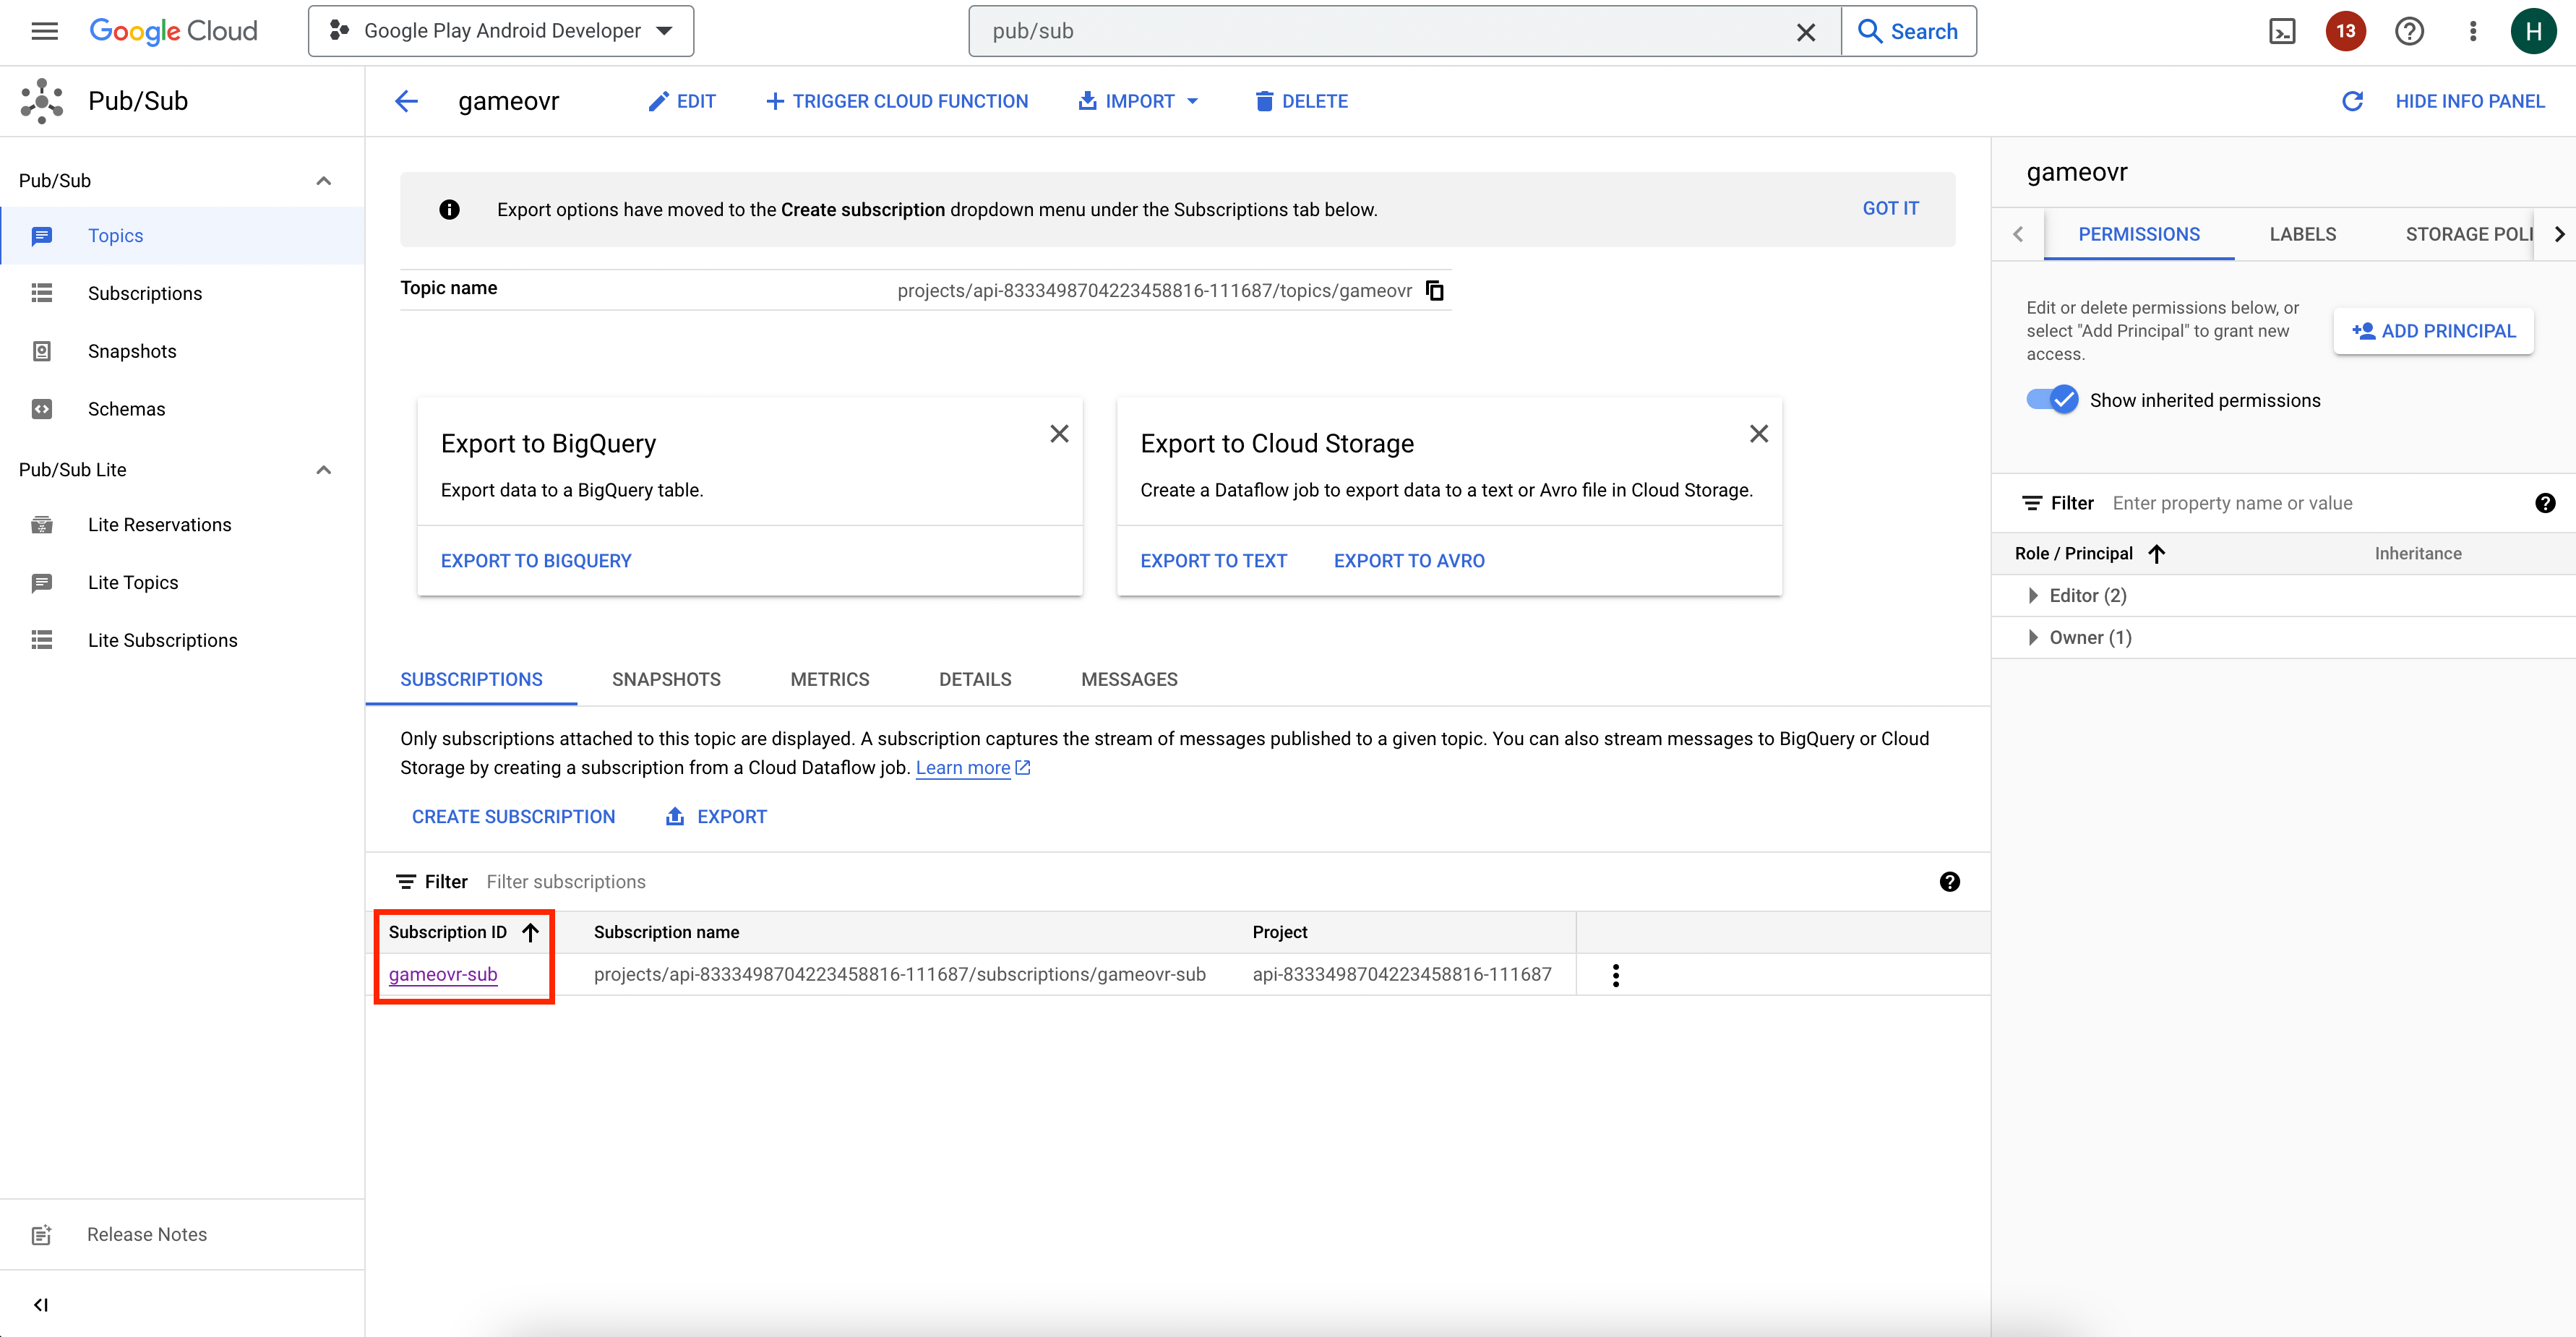
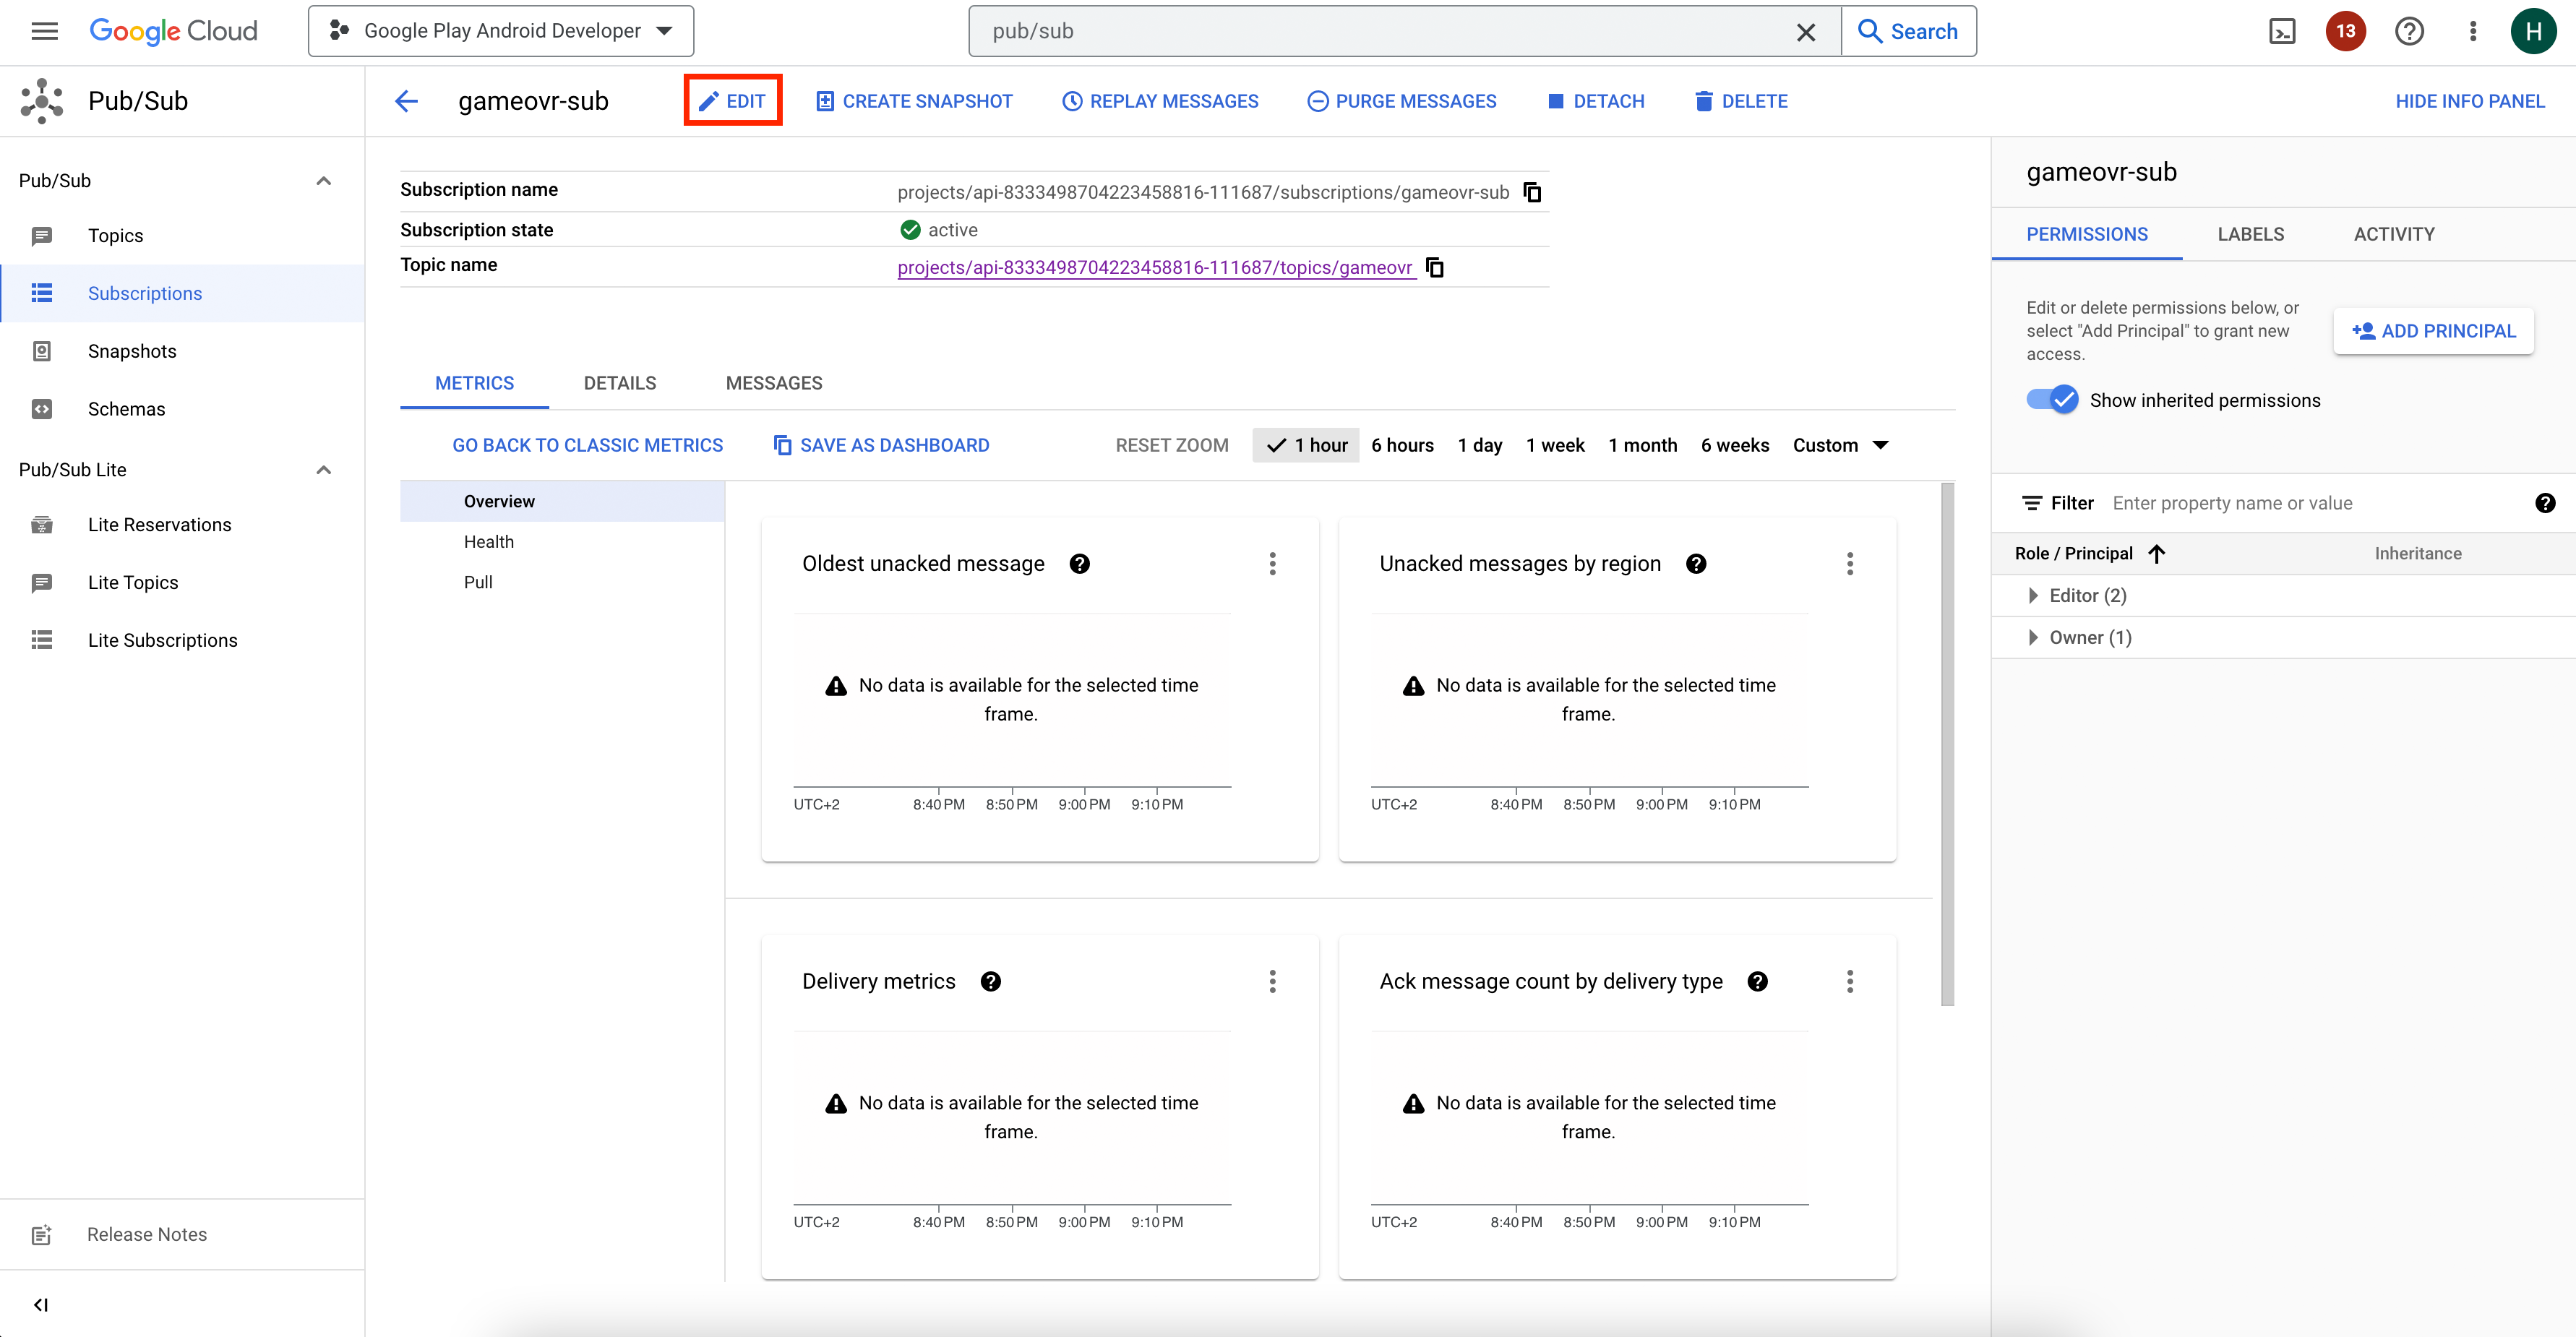
8. Click below on the new subscription created
image.png661.67 KB
9. Click "Edit" at the top of the page.
image.png906.18 KB
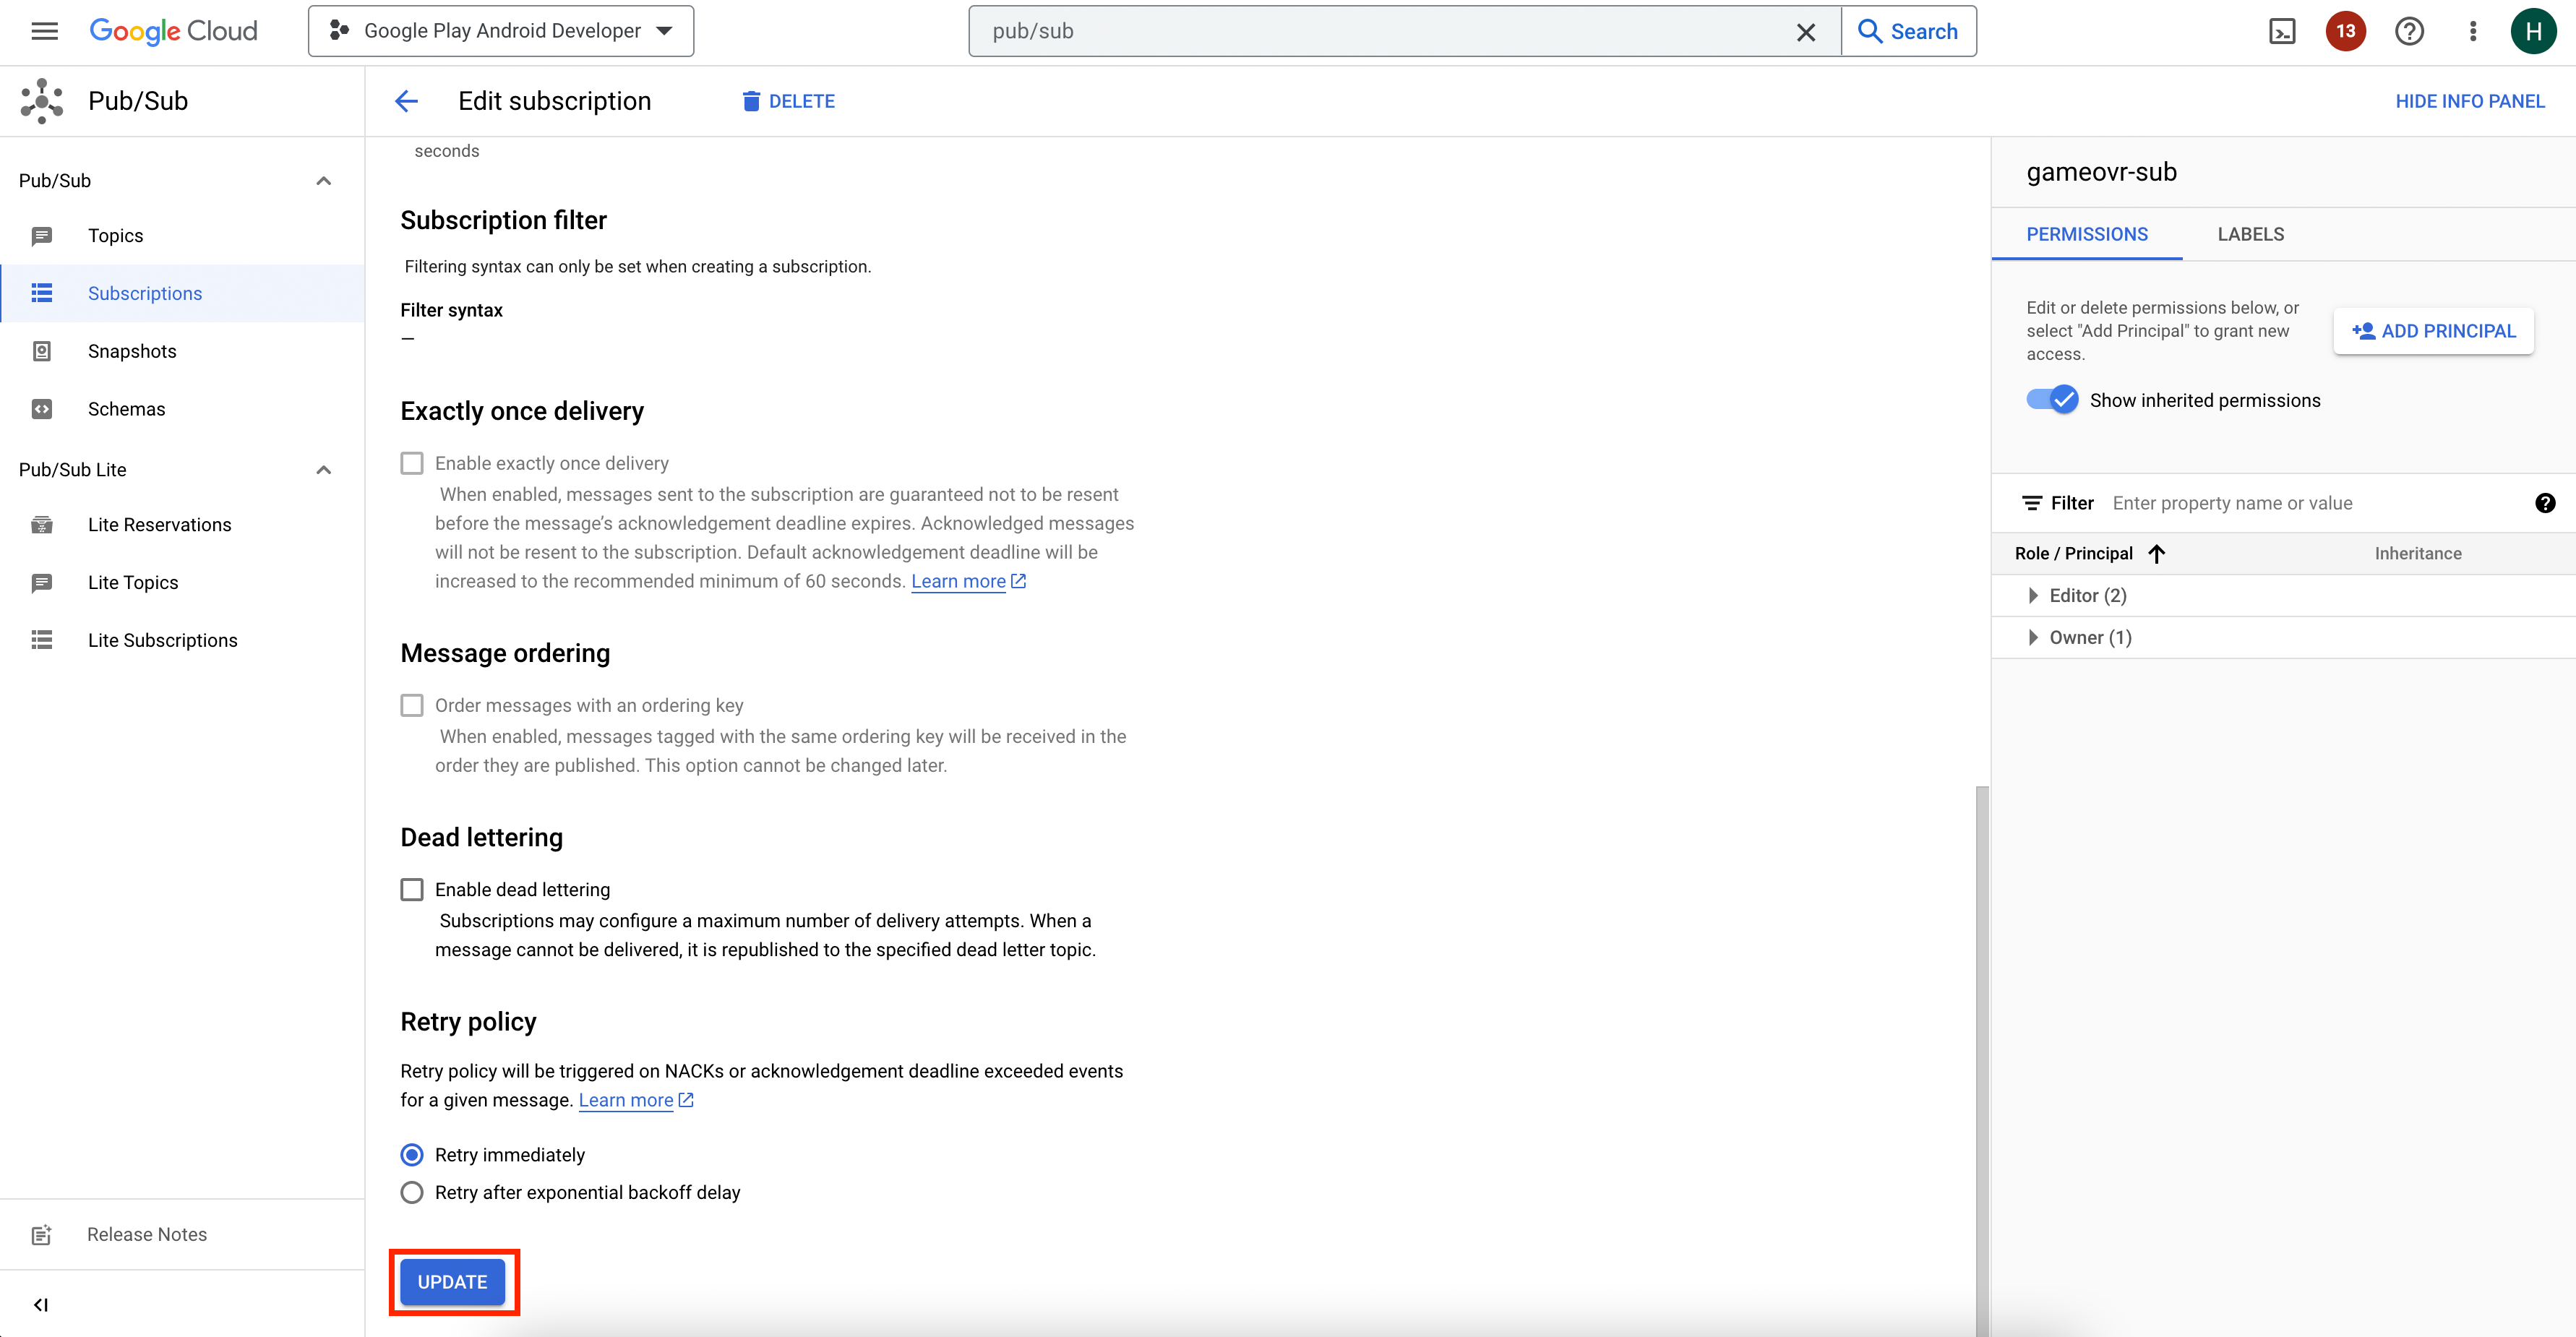
10. Change to "Push" under "Delivery type" and enter the webhook URL that you have previously copied from Zappter
image.png657.61 KB
11. Scroll down and click on "Update"
image.png654.13 KB
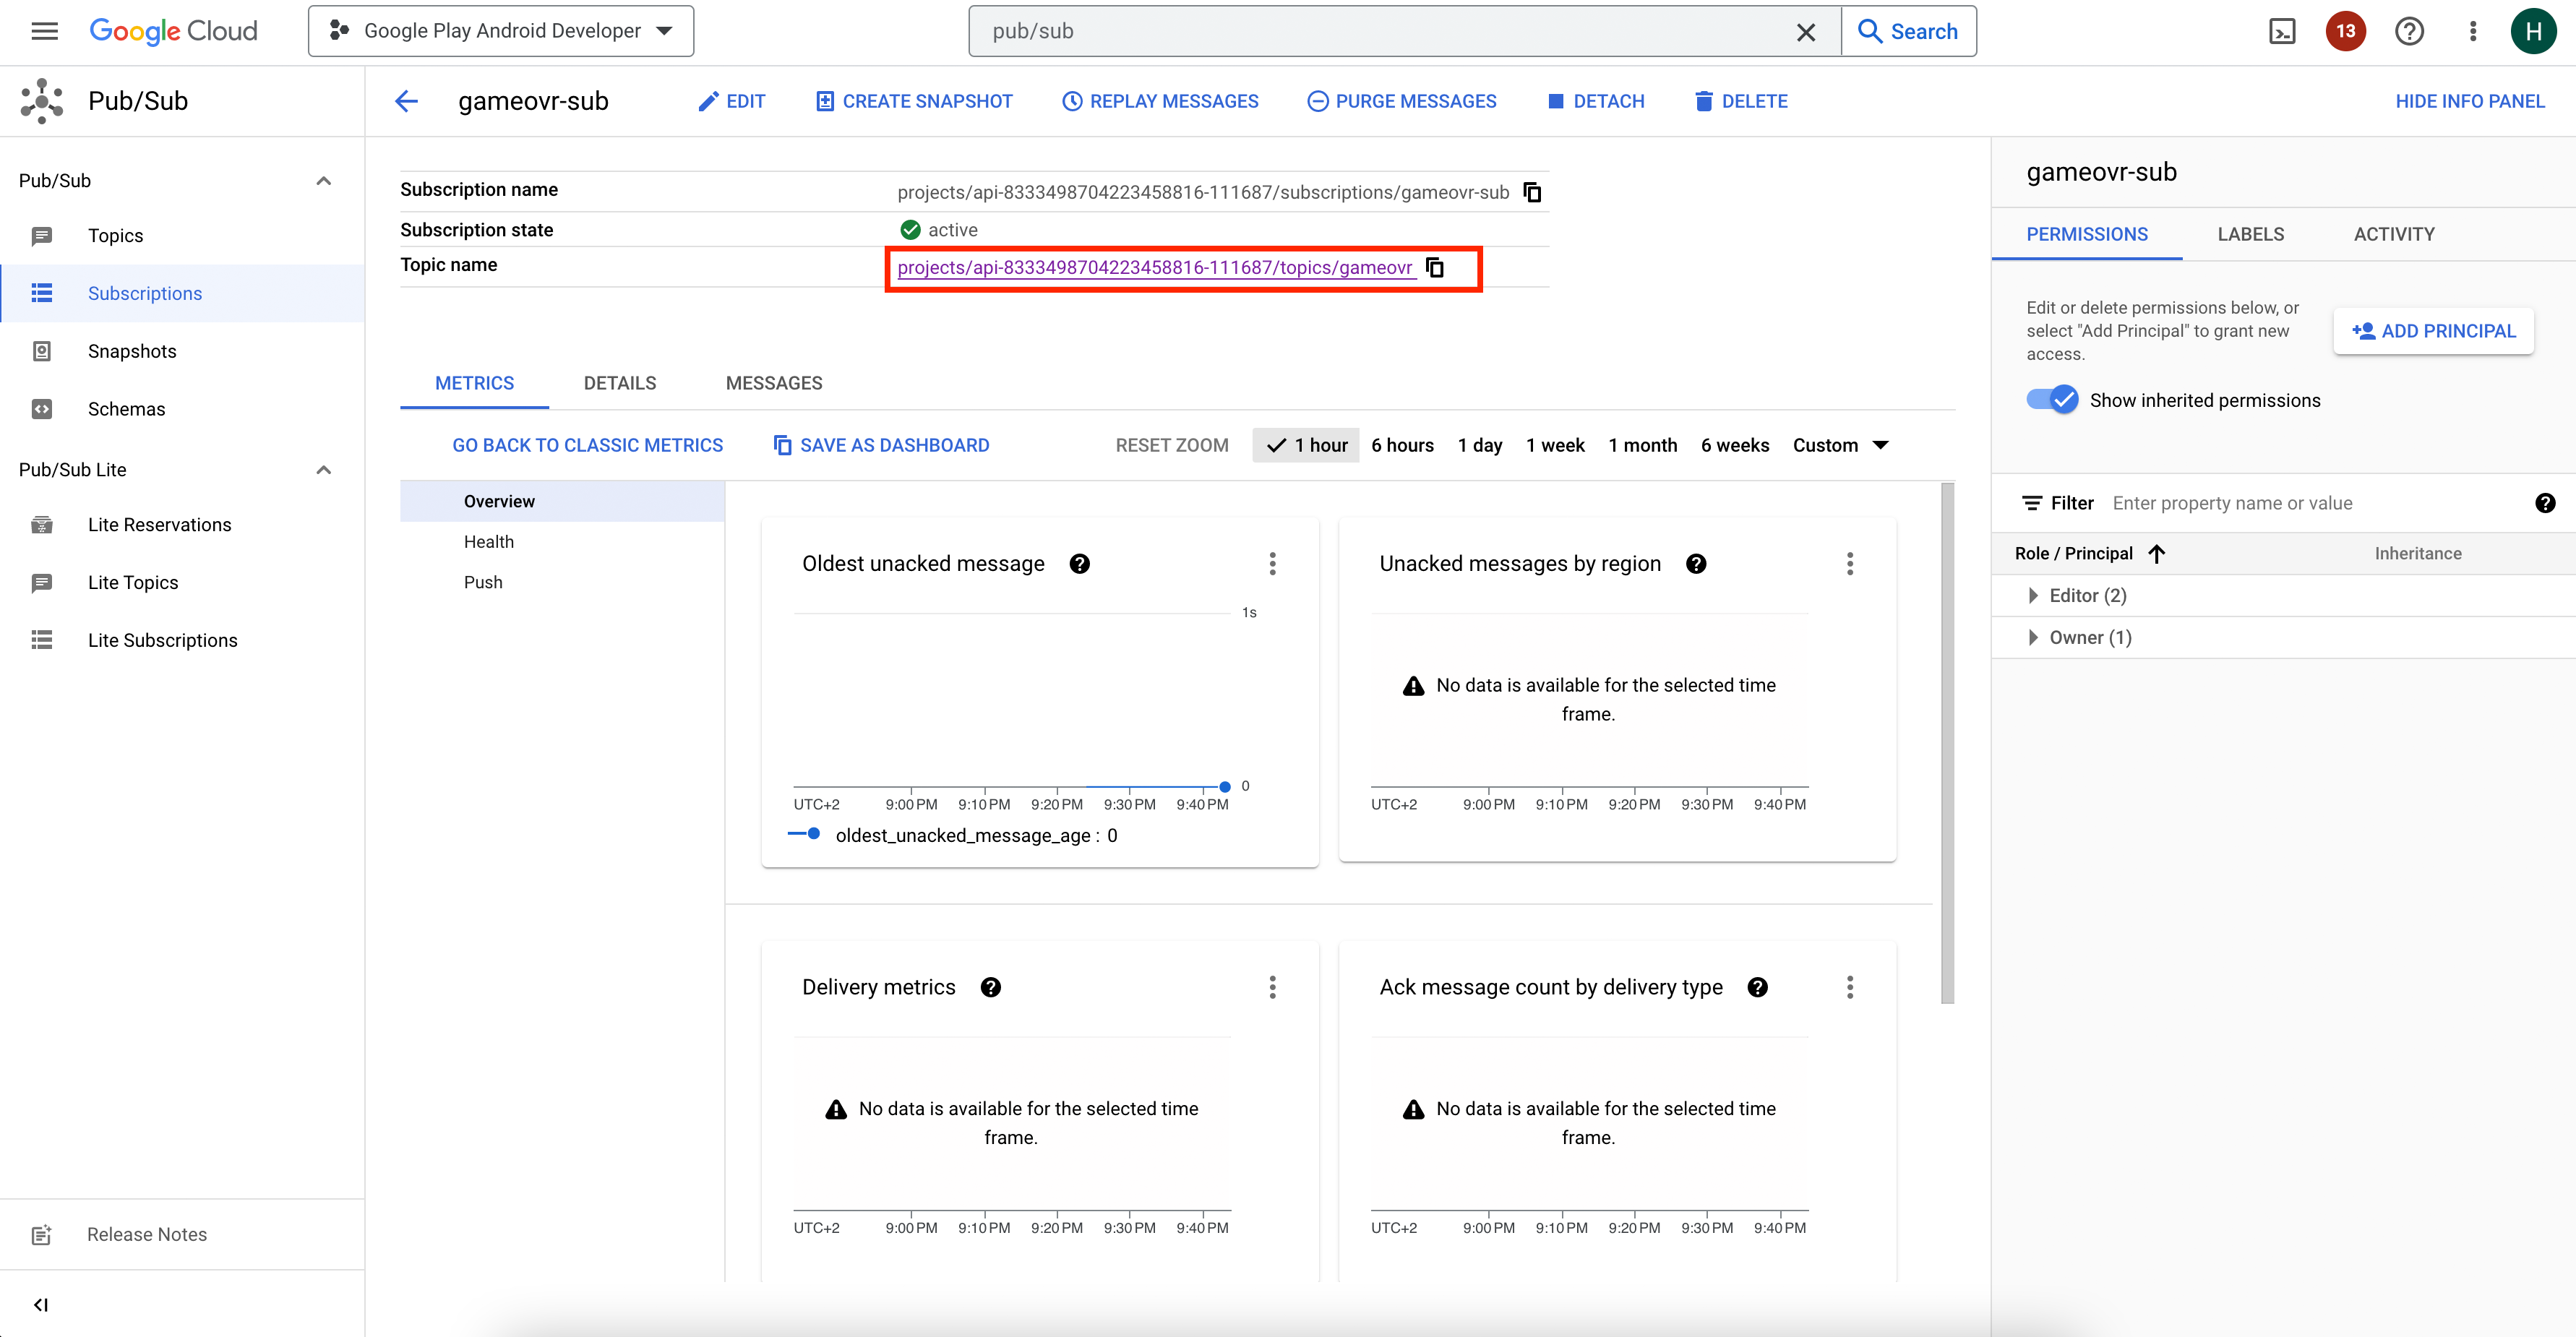
12. Copy the topic name, you will need to paste it now in the next steps
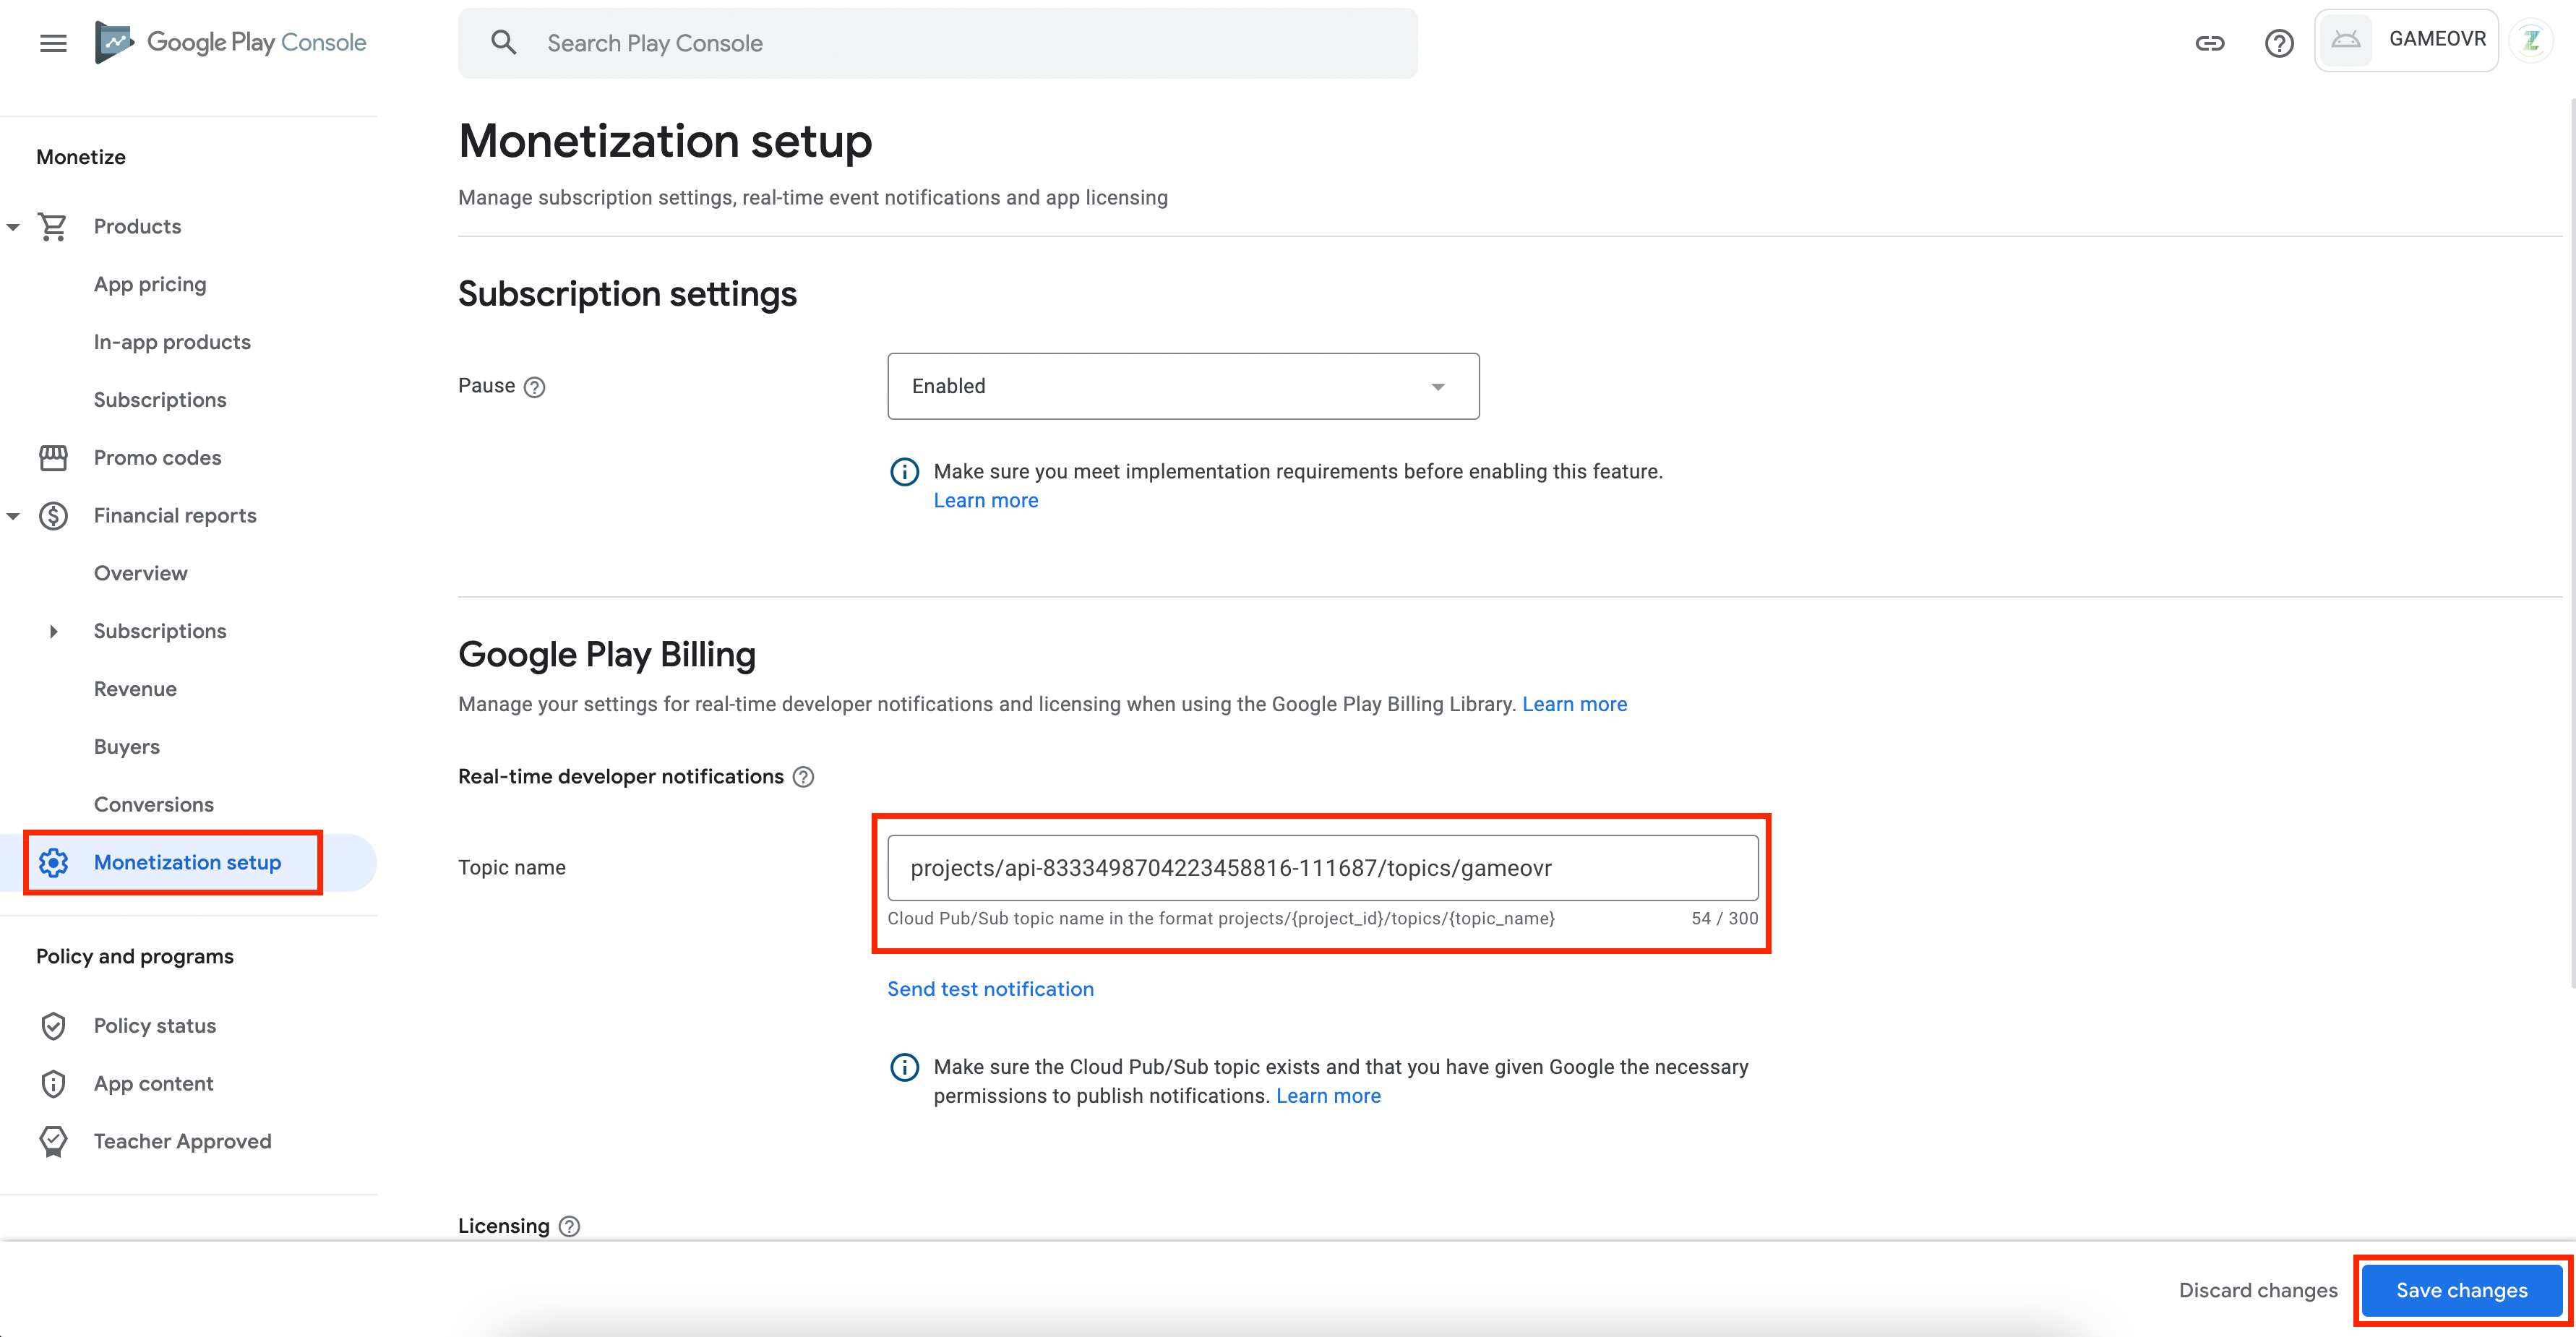
14. Go to "Monetization setup" under "Monetize" from the left sidebar menu. In the "Google Play Billing" section, under "Real-time developer notifications", provide the topic name that you have copied before:
image.png770.83 KB
15. Click on "Save changes".
That's it! Your webhook for the Google Play Console is now set up.