Get started  
Login  

Help Center

Community / Forum Ask Zappter Support We build your app Marketplace

Documentation

English

General

Videos

Mastering the content editor Pixel perfect design Setup your E-Commerce Store Configure your booking engine Event-System / Drop-In

Popular

App Store Submission Creating Push Notifications Typography Changing template Changing Rules

Business Modules

New

More Tutorials

Documentation

Customizing upper bar

Create a unique upper bar

Customizing upper bar

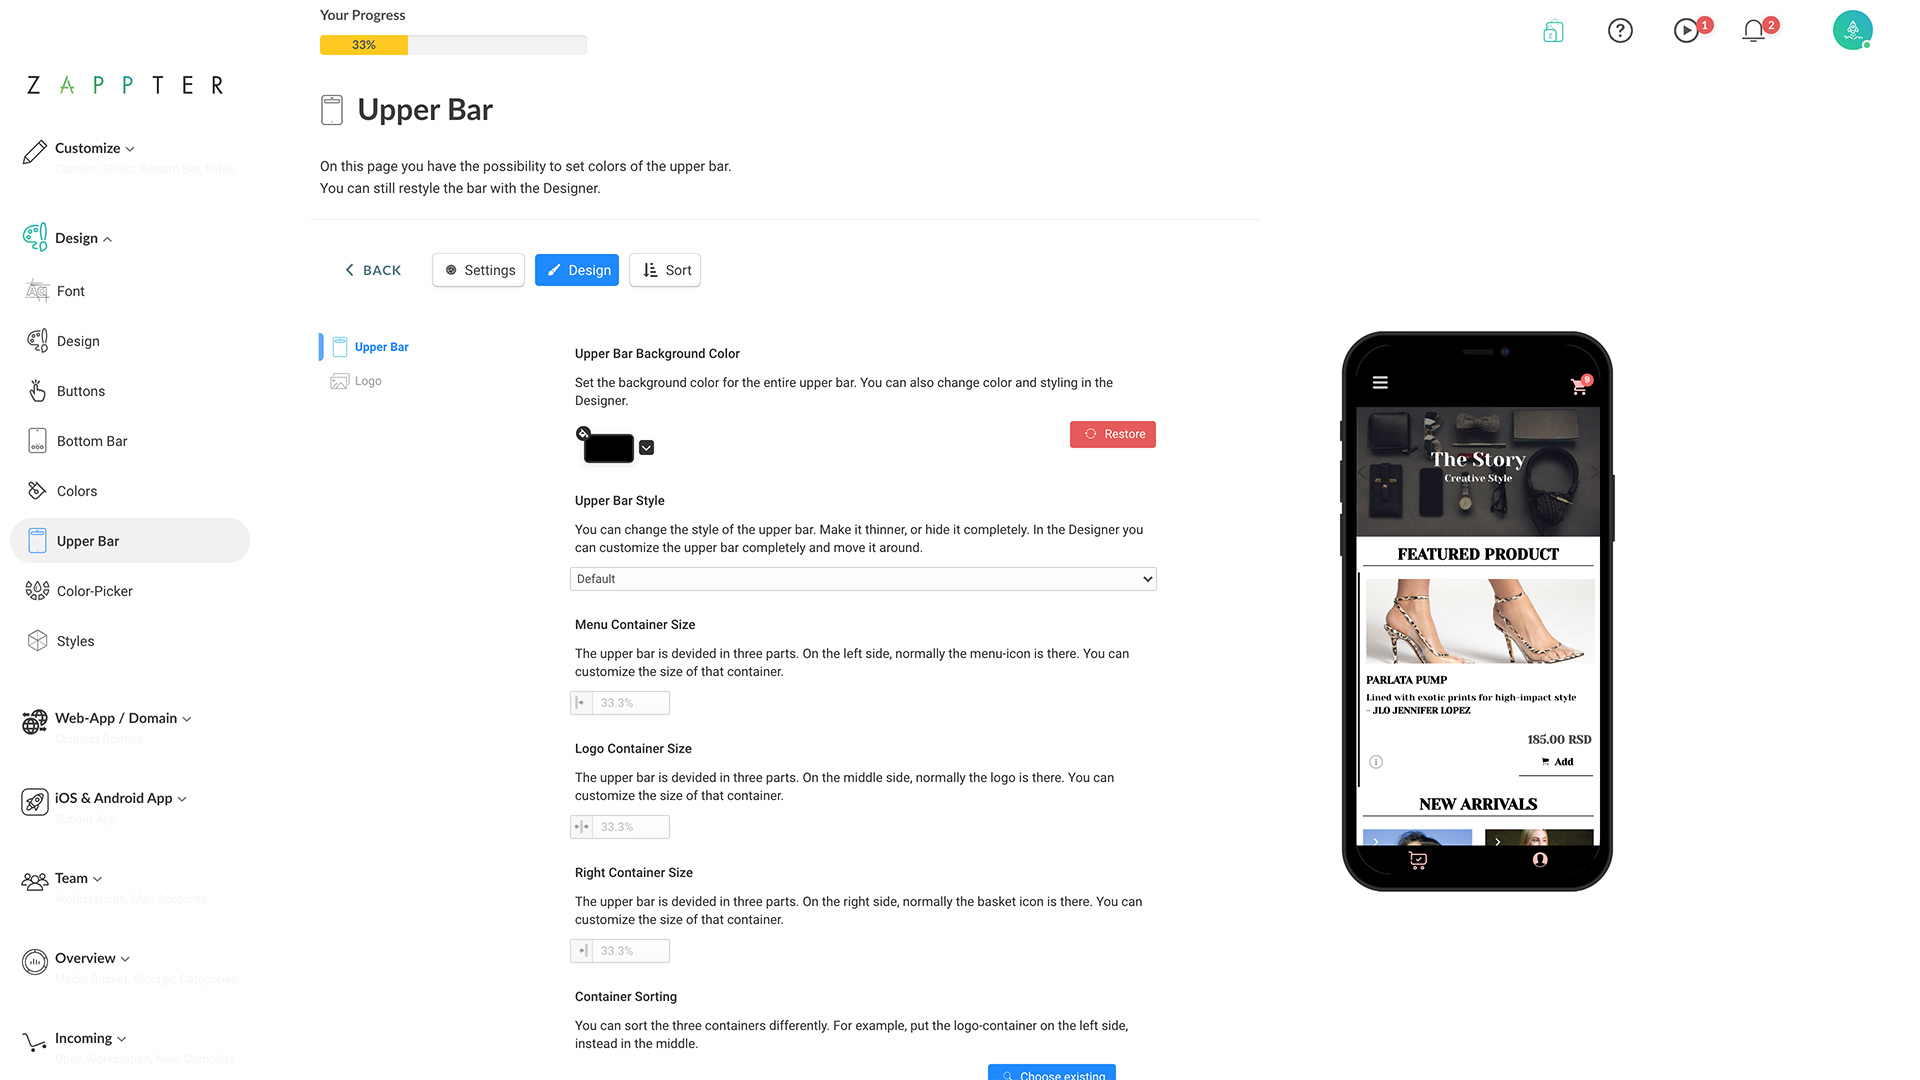
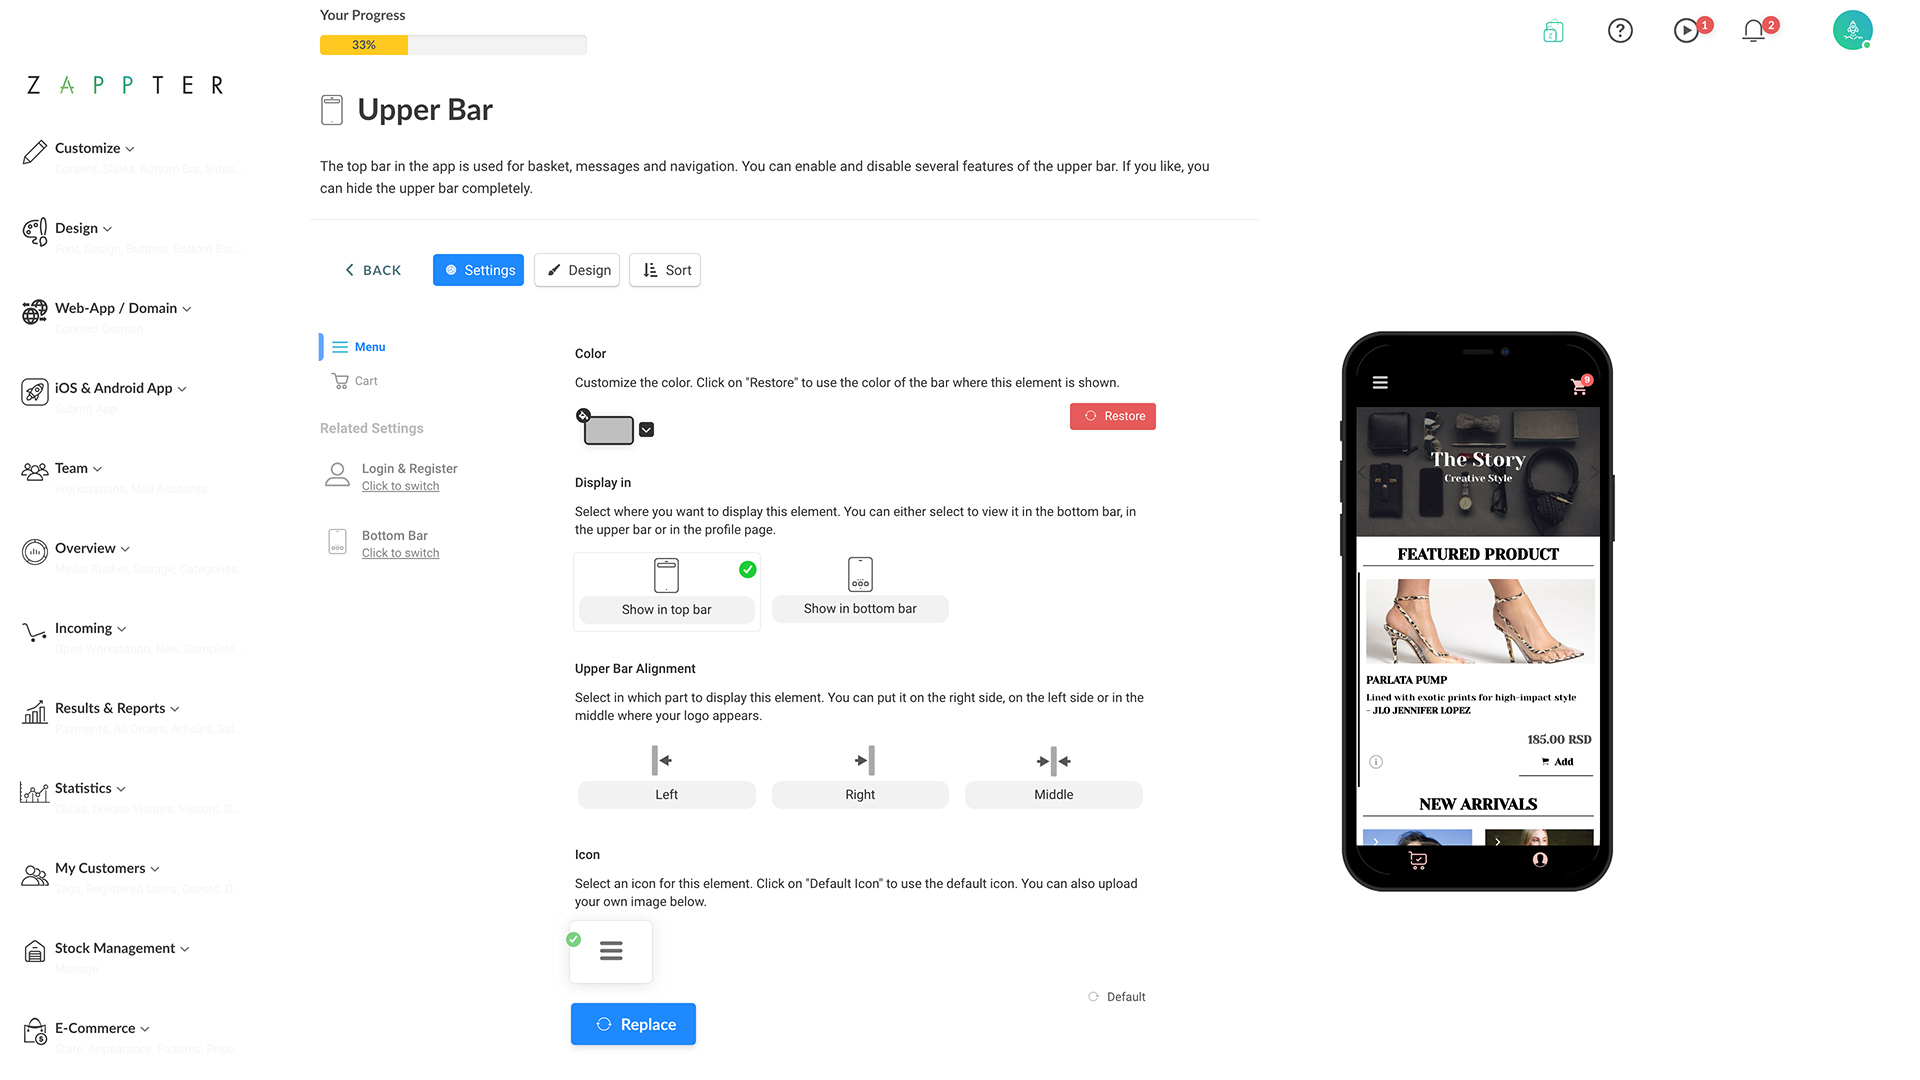
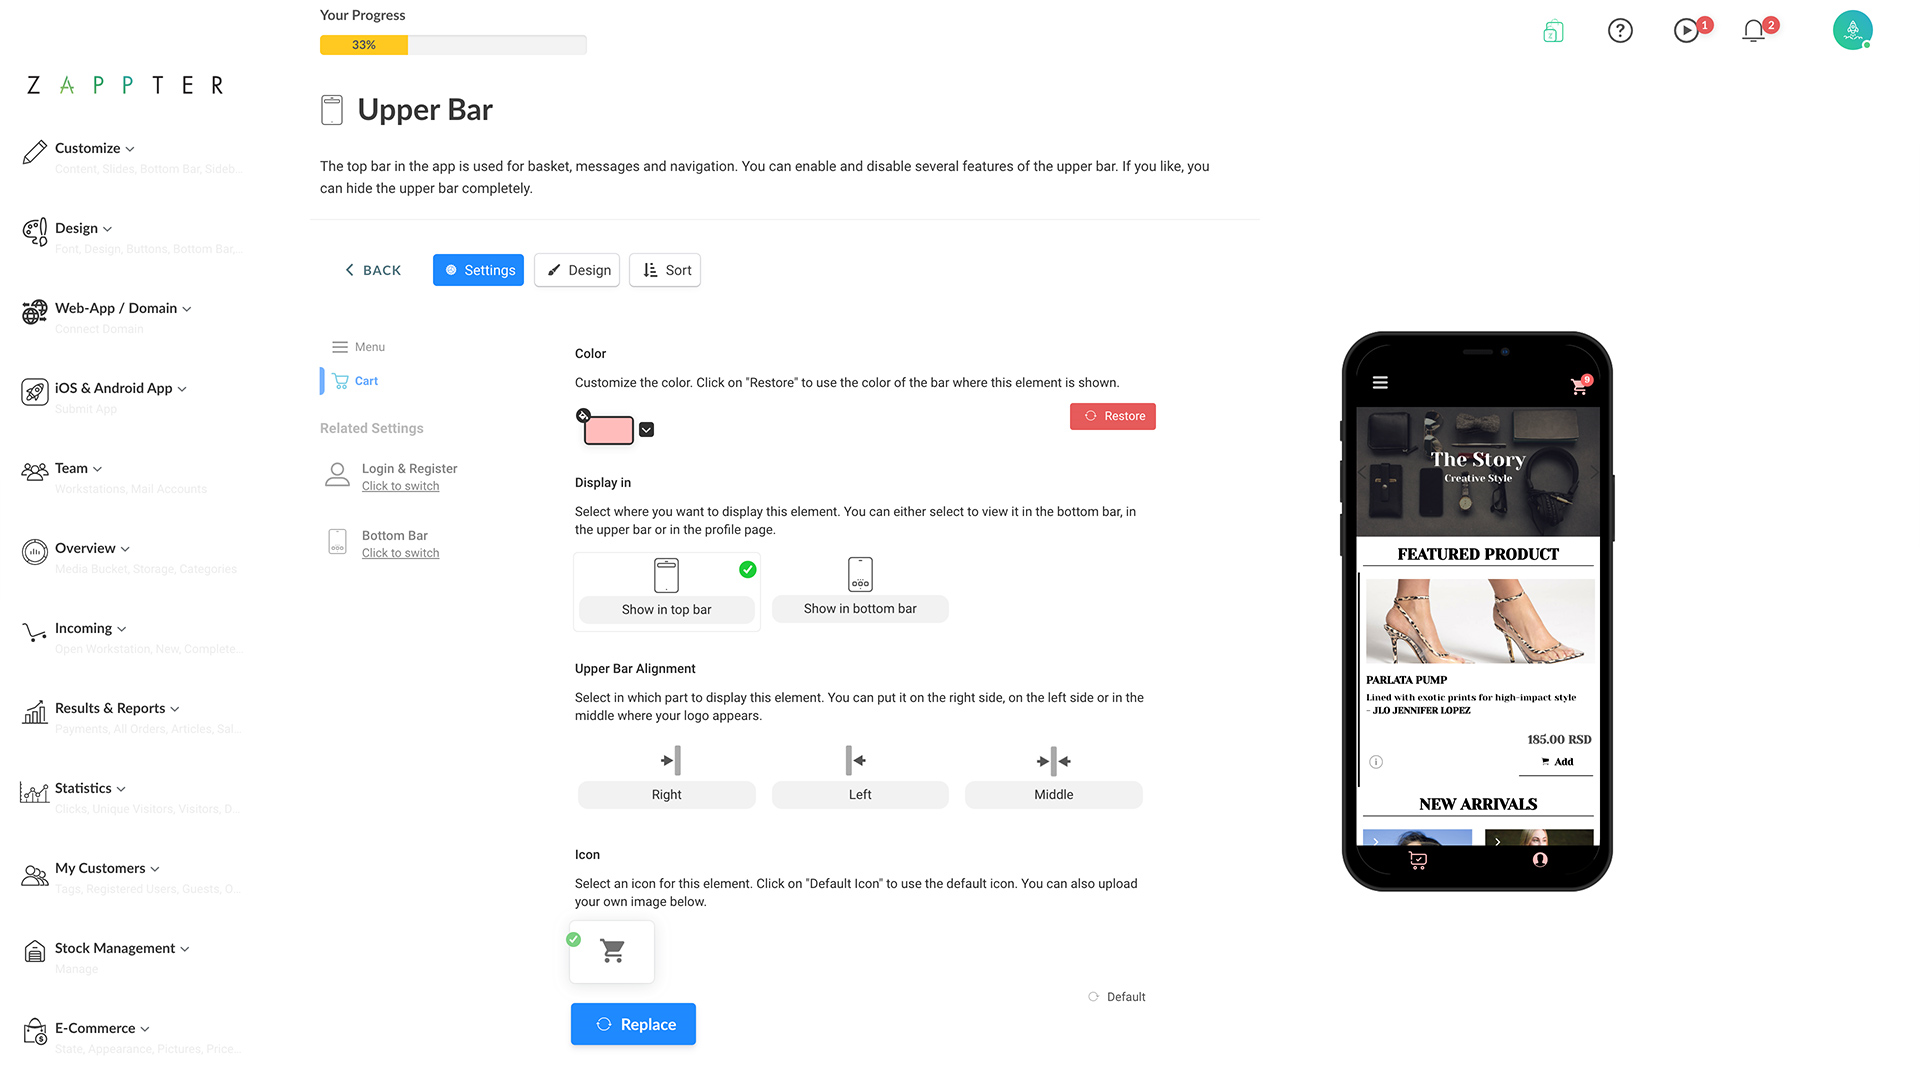
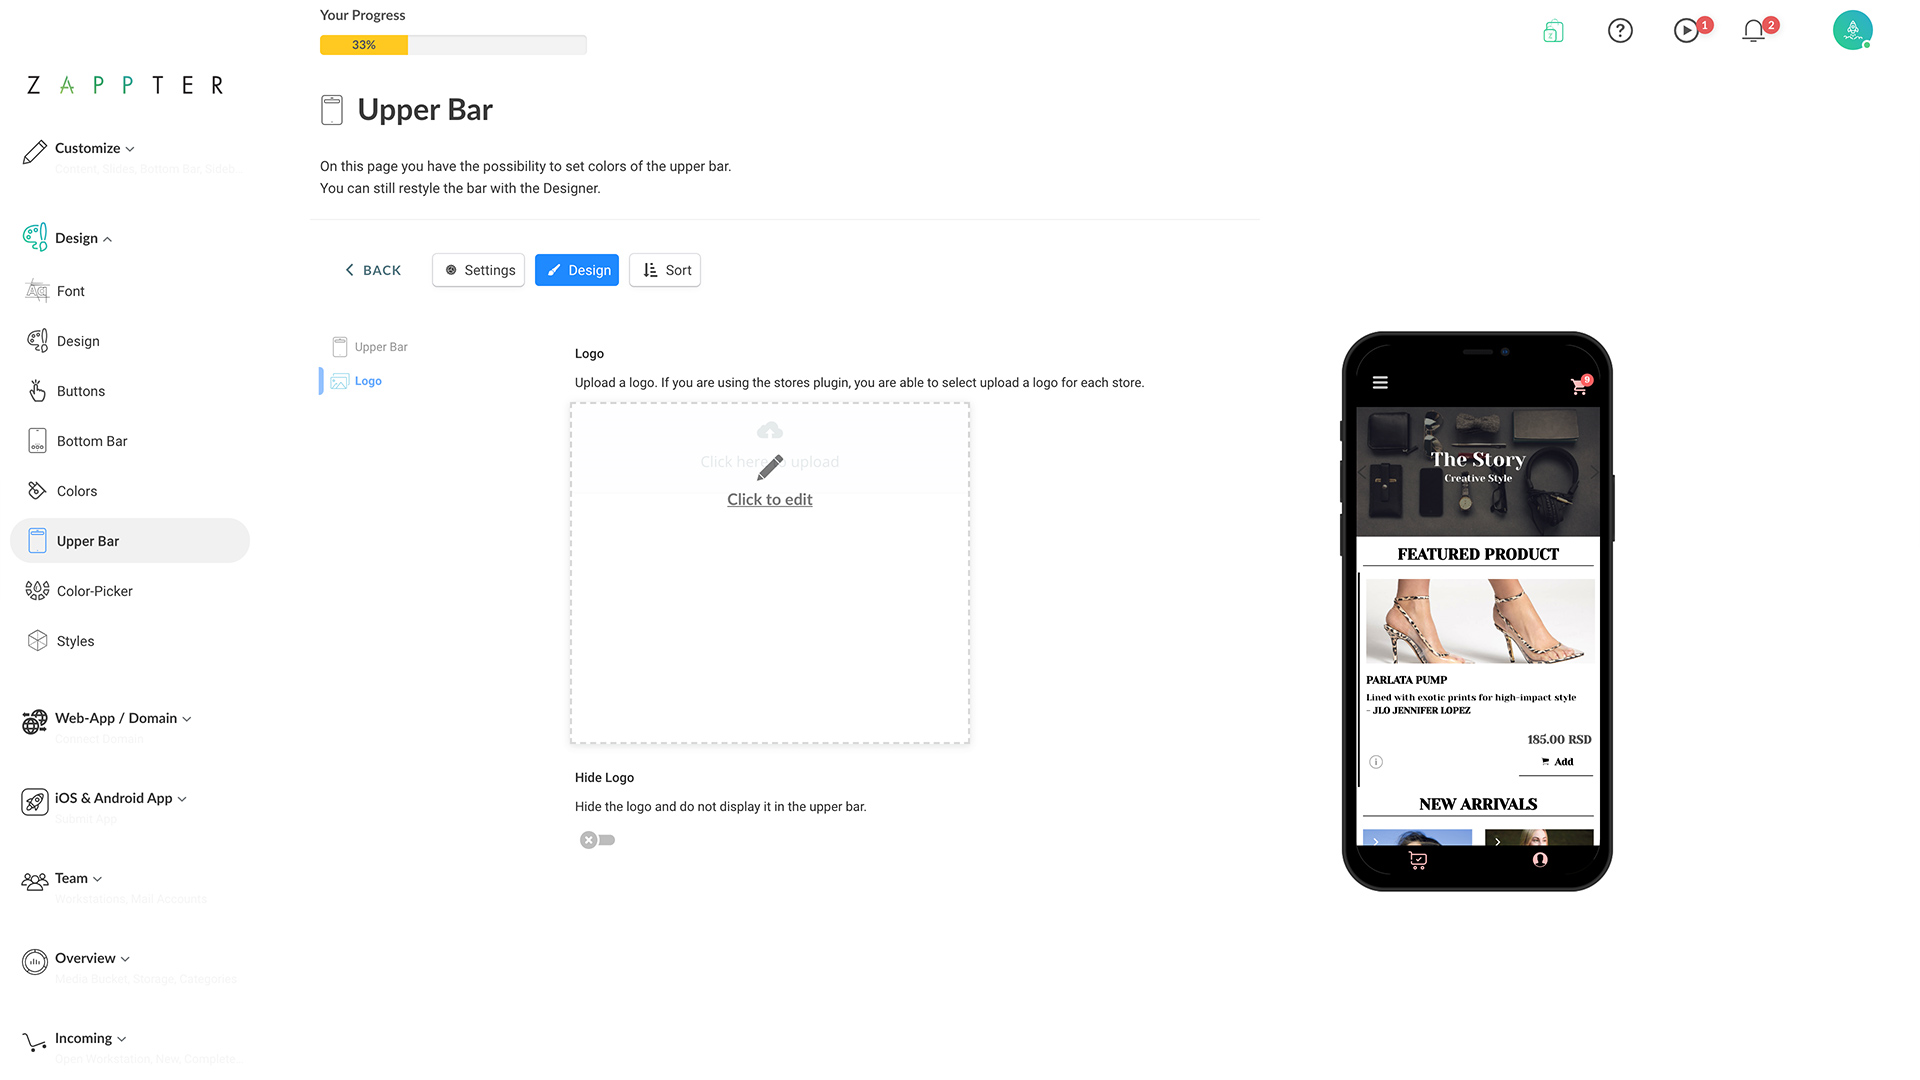
Customizing your 'upper bar' or 'bottom bar' enhances the user experience and helps your app adapt to your brand. You can customize the upper bar and its style, behavior, user interface, and every UI element on the upper bar such as menu, logo, and shopping cart.
Upper bar elements: menu, logo, and cart
Follow the below steps to customize the elements. And when you hit 'save,' the on-screen simulator shows how your new changes will look on users' devices without the need to navigate away from the page. It saves your time when you have to try various options before finalizing the best design for your upper bar or bottom bar.
1. Admin > Design > Upper Bar. By default, it opens with 'Design' option selected. 
image.png 457.07 KB
2. Click on the 'Settings' to start from there for this tutorial. The 'Menu' tab is selected.
image.png 458.99 KB
3. You can customize the below settings under this tab for your app menu.
Under every change, you get 'Save' or 'Discard' option. You can save changes at each change or save it all before moving on to the next tab. If you try to move to the 'Design' options with unsaved changes, Zappter prompts you to save or discard the changes on the current tab.

  • Color: Change the color of the hamburger menu
  • Display in: You can choose to display the menu on the upper bar or bottom bar
  • Upper Bar Alignment: The menu can be left-aligned, right-aligned, or centered using this option
  • Icon: You can change the default icon of the menu using this option
  • Use image: Instead of an icon, you can choose to use an image for the menu
4. Save as explained above, and move on to the 'Cart' tab. 
image.png 463.31 KB
5. Under the 'Cart' tab, you can change these settings for the shopping cart icon on your app.
  • Color: Change the color of the shopping cart icon
  • Display in: You can choose to display the  cart on the upper bar or bottom bar
  • Upper Bar Alignment: The  cart can be left-aligned, right-aligned, or centered using this option
  • Icon: You can change the default icon of the  cart using this option
  • Use image: Instead of an icon, you can choose to use an image for the  cart 
6. Save changes, if you haven't.
Design options
7. Click on the 'Design' button.
image.png 455.28 KB
8. The 'Upper Bar' tab is selected by default. Here you can customize the below settings for the upper bar itself.
  • Upper Bar Background Color: The color of the upper bar
  • Upper Bar Style: You can choose one of three different styles for your upper bar: 1. Default, 2. Thin, and 3. Hidden
  • Menu Container Size: What is the width of the menu icon area in percentage. (default is 33.3% to equally divide the width among menu icon area, logo area, and cart icon area)
  • Logo Container Size:  What is the width of the logo area in percentage. (default is 33.3% to equally divide the width among menu icon area, logo area, and cart icon area) 
  • Right Container Size:  What is the width of the cart icon area in percentage. (default is 33.3% to equally divide the width among menu icon area, logo area, and cart icon area) 
  • Container Sorting: With this option, you can rearrange which icon area comes first, second and the third. For example, to move the logo to the first, then cart icon, and then menu
9. Save changes, if you haven't done so. Move on to the 'Logo' tab.
image.png 380.02 KB
10. Here in this tab, you can upload the logo and save changes.
You can also upload logo from: Admin > Settings > Logo.
Sort options
11. Click on the 'Sort' button. Use this option to set the order for three primary items on the upper bar. It is the same functionality discussed under 'Container sorting' in step 8 above.
image.png 366.62 KB
12. Use drag and drop to rearrange the icons, Cart and Menu and save changes.
Last updated at 11.07.2022 13:27