Creating a new In-App Purchase in Zappter is a simple process. Here are the steps to follow.
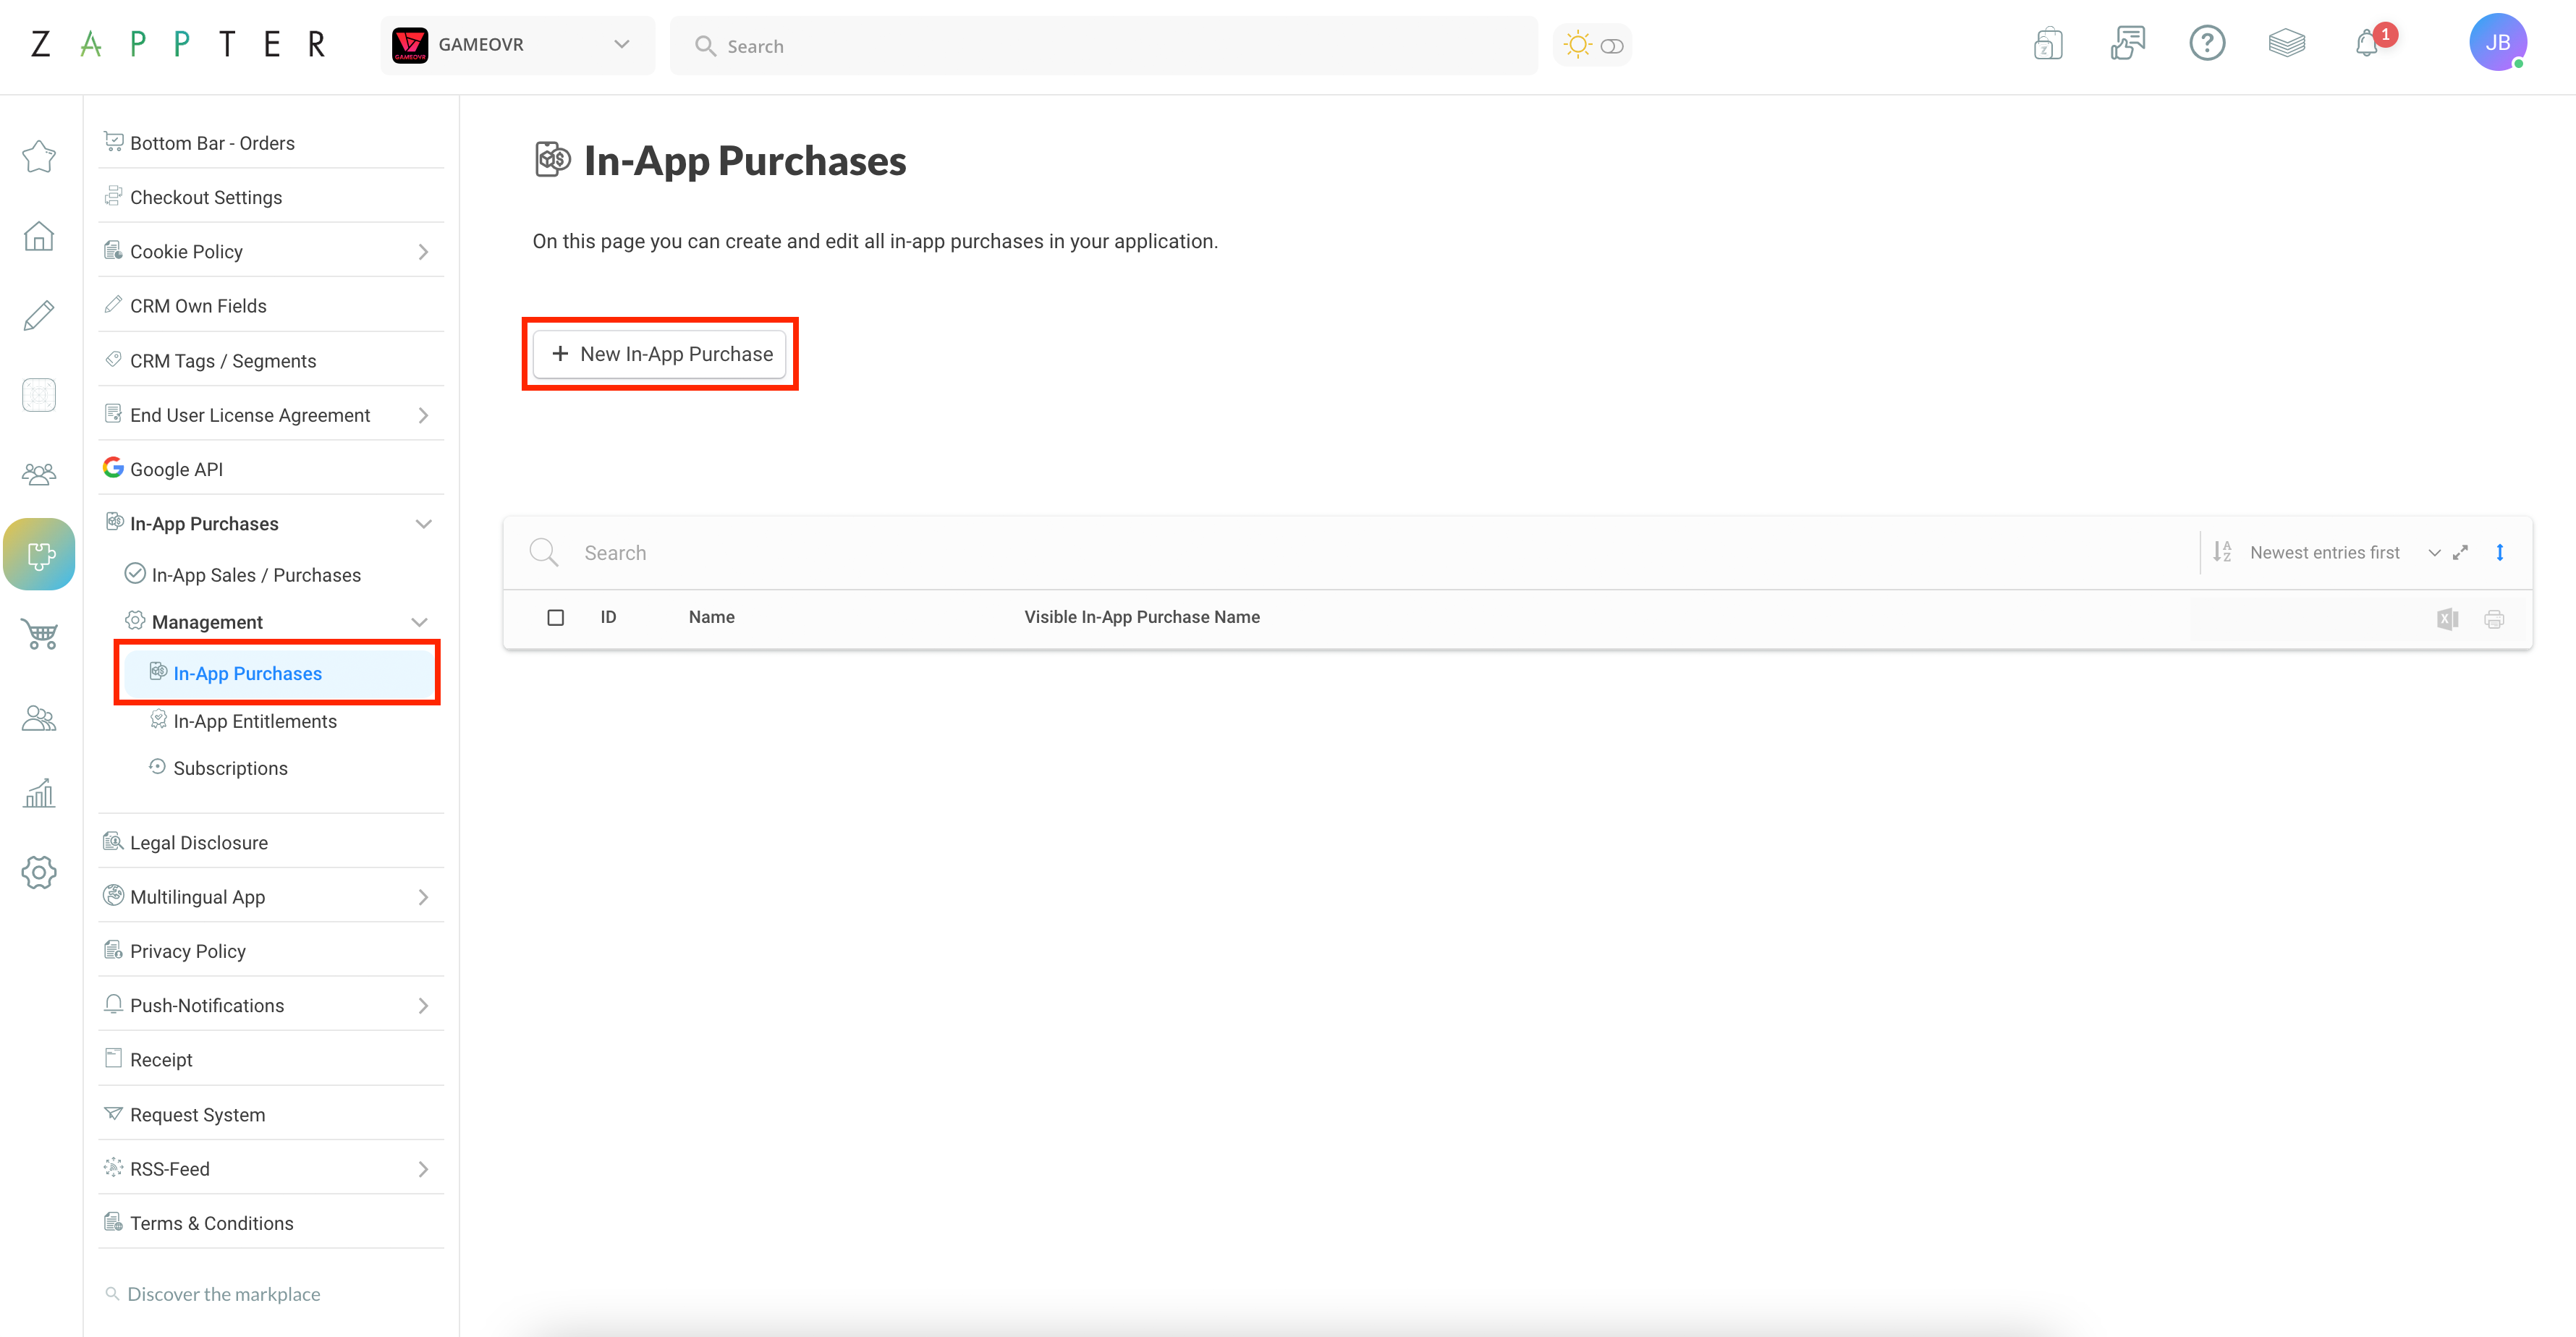
1. From the Zappter's edit app left sidebar menu, go to "In-App Purchases > Management > In-App Purchases". Click on "New In-App Purchase" to create a new in-app purchase.
image.png457.48 KB
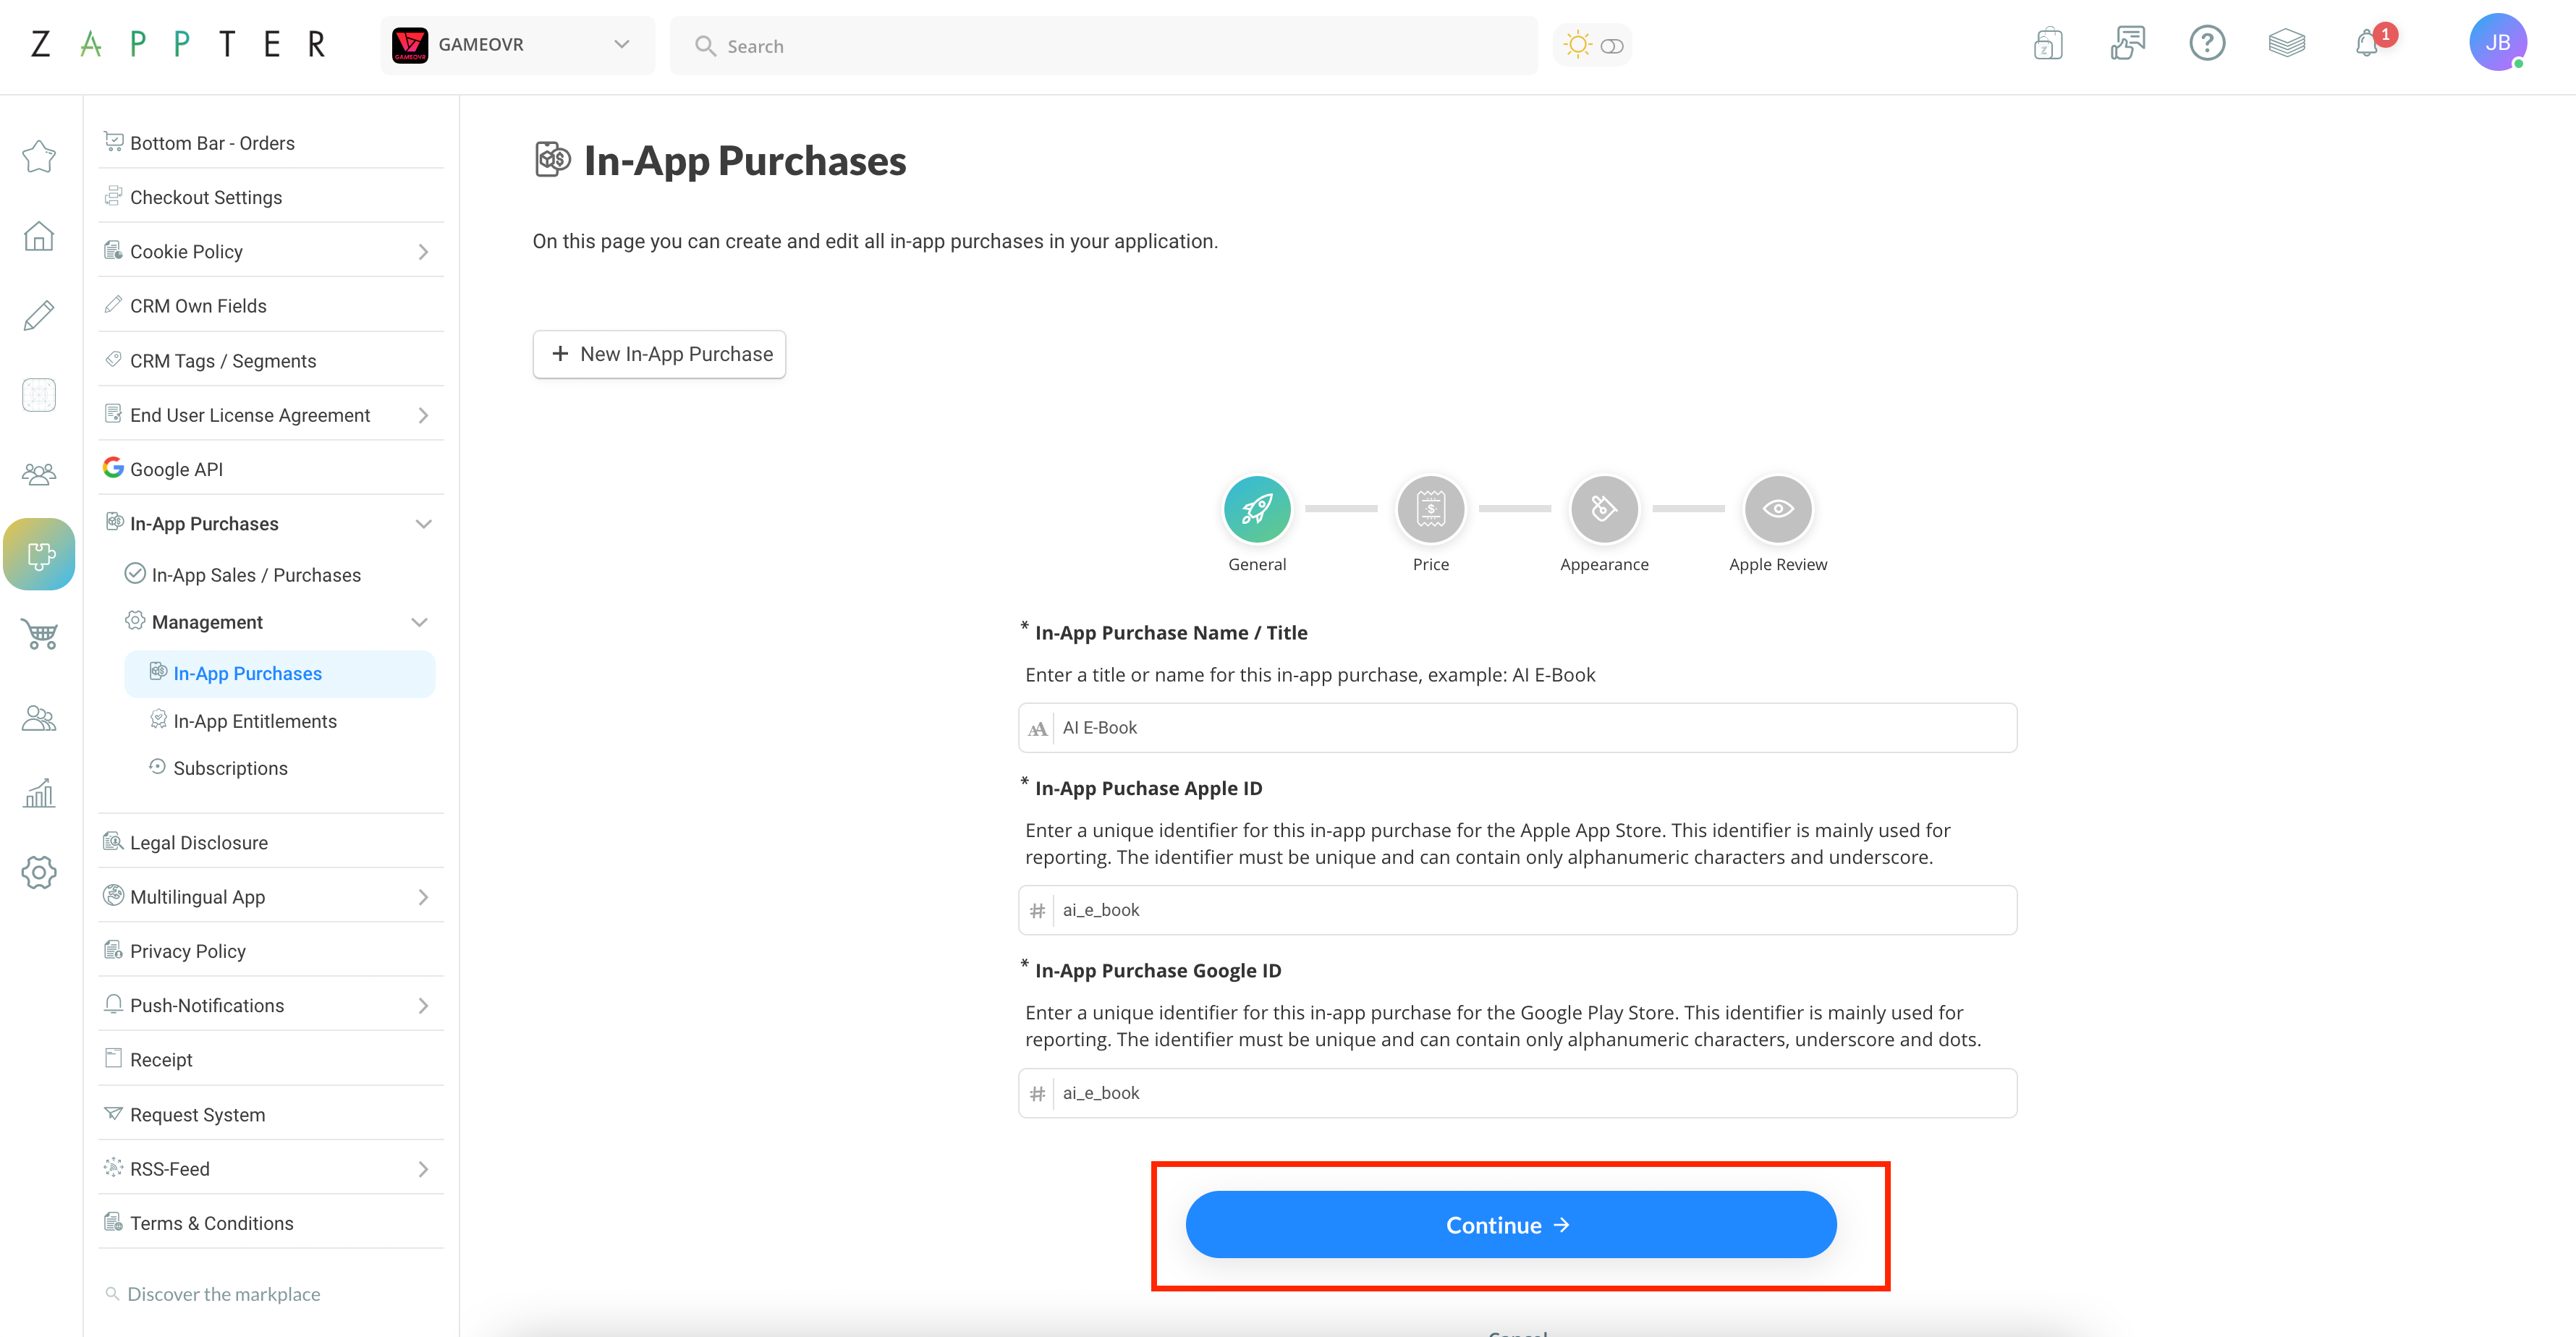
2. On the first step, you will be required to fill in three fields: The purchase name, Apple ID, and Google ID. The purchase name is the name that will be used across Zappter panel, while the Apple ID and Google ID are unique identifiers that cannot be reused even after the purchase has been deleted. Once you have entered your information, click on "Continue".
image.png608.16 KB
3. On the second step, set the prices for your purchase. The default currency for the purchases is the currency from the country you have chosen for your Developer Account. All other currencies will be automatically calculated by the app stores. For Apple, you can only choose from a predefined list of prices, but for Google, you can set your own price. Remember that the VAT will be automatically added to the price for Google. Click "Continue" when you are done setting the prices.
image.png581.14 KB
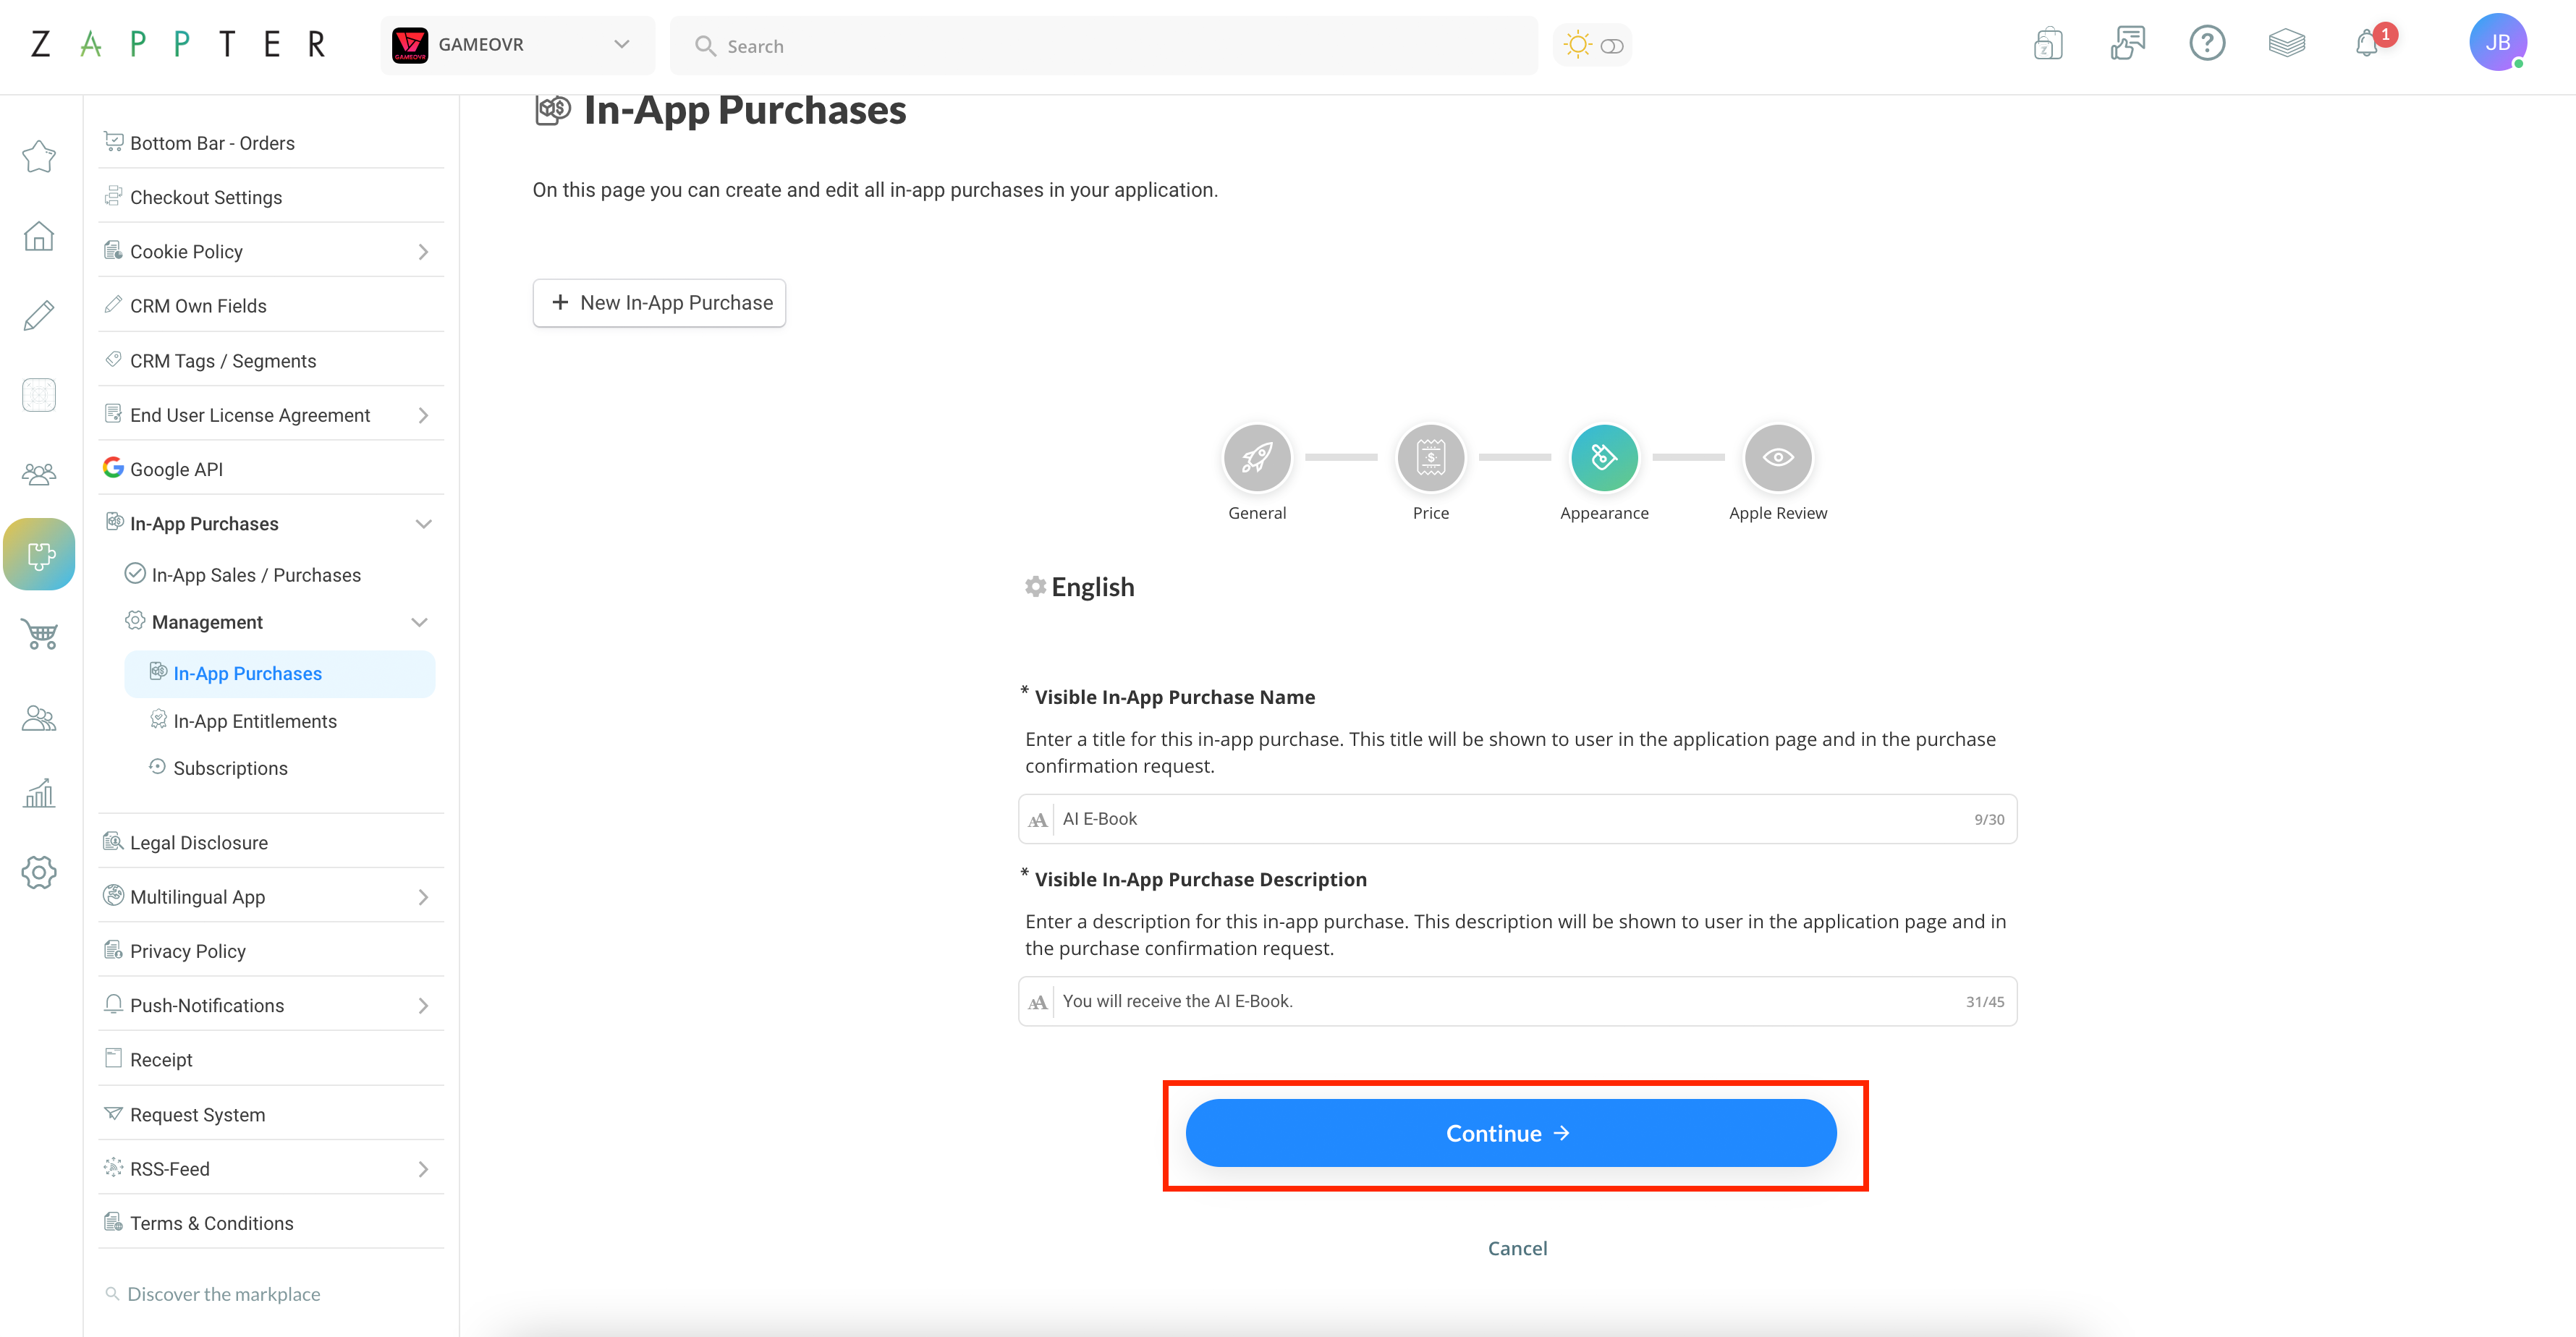
4. On the third step, you have to set up the purchase title and description for all languages that you have in the application. This text will be shown to the user when the purchase is started and also in the receipt. Click "Continue" when you are finished adding the locales.
image.png583.53 KB
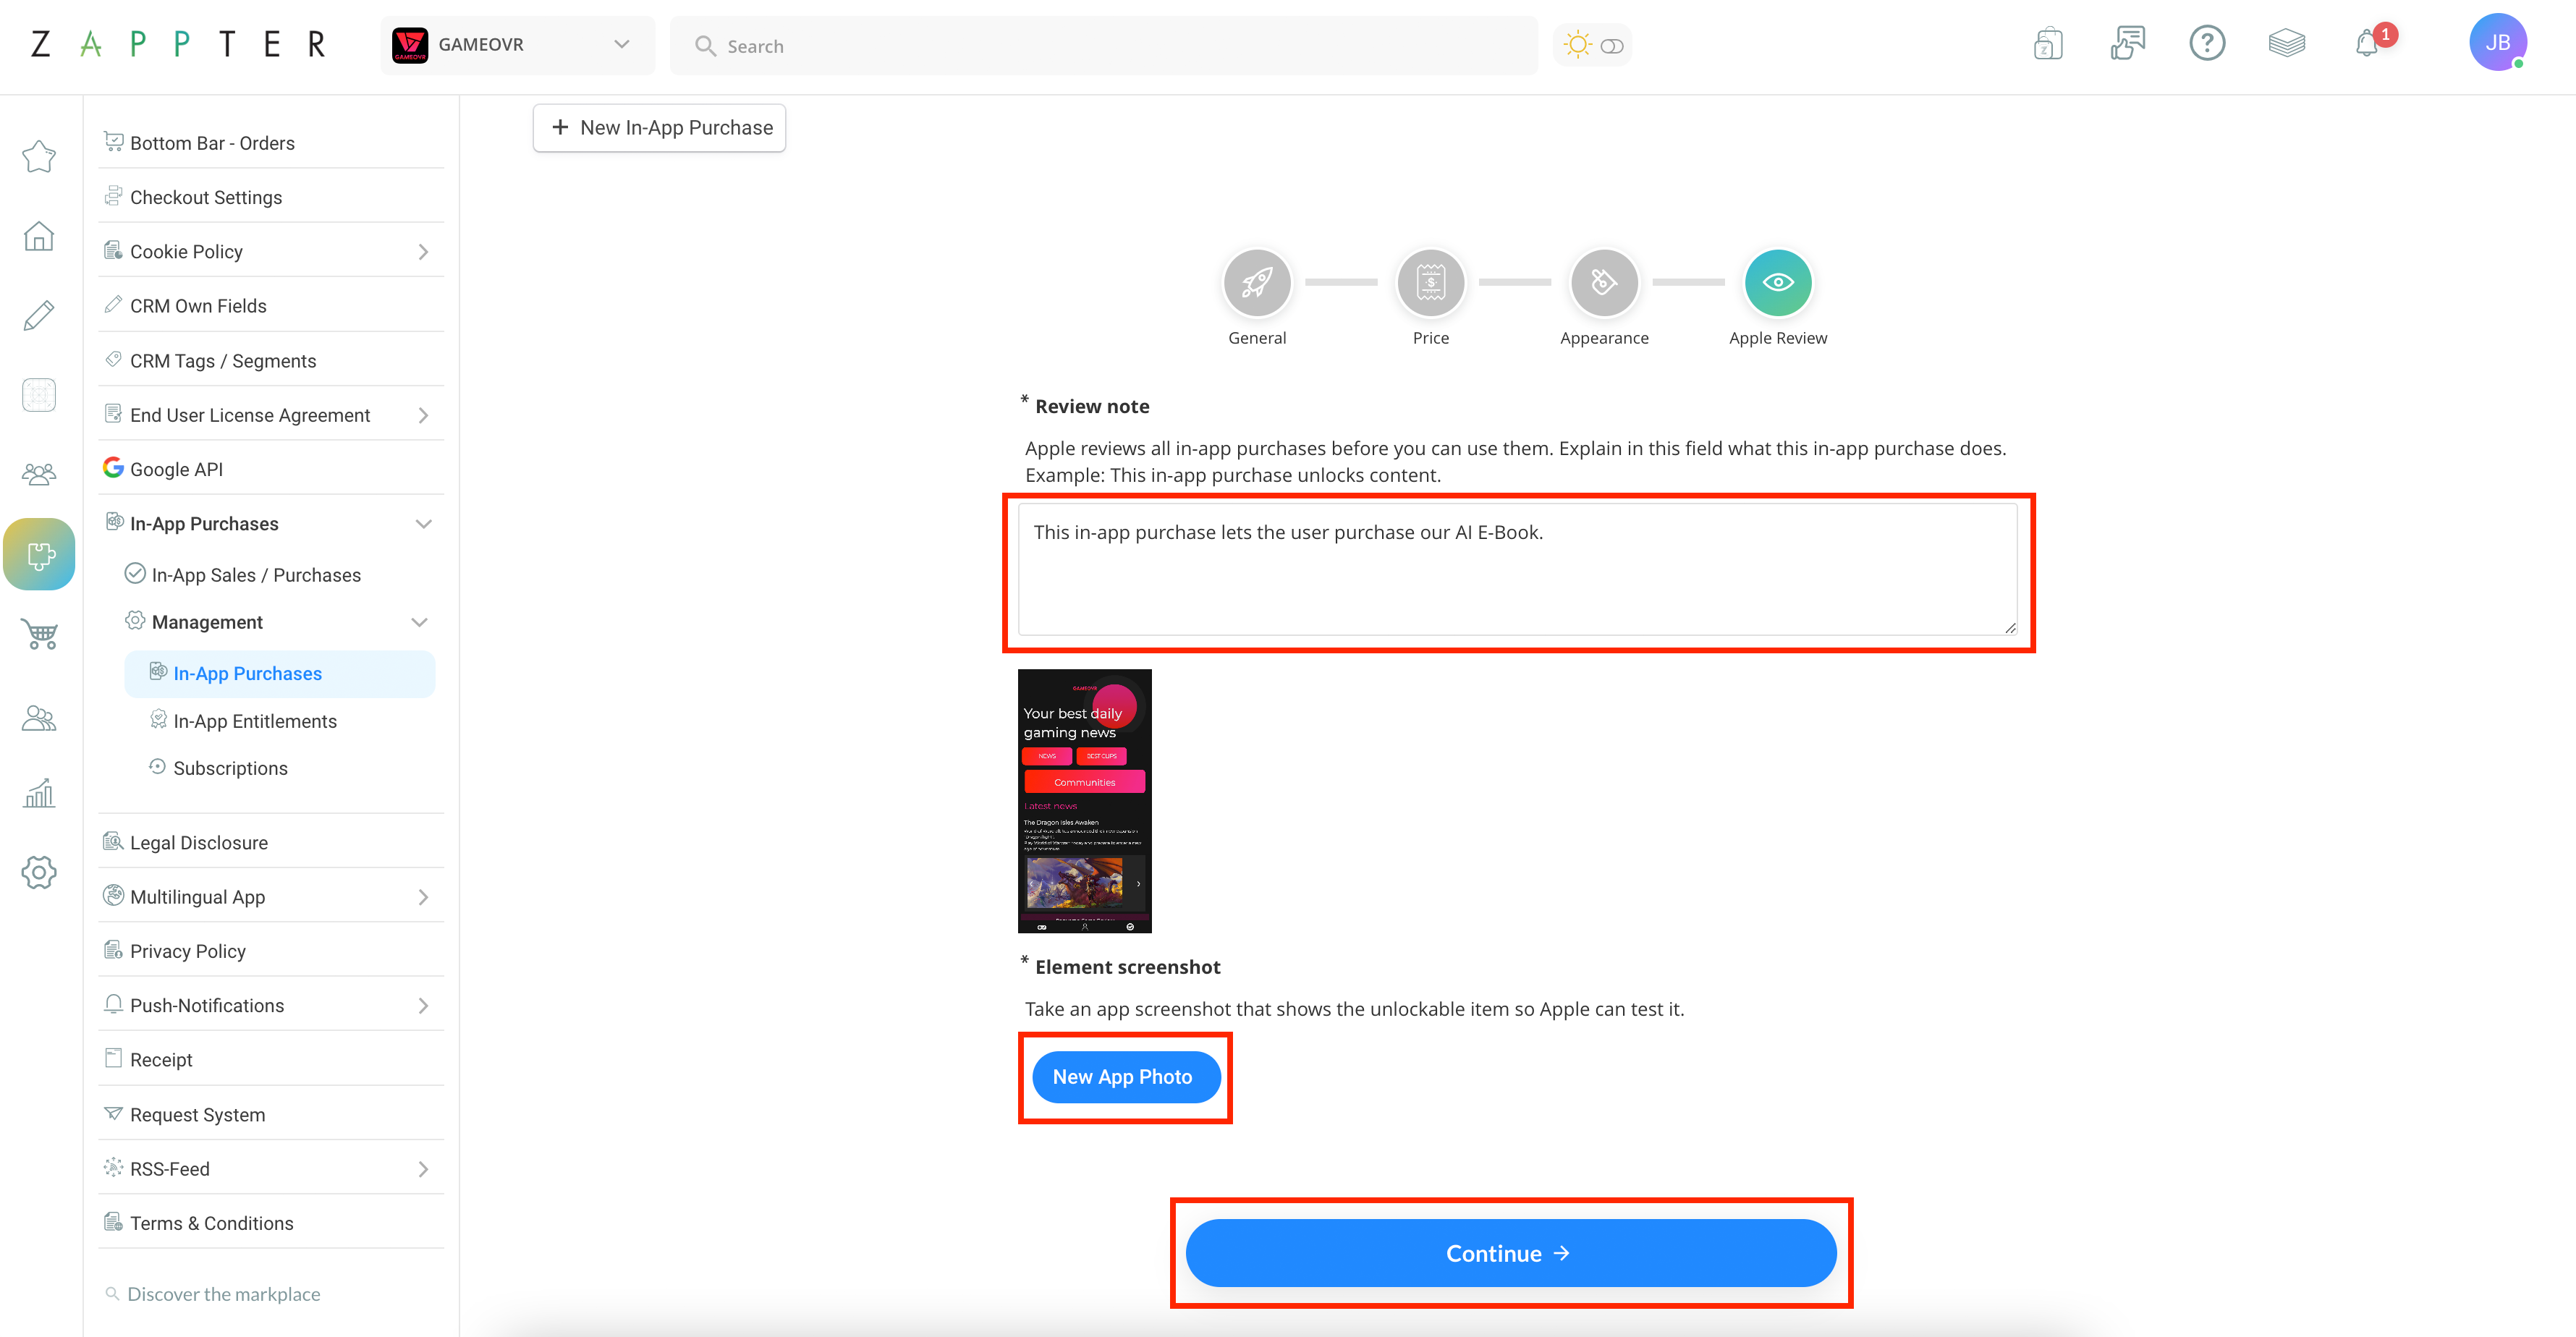
5. On the last step, you have to provide information about your in-app purchase for Apple. Provide as much information as possible about the purchase you have just added. You will also need to attach a screenshot of the content that can be unlocked with the purchase. To do this, click "New App Photo," select the place where the unlockable content is located, and click "Choose." If you haven't created content before, don't worry; the purchase is already created and stored, and you can come back later to finish this step.
image.png613.63 KB
6. That's it! You have now successfully created your first in-app purchase.