Your chat widget is going to be a focal point of your user interaction, so you need to balance the consistency between the widget and your app design. You can customize HubSpot chat widget to suit your requirements and design. Below guides you through the steps to perform that in HubSpot.
Note that the below steps are performed at a third-party site, that may be subject to change without prior notification.
1. Log into your HubSpot dashboard. Then navigate to, Conversations > Chatflows.
2. All your Chatflows display, click on the hyperlink, 'inbox settings' (previous section, Integrating HubSpot Chat explains how to create Chatflows and connect to your app).
image.png44.69 KB
3. Hover over the 'Chat' and you get an 'Edit' option there. Click on it.
image.png59.05 KB
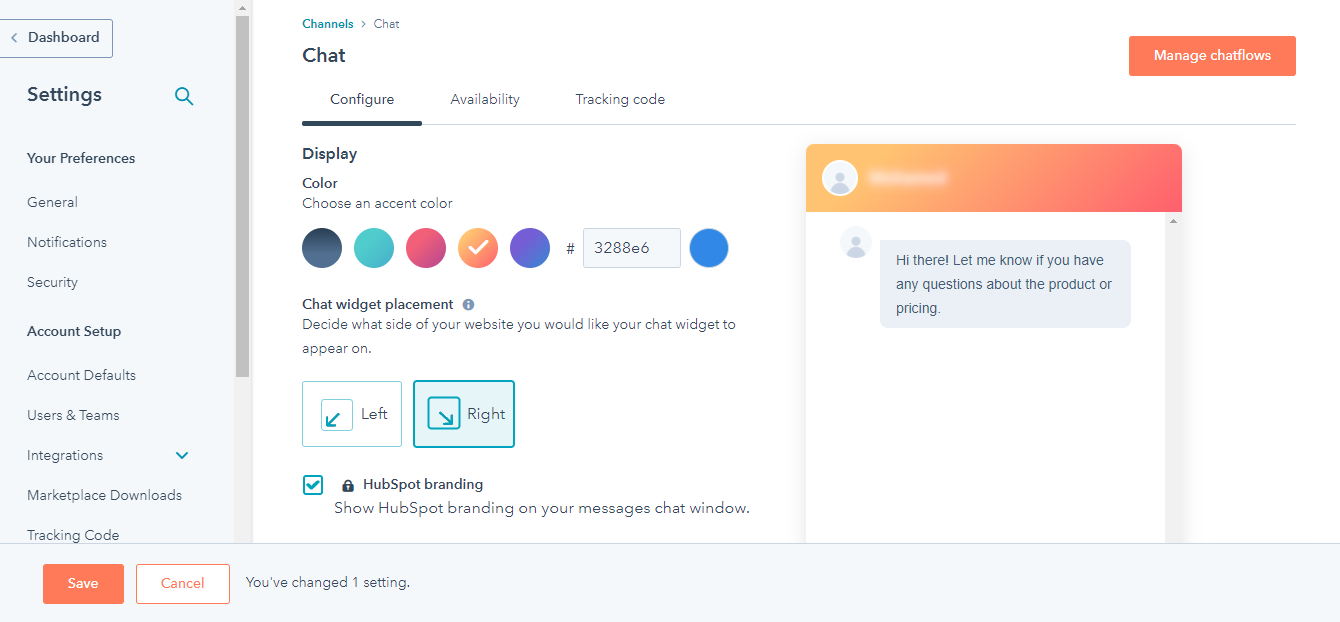
4. It takes you to widget customization.
image.png86.56 KB
Display: You can change the chat box color (widget color) or provide your custom color
Chat widget placement: Whether the widget should be place at the left or right corner
HubSpot branding: If you have a paid membership, you can remove HubSpot branding
Chat transcript (if you scroll down on the screen): It is an end-chat transcript. You can create or customize your own messages that is sent to your users at the end of the session. You can utilize this for your marketing or brand specific messages
5. Save the change to complete your widget customization.