Get started  
Login  

Help Center

Community / Forum Ask Zappter Support We build your app Marketplace

Documentation

English

General

Videos

Mastering the content editor Pixel perfect design Setup your E-Commerce Store Configure your booking engine Event-System / Drop-In

Popular

App Store Submission Creating Push Notifications Typography Changing template Changing Rules

Business Modules

New

More Tutorials

Documentation

Integrating Google

Integrating Google authentication

This integration has two parts to it:
  • Creating Client ID & Secret Key in Google
  • Entering Google's  Client ID & Secret Key in Zappter
Creating Client ID & Secret Key in Google:
Your app URL
Ensure to have your web app URL while completing the below steps. Here is how to get your web app URL from Zappter:

  1. Log in to your admin.
  2. Open your profile menu and your web app link is the first option available under this menu. 
  3. Make a note or copy the URL.
Your app will utilize Google's user account information to give app users access to register a new user or sign in; you need to make sure that Google is aware of it. This plugin simplifies your integration using Google APIs. However, you need to set up the Google side for it. 

There are plenty of articles about setting up Google OAuth2.0 Client ID & Client Secret are available on the internet as well. Or, you can follow through with the steps explained in detail below.
Google uses OAuth 2 protocol to share password tokens with your app. It doesn't share password data; instead, it uses authorization tokens to prove an identity between your app users and Google. It works by delegating user authentication to the Google service that hosts the user account and authorizing your app to access the user account.
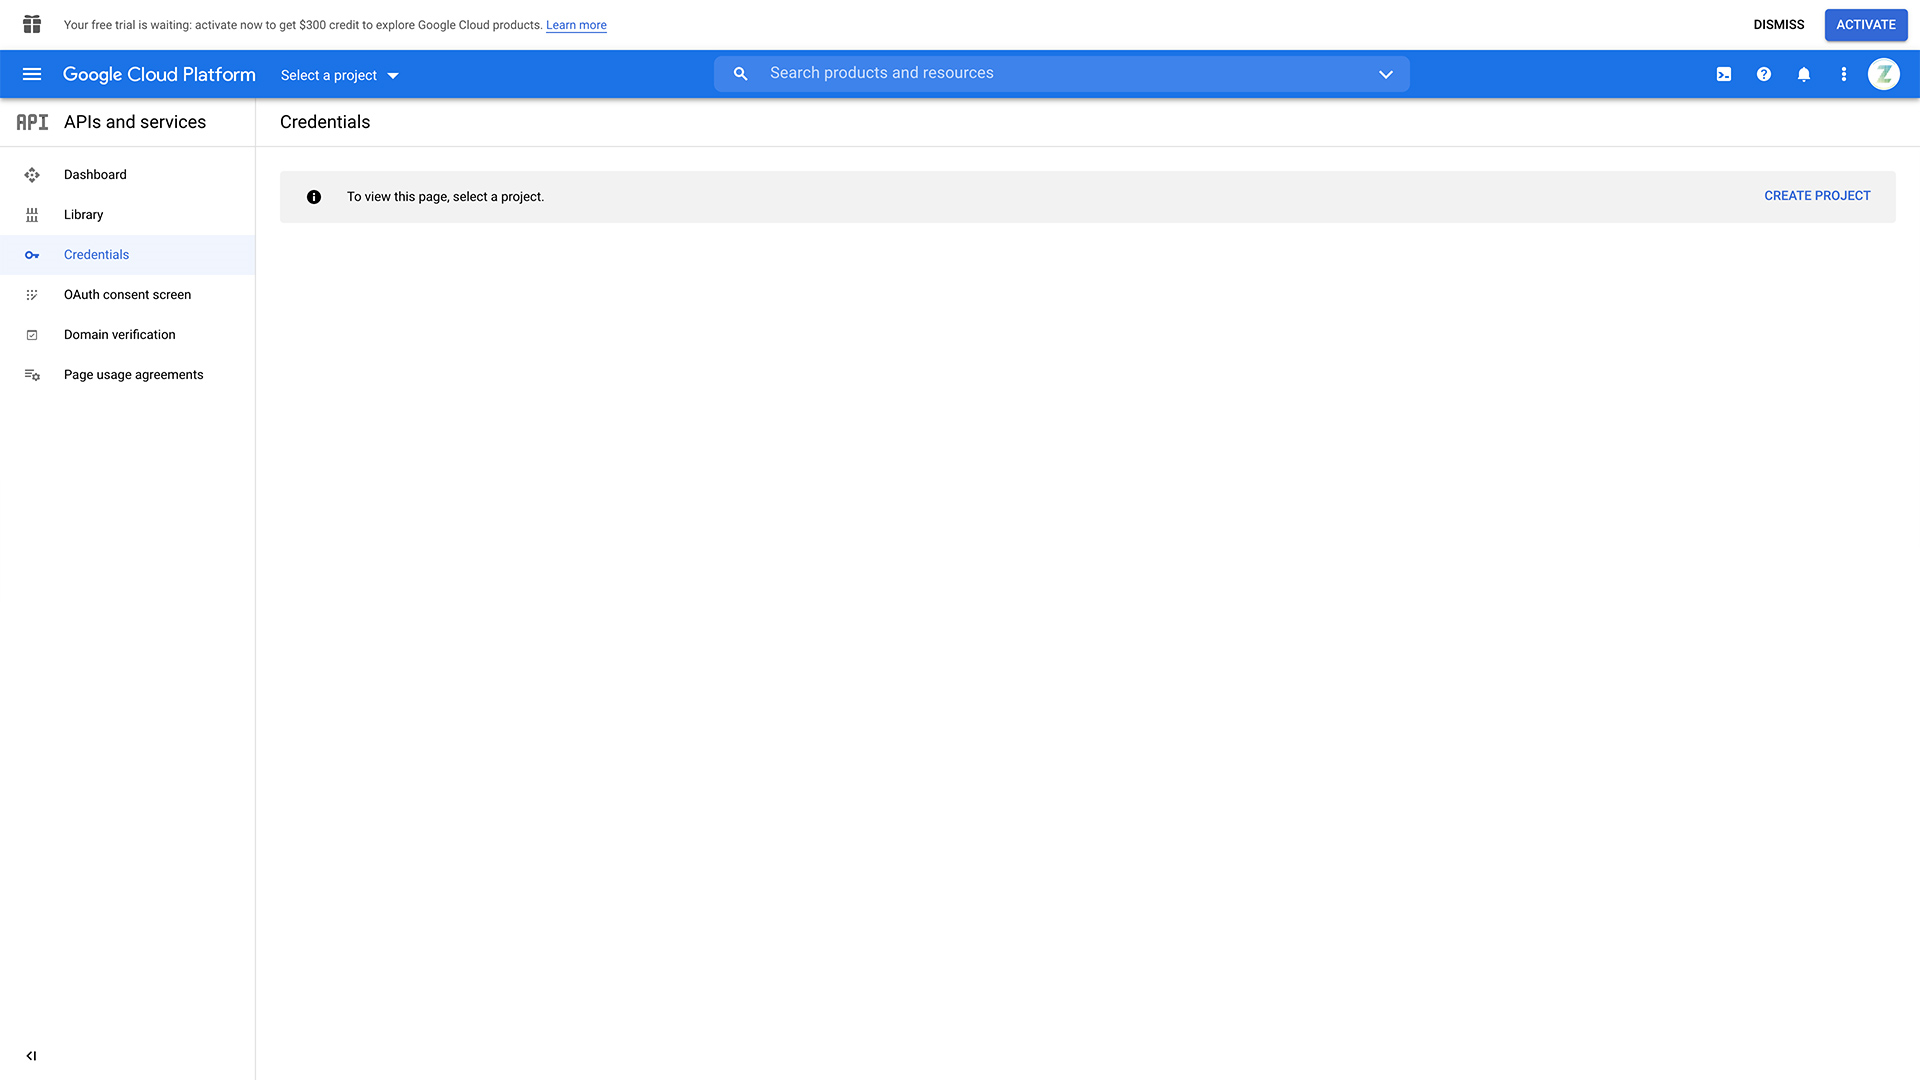
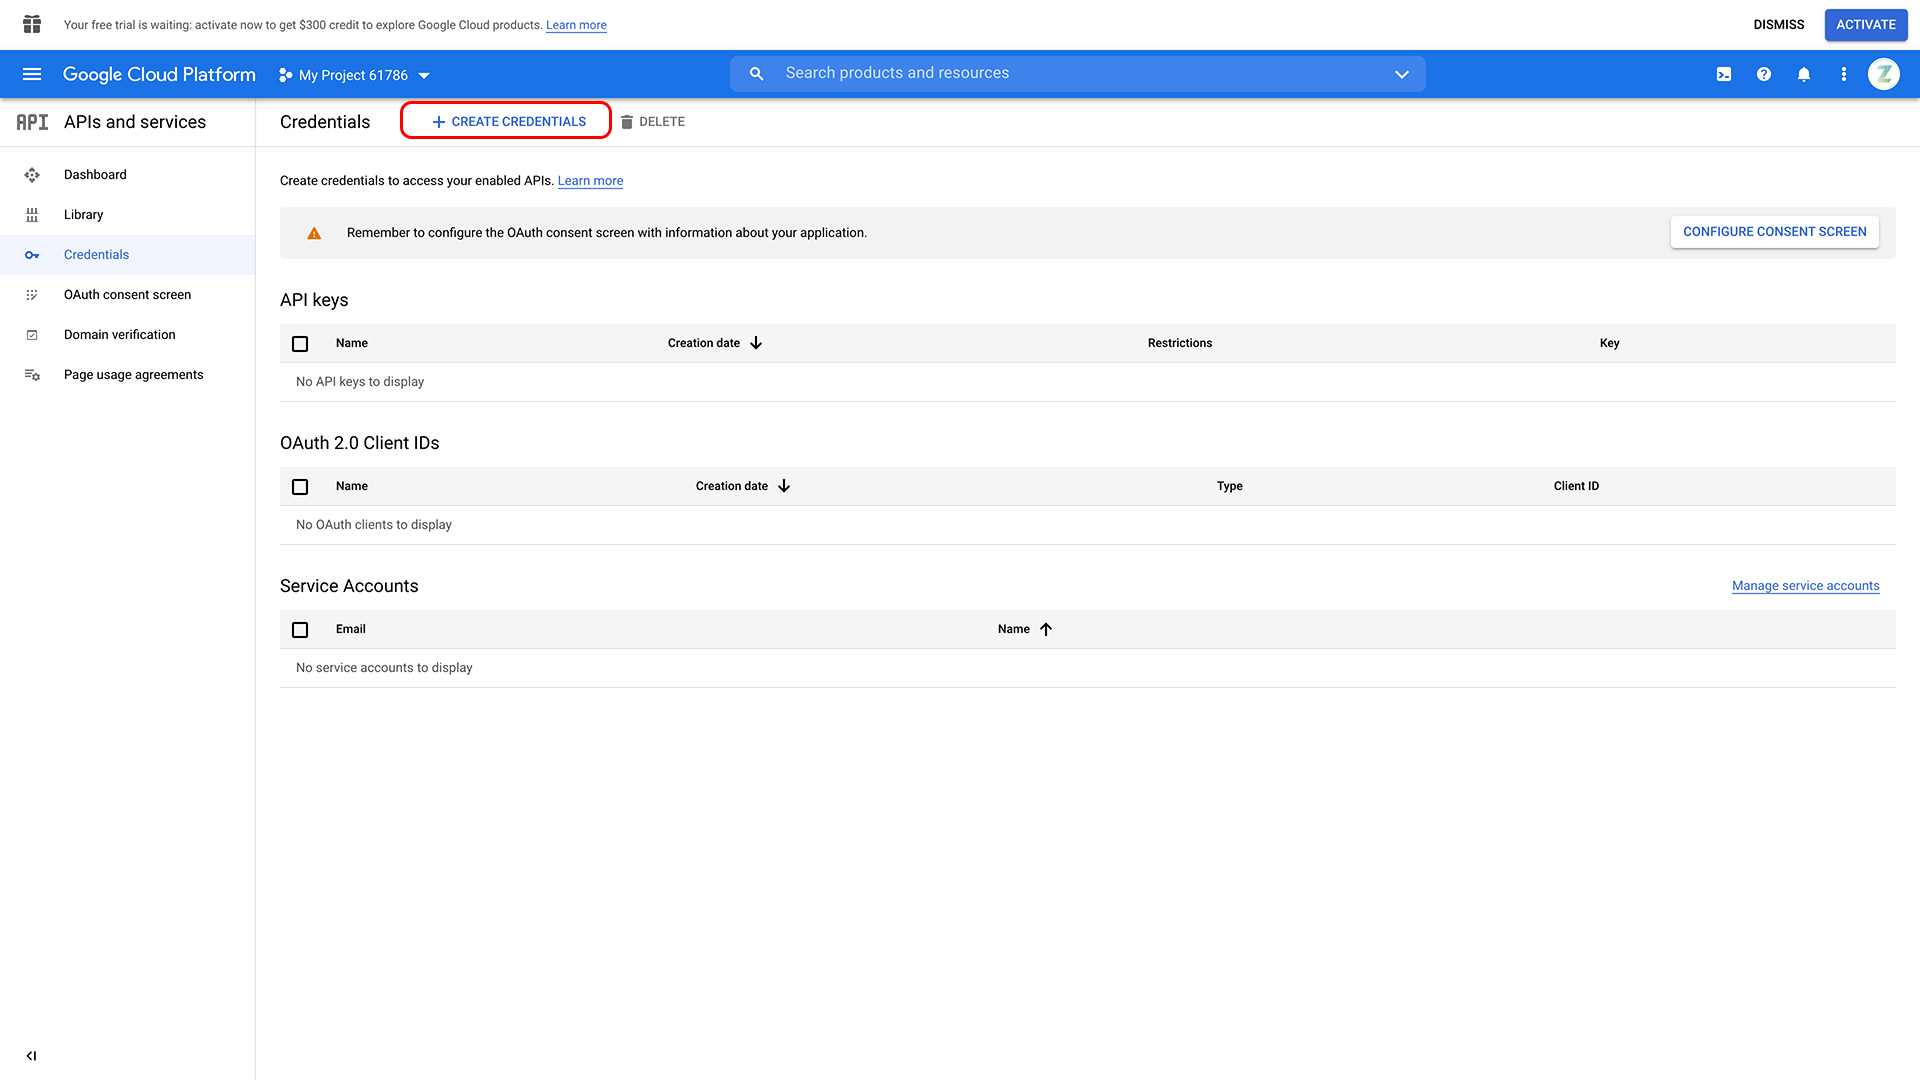
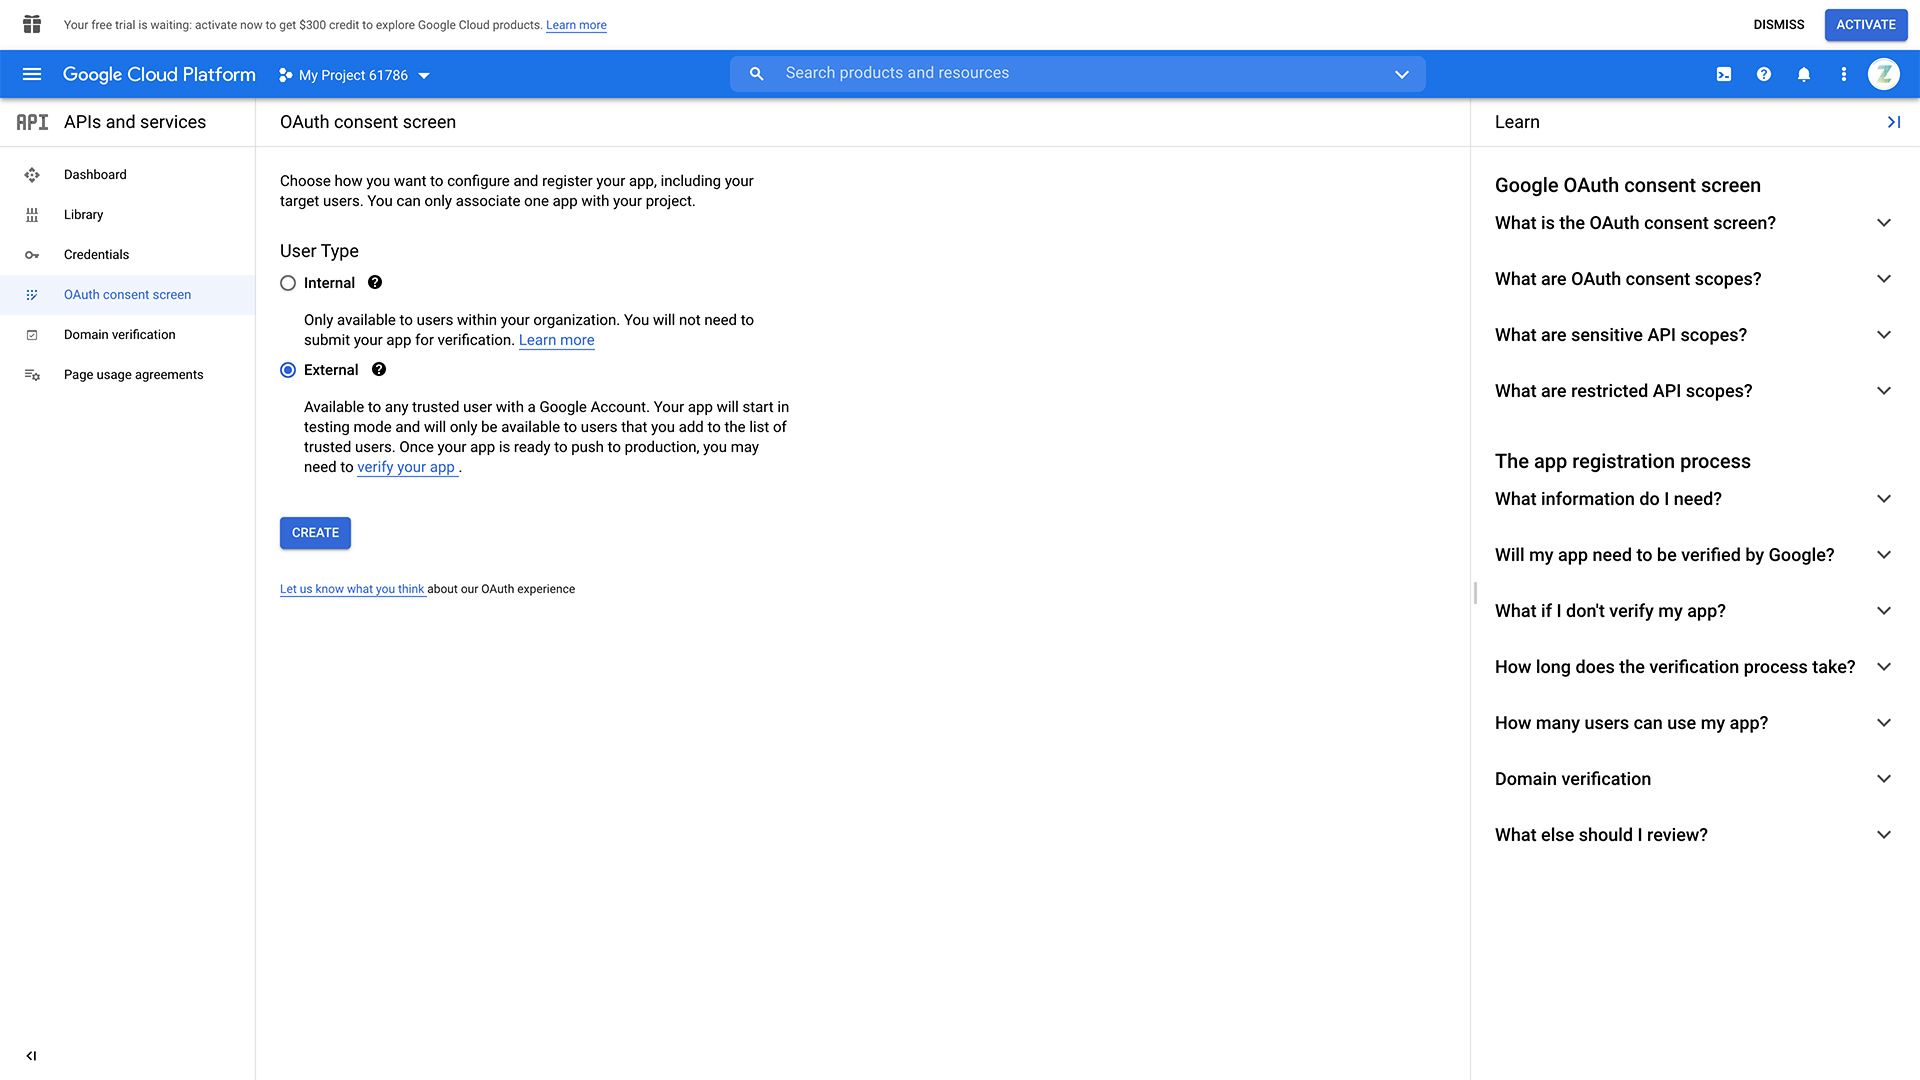
1. Go to the Credentials page: https://console.developers.google.com/apis/credentials. Before you can create the credentials, you need to have an active project. Click on the drop-down list, 'Select a project.' (If you already have a project, the below screen should look different and move to step #13 in that case)
image.png 153.78 KB
2. Click on the 'NEW PROJECT below.
image.png 265.98 KB
3. Give/rename the project name. And, select the organization or leave is as it is and click on 'CREATE.'
image.png 177.16 KB
4. Your project is created. Now click on 'CREATE CREDENTIALS' create credentials that you will use in Zappter to integrate.
image.png 232.3 KB
5. Click on 'OAuth client ID' in the list.
image.png 260.77 KB
6. Click on 'CONFIGURE CONSENT SCREEN.'
image.png 196.73 KB
7. Select 'External' and 'CREATE.'
image.png 333.03 KB
8. Provide, app name, support email and logo.  Scroll down and provide support email. Then click on 'SAVE AND CONTINUE.'
image.png 420.59 KB
9. Click on 'SAVE AND CONTINUE' in the Scope.
10. Provide test user accounts. And, close the window and click on 'SAVE AND CONTINUE.'
image.png 314.12 KB
11. Click on 'BACK TO DASHBOARD.'
12. Click on 'Credentials' dashboard option.
13. Click on 'CREATE CREDENTIALS' and select 'OAuth Cliend ID.' 
14. Select 'Web application' under 'Application type' drop down.
image.png 200.75 KB
15. Scroll down and click on 'CREATE.'
image.png 264.71 KB
16. Now, click on 'OAuth consent screen' and click on 'Make external'
17. Under 'Make external', select 'in production' and click confirm.
18. Move onto Credentials, your Client ID and Client Secret have been created. Copy this information and move on to Zappter to complete integration.
image.png 339.38 KB
Entering Client ID & Client Secret in Zappter:
Back in Zappter, you can follow these steps to input the Client ID and Client Secret that your created in the above section. 
1. Admin > Settings > Social Auth.
image.png 186.94 KB
Each social media platform you're integrating with has its own tab as you install relevant plugin.
2. Enter Client ID and Client Secret, and save to complete integration.
Google OAuth