Get started  
Login  

Help Center

Community / Forum Ask Zappter Support We build your app Marketplace

Documentation

English

General

Videos

Mastering the content editor Pixel perfect design Setup your E-Commerce Store Configure your booking engine Event-System / Drop-In

Popular

App Store Submission Creating Push Notifications Typography Changing template Changing Rules

Business Modules

New

More Tutorials

Documentation

Understanding Workstations

Workstations integrated in your business

What are workstations?

Workstations are an important part of your operation, where every order, booking, request, and the chat request is received for processing as soon as the customer confirms at his/her end. Larger organizations and businesses can have more workstations with dedicated staff to handle tasks; each workstation is assigned to perform tasks for a department, a section, section, an outlet, or it can be a unique business requirement. 
 For instance, you have a restaurant and a spa. You can create two workstations, one for the spa and the other one for the restaurant.  So, any orders and booking for spa will end up in spa workstation and the restaurant will end up in the other. 

How do Workstations work?

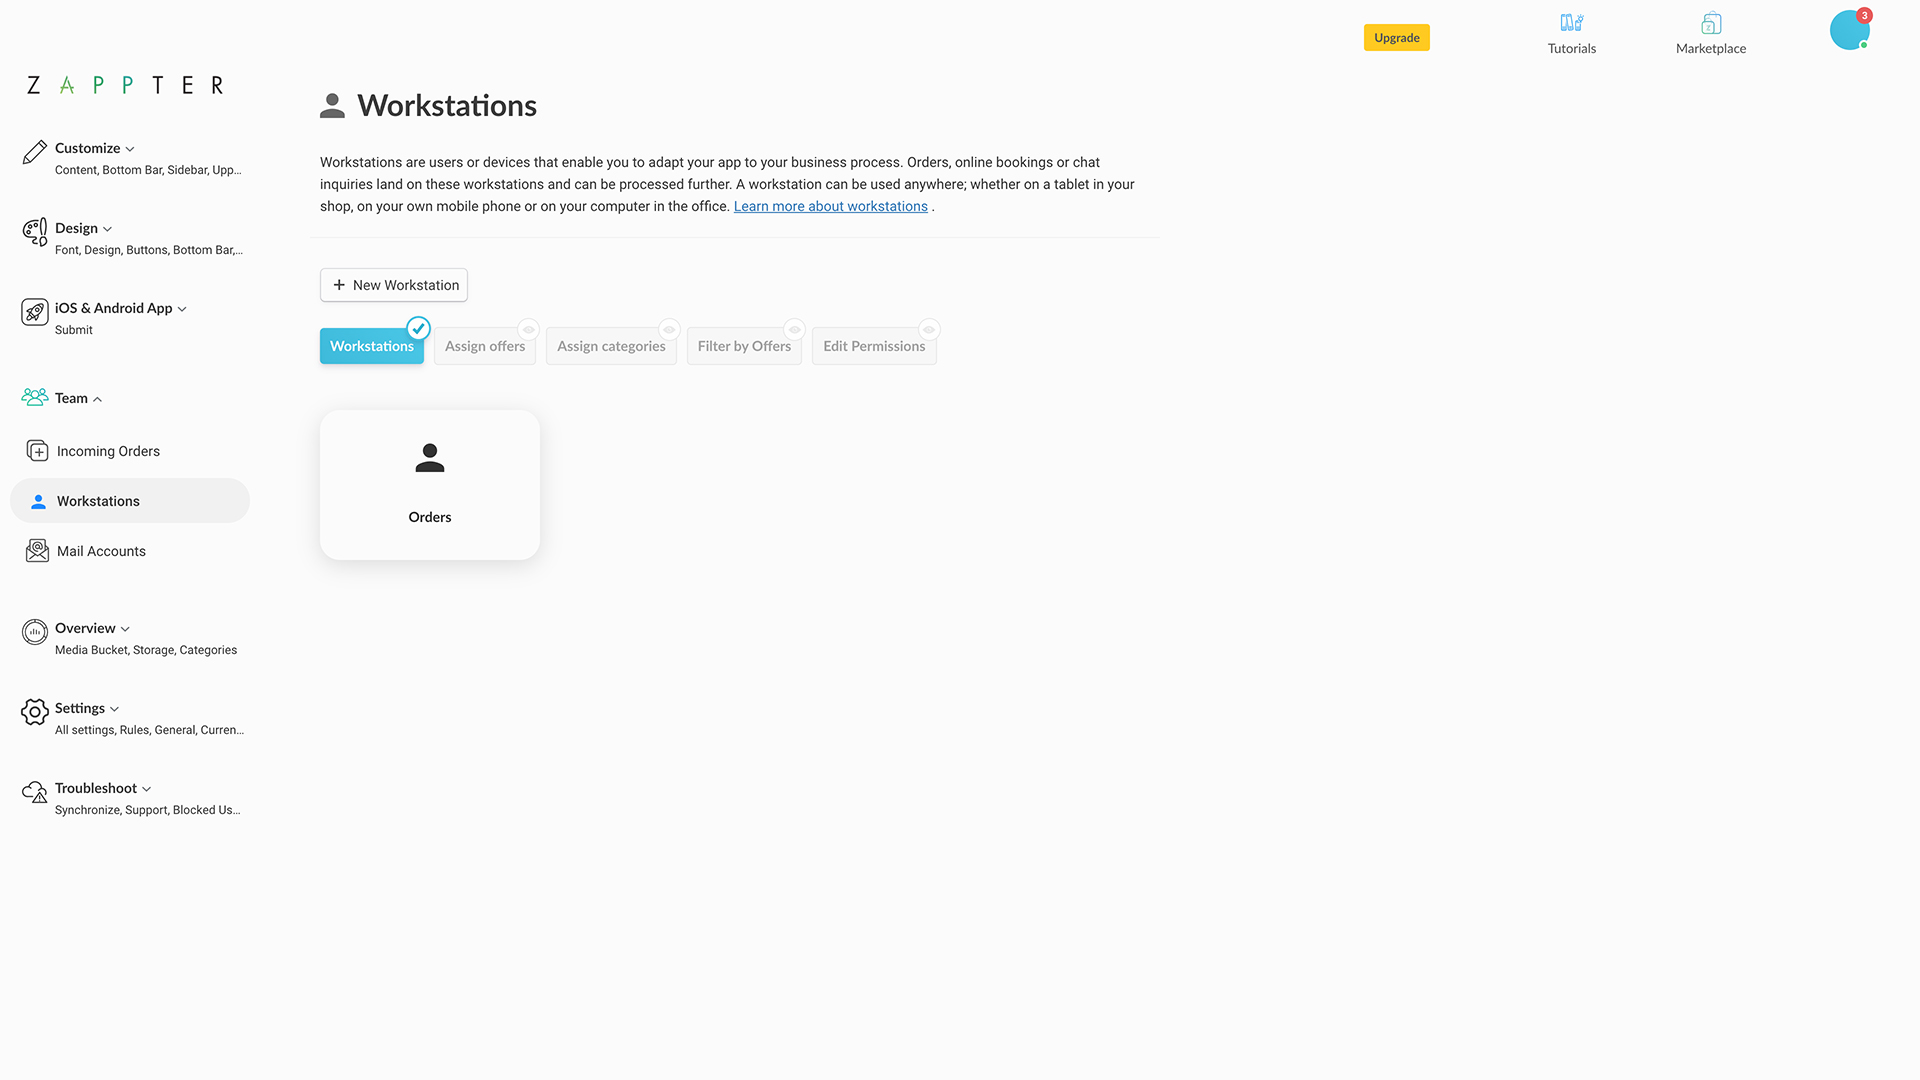
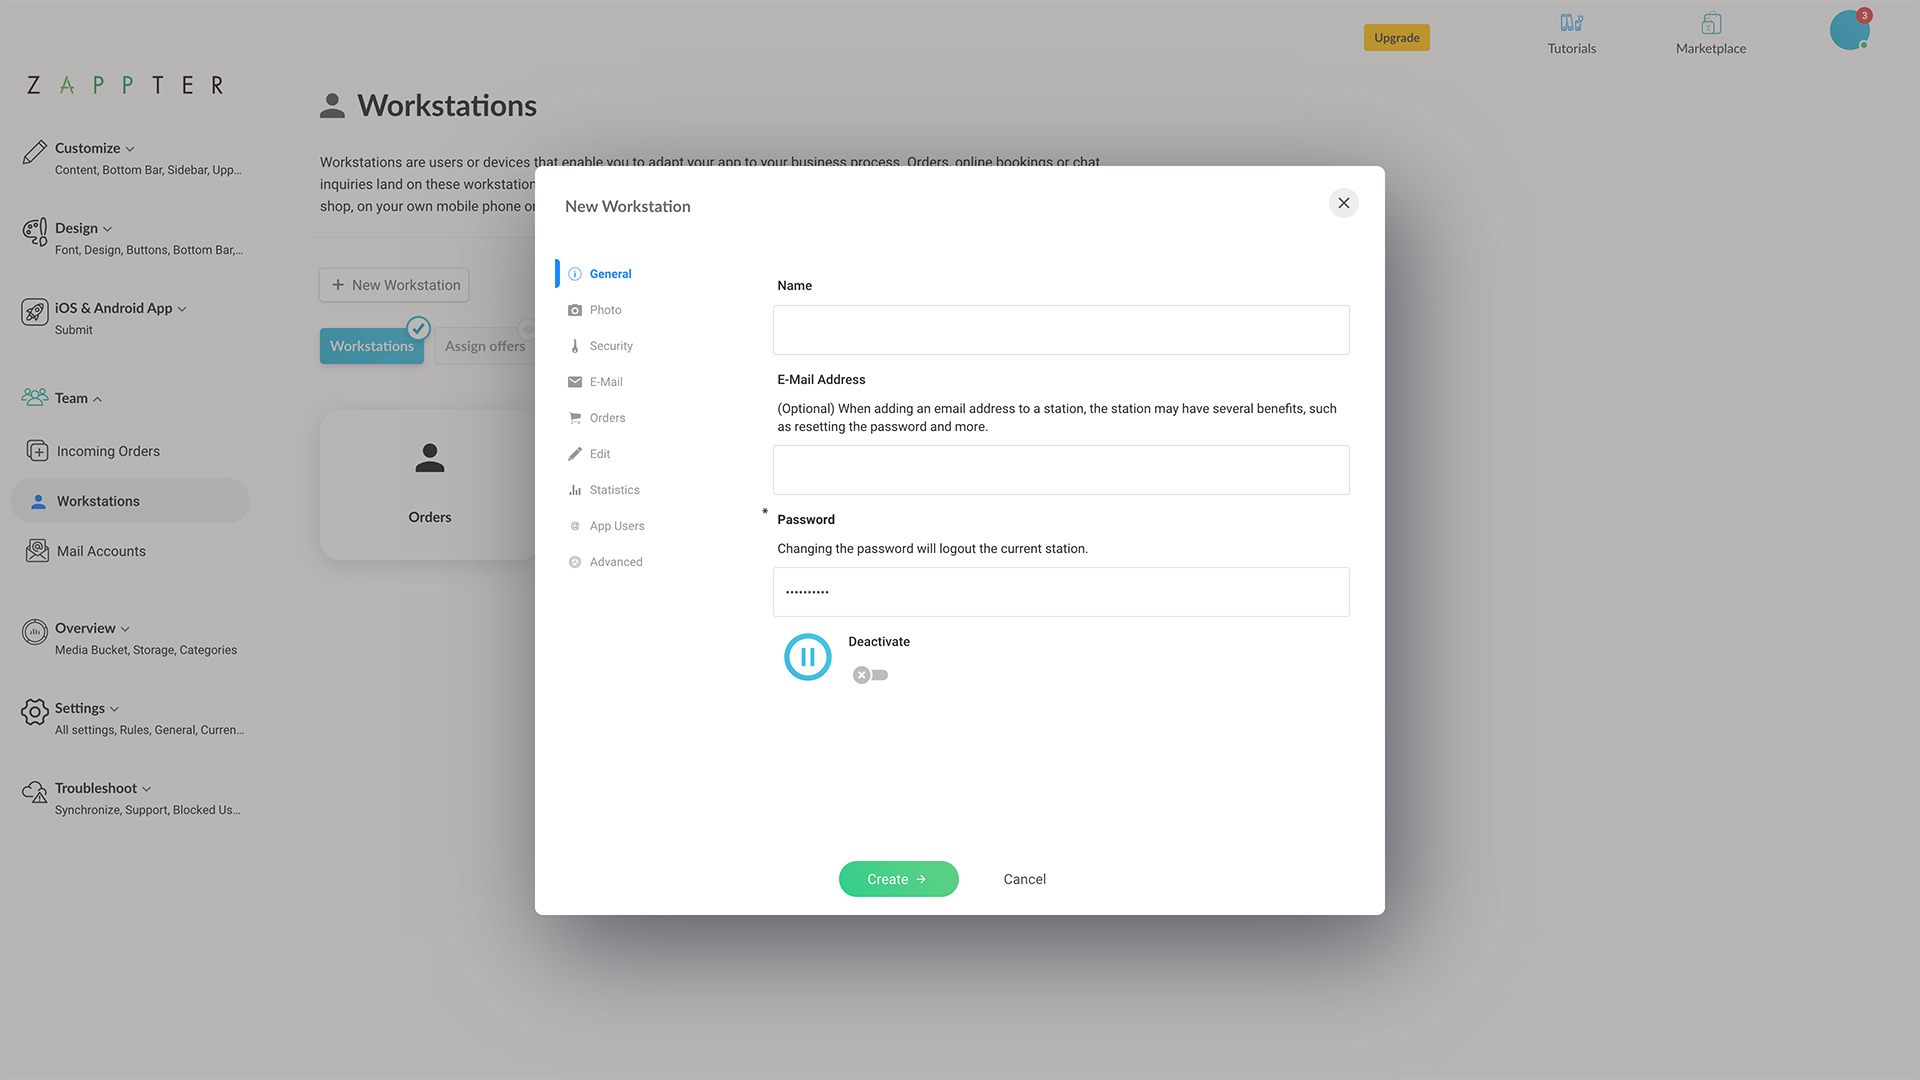
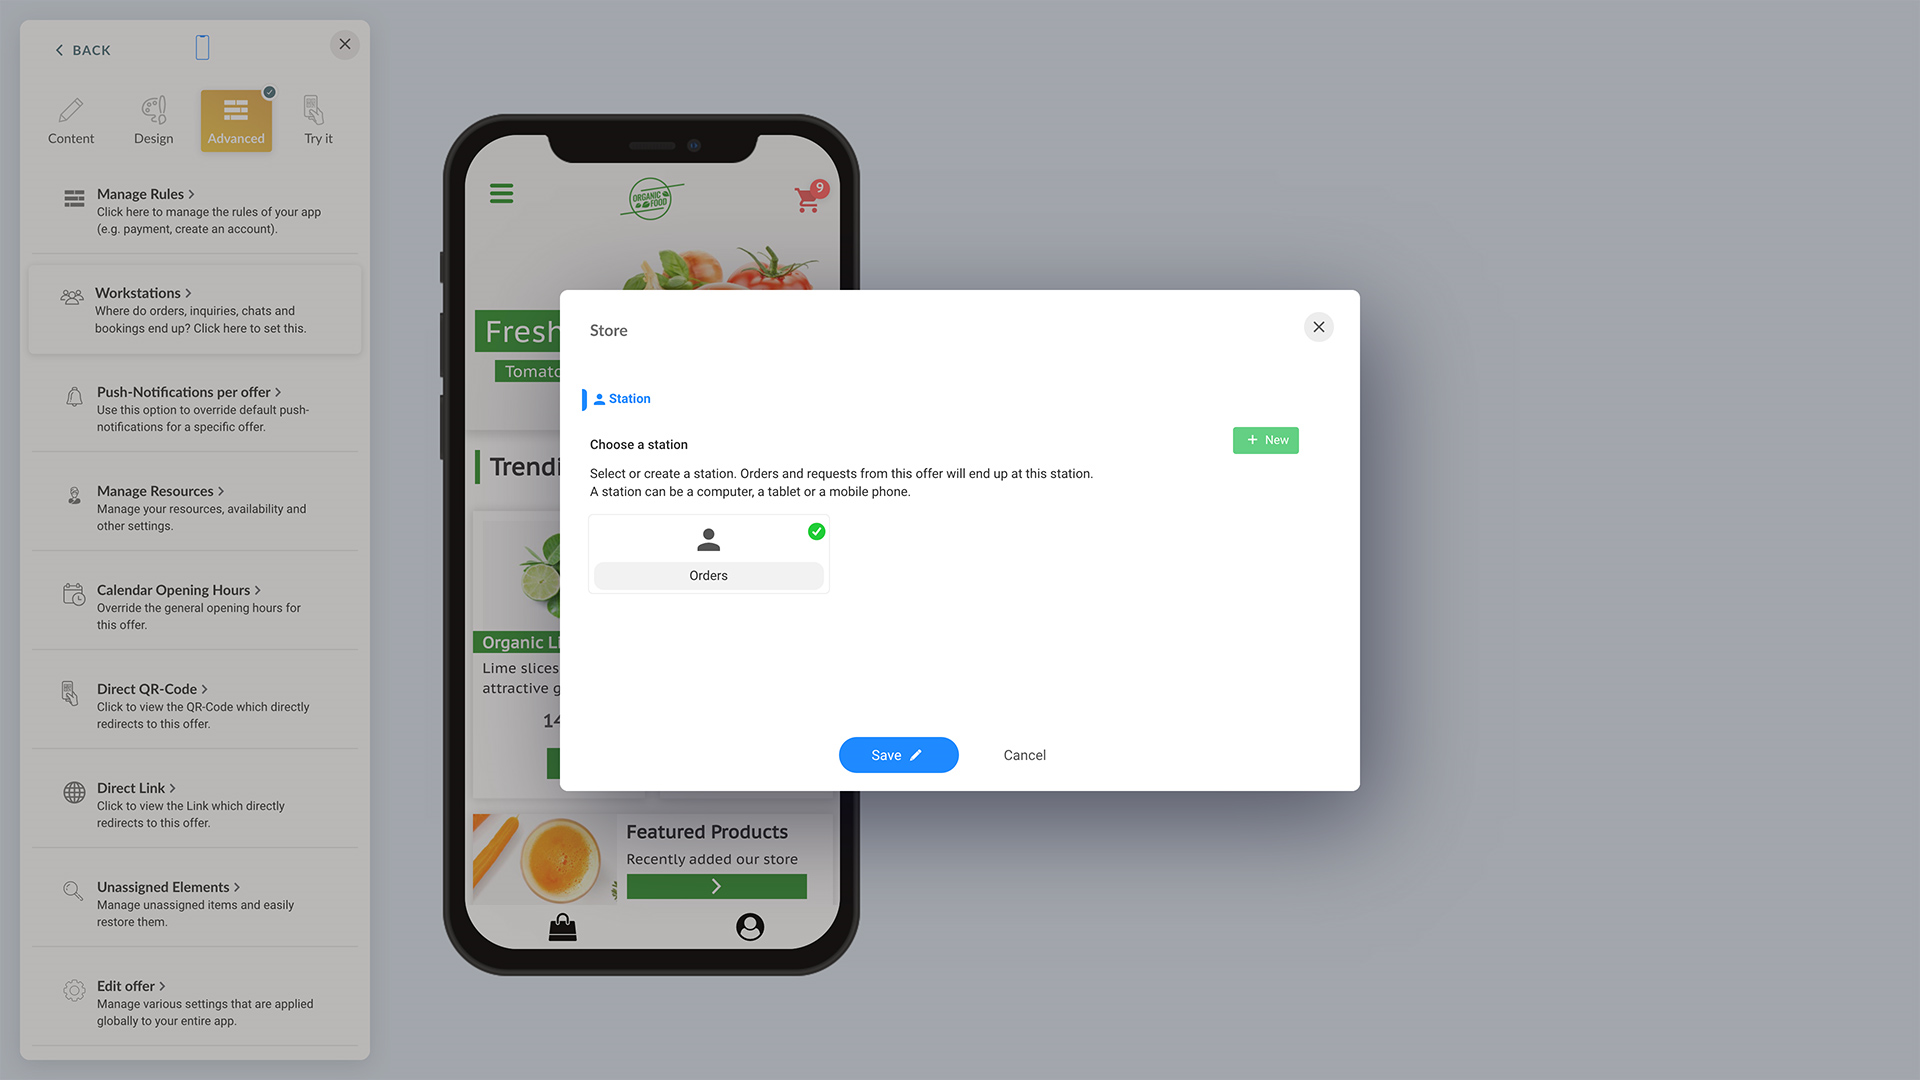
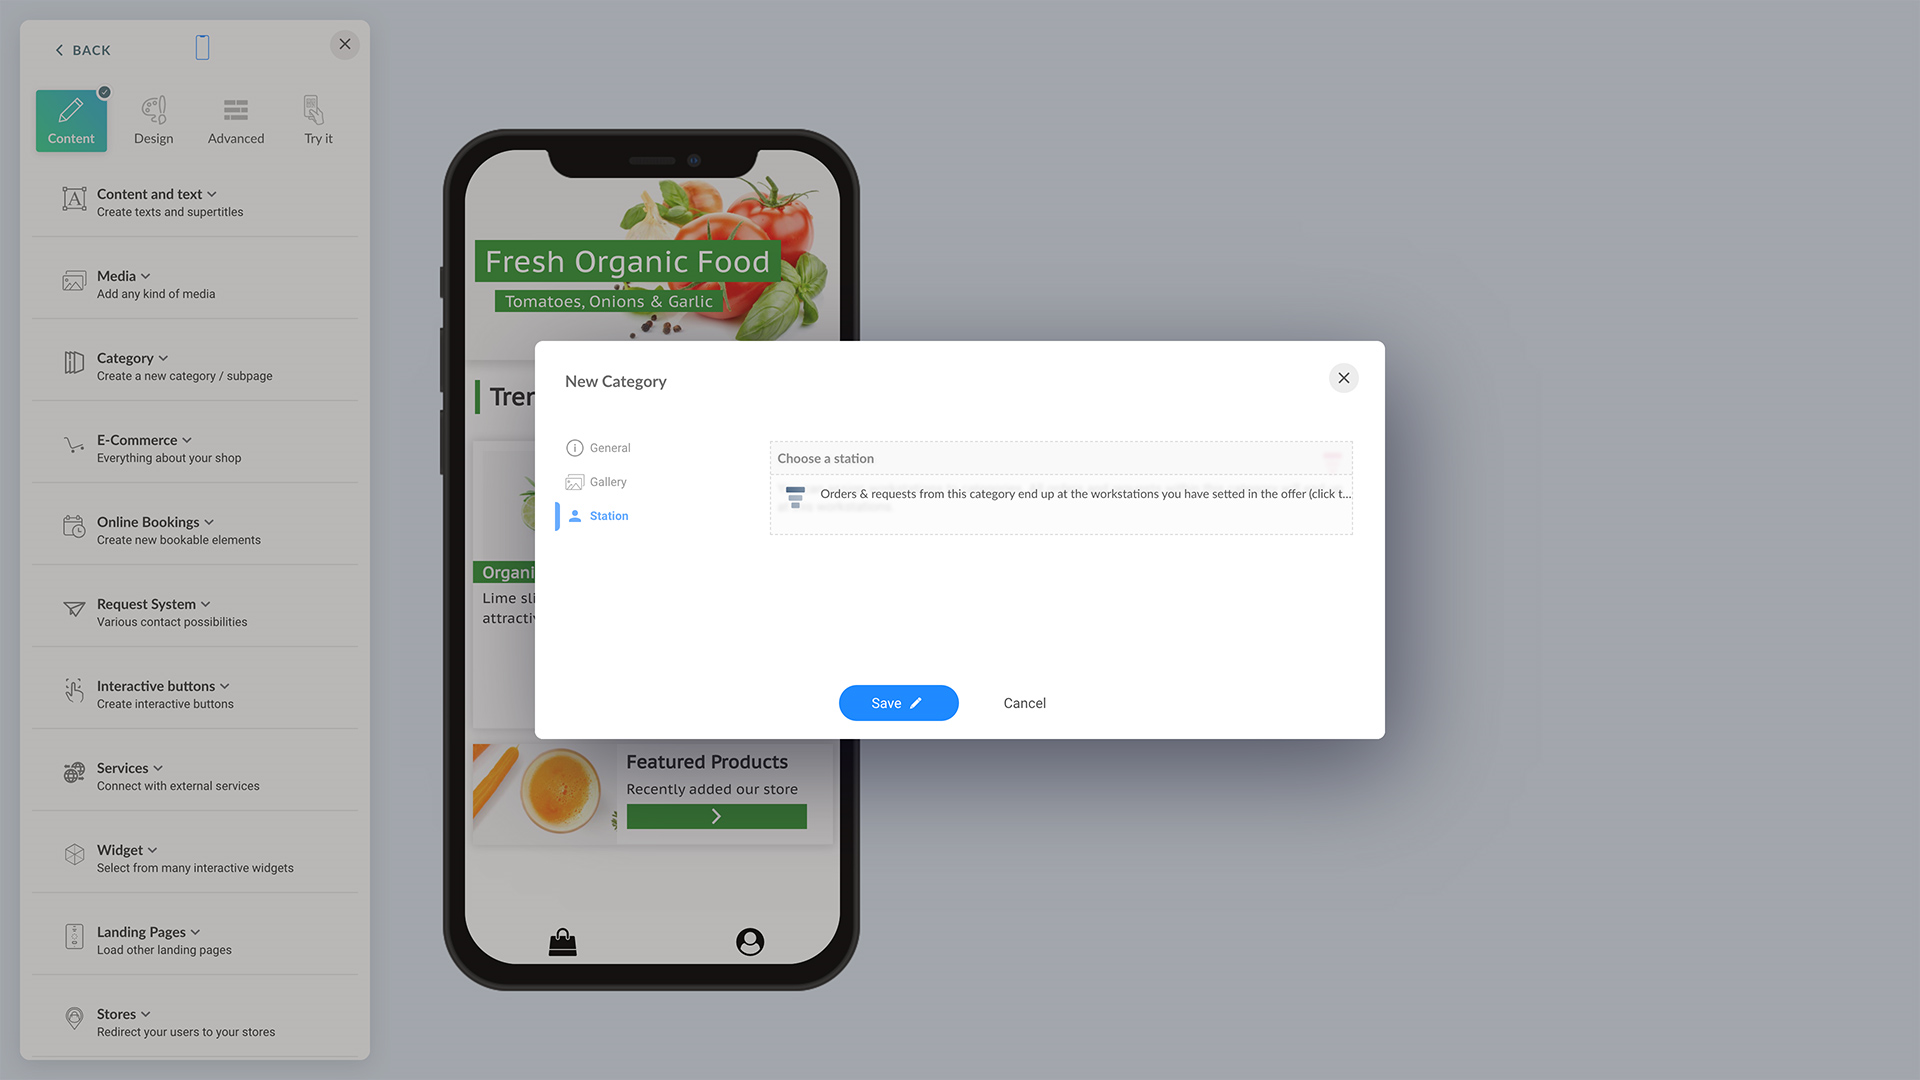
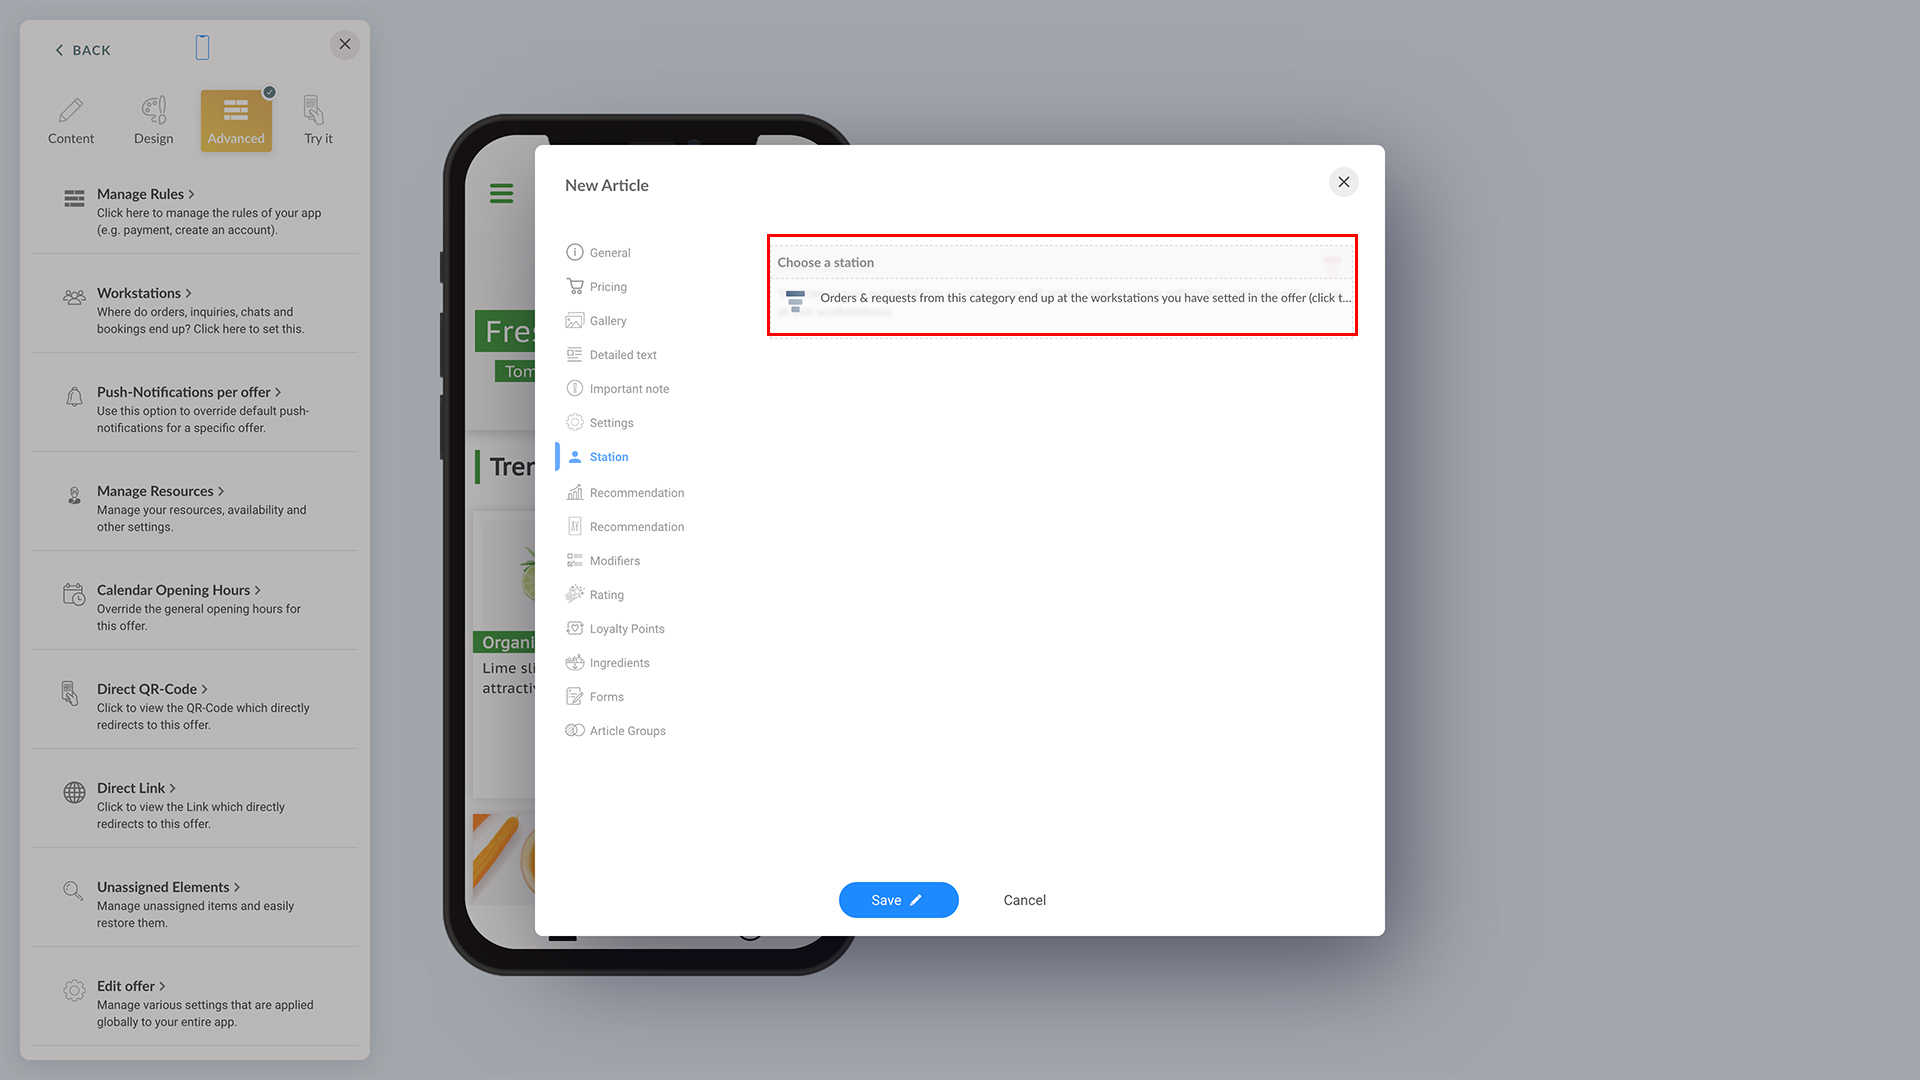
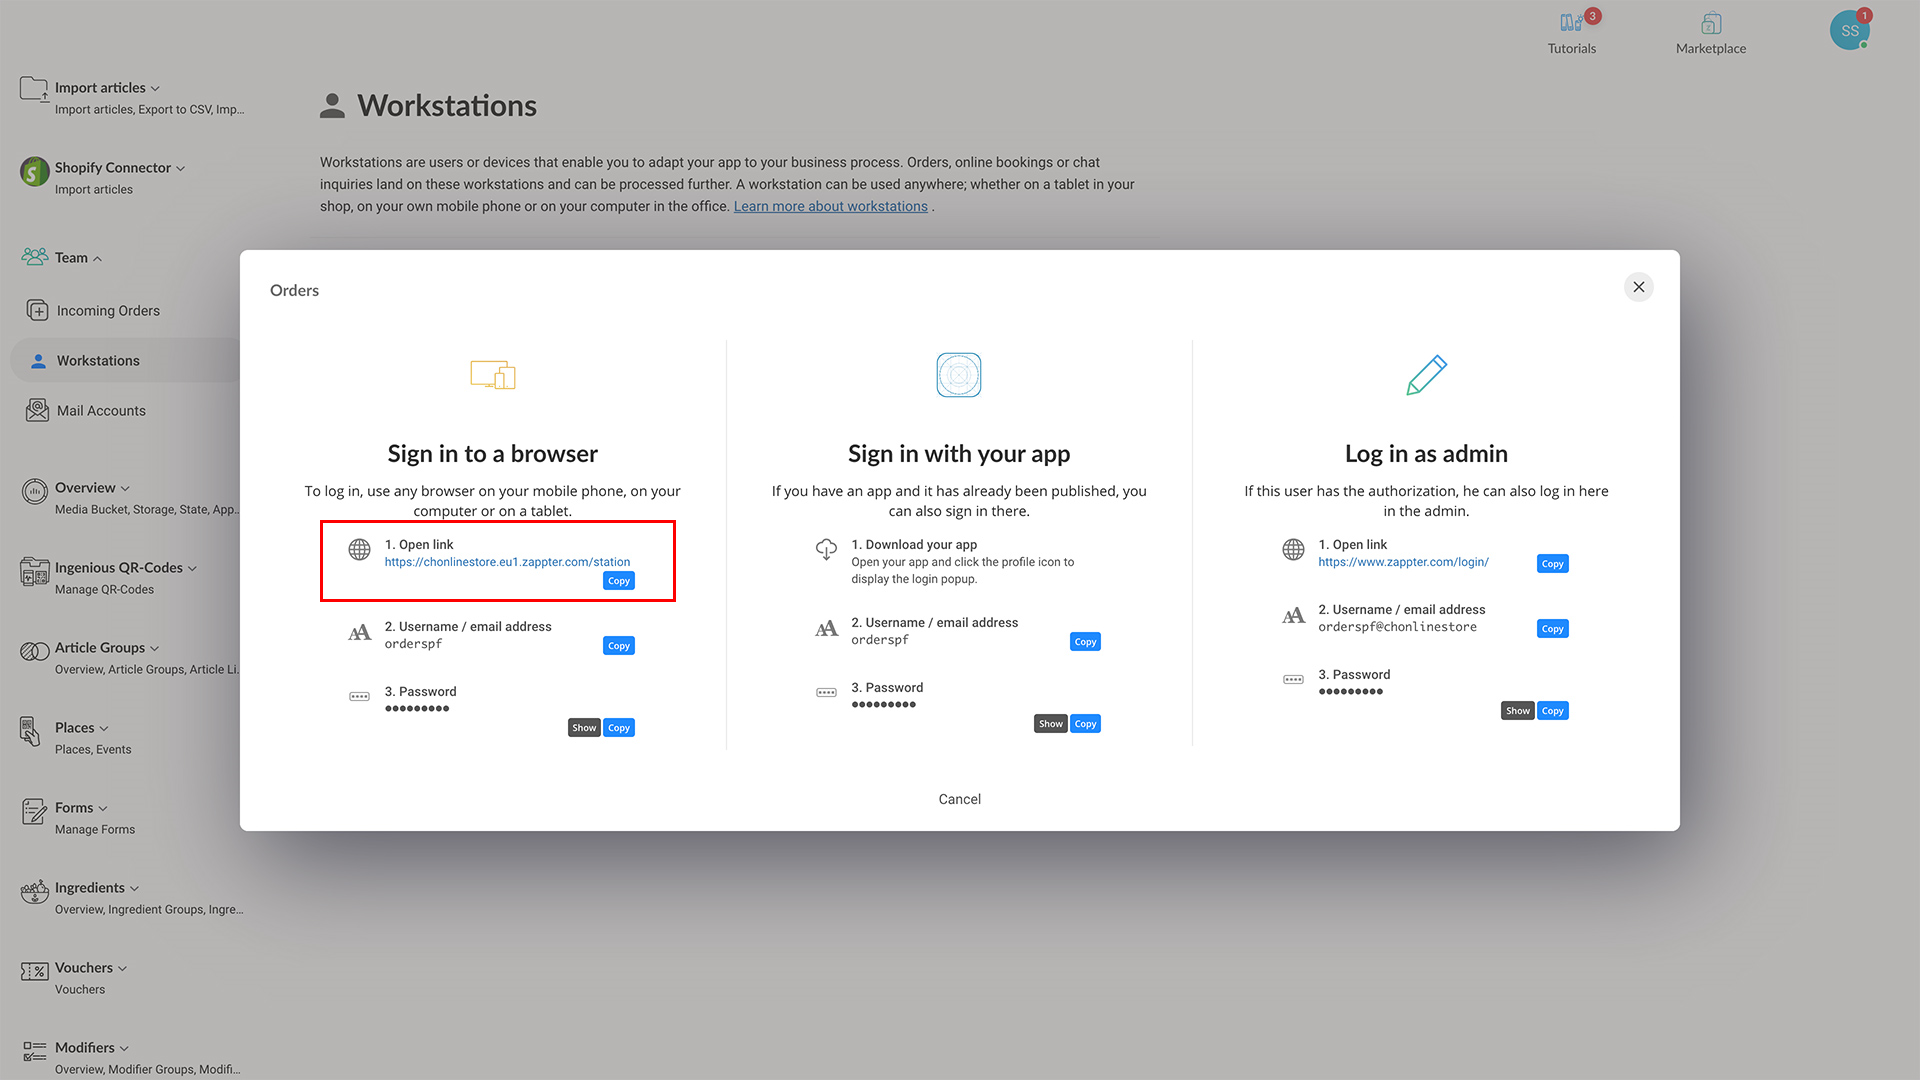
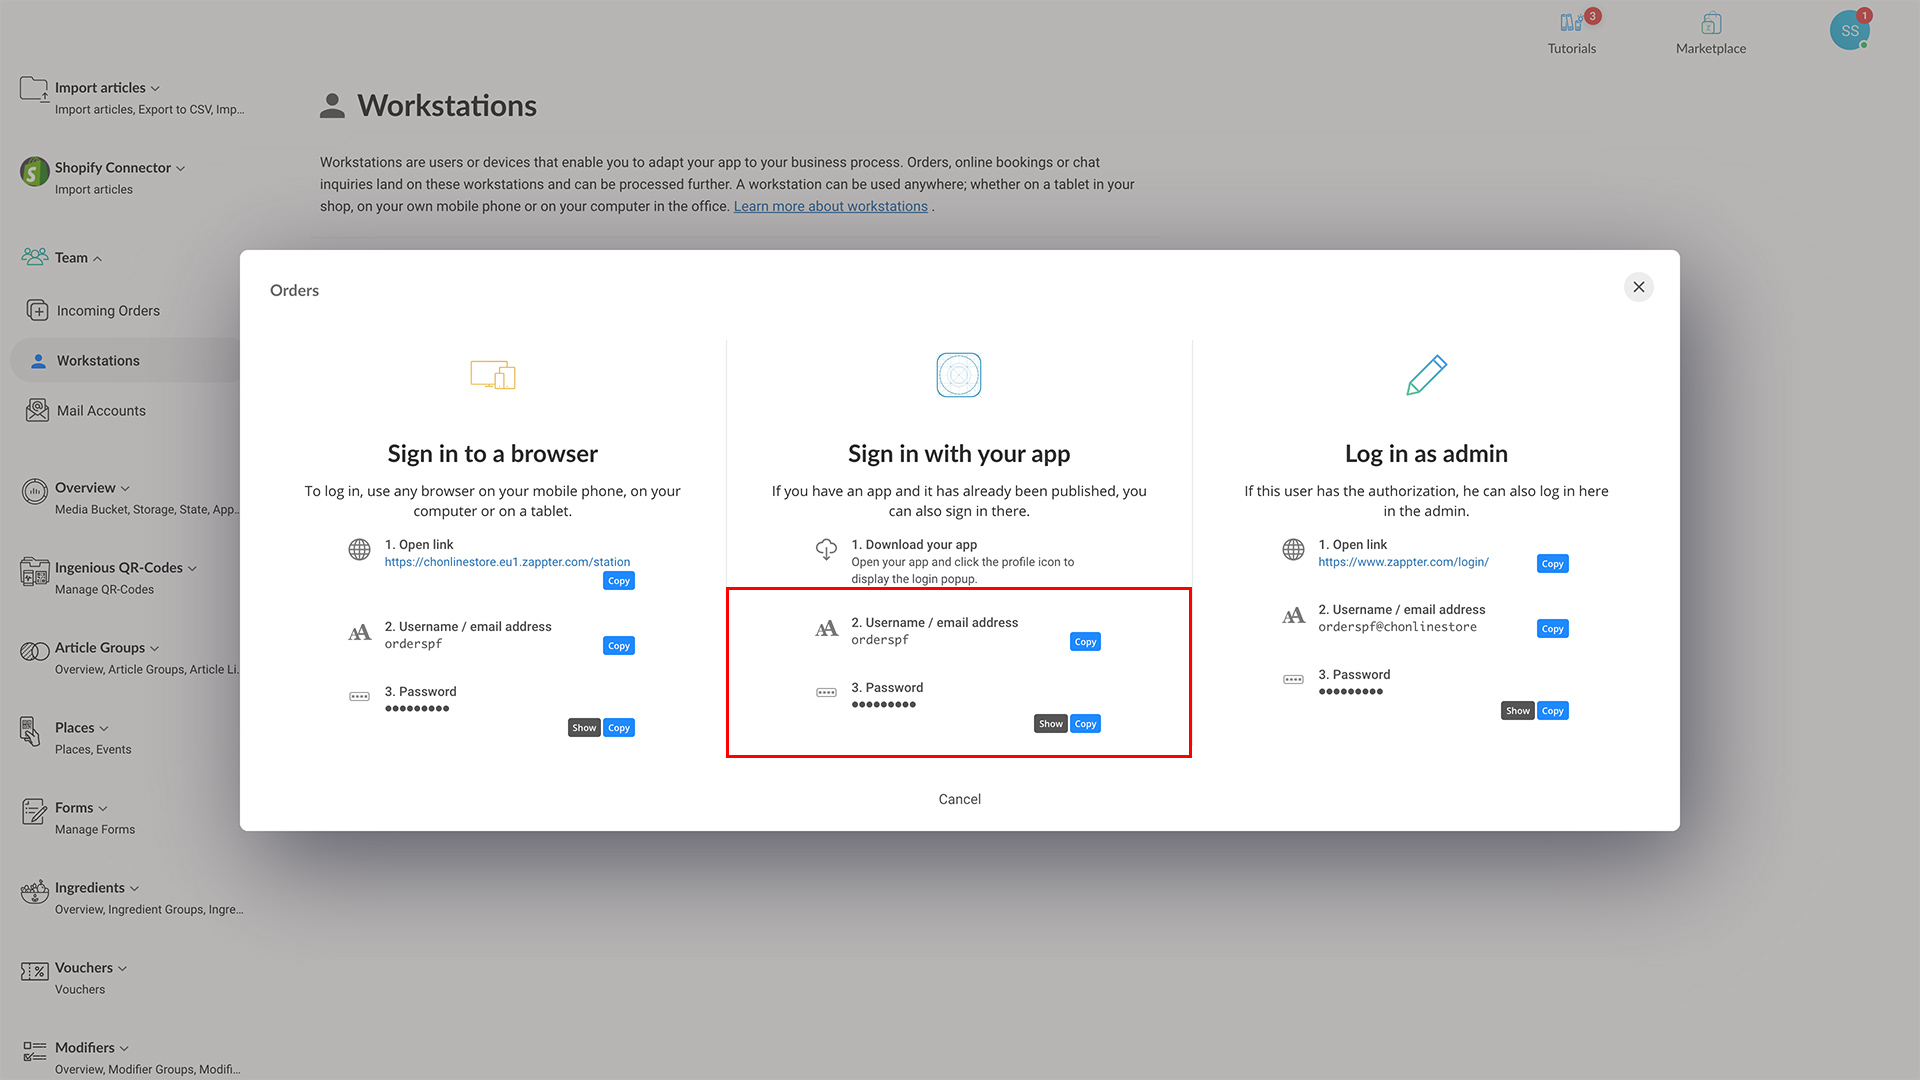
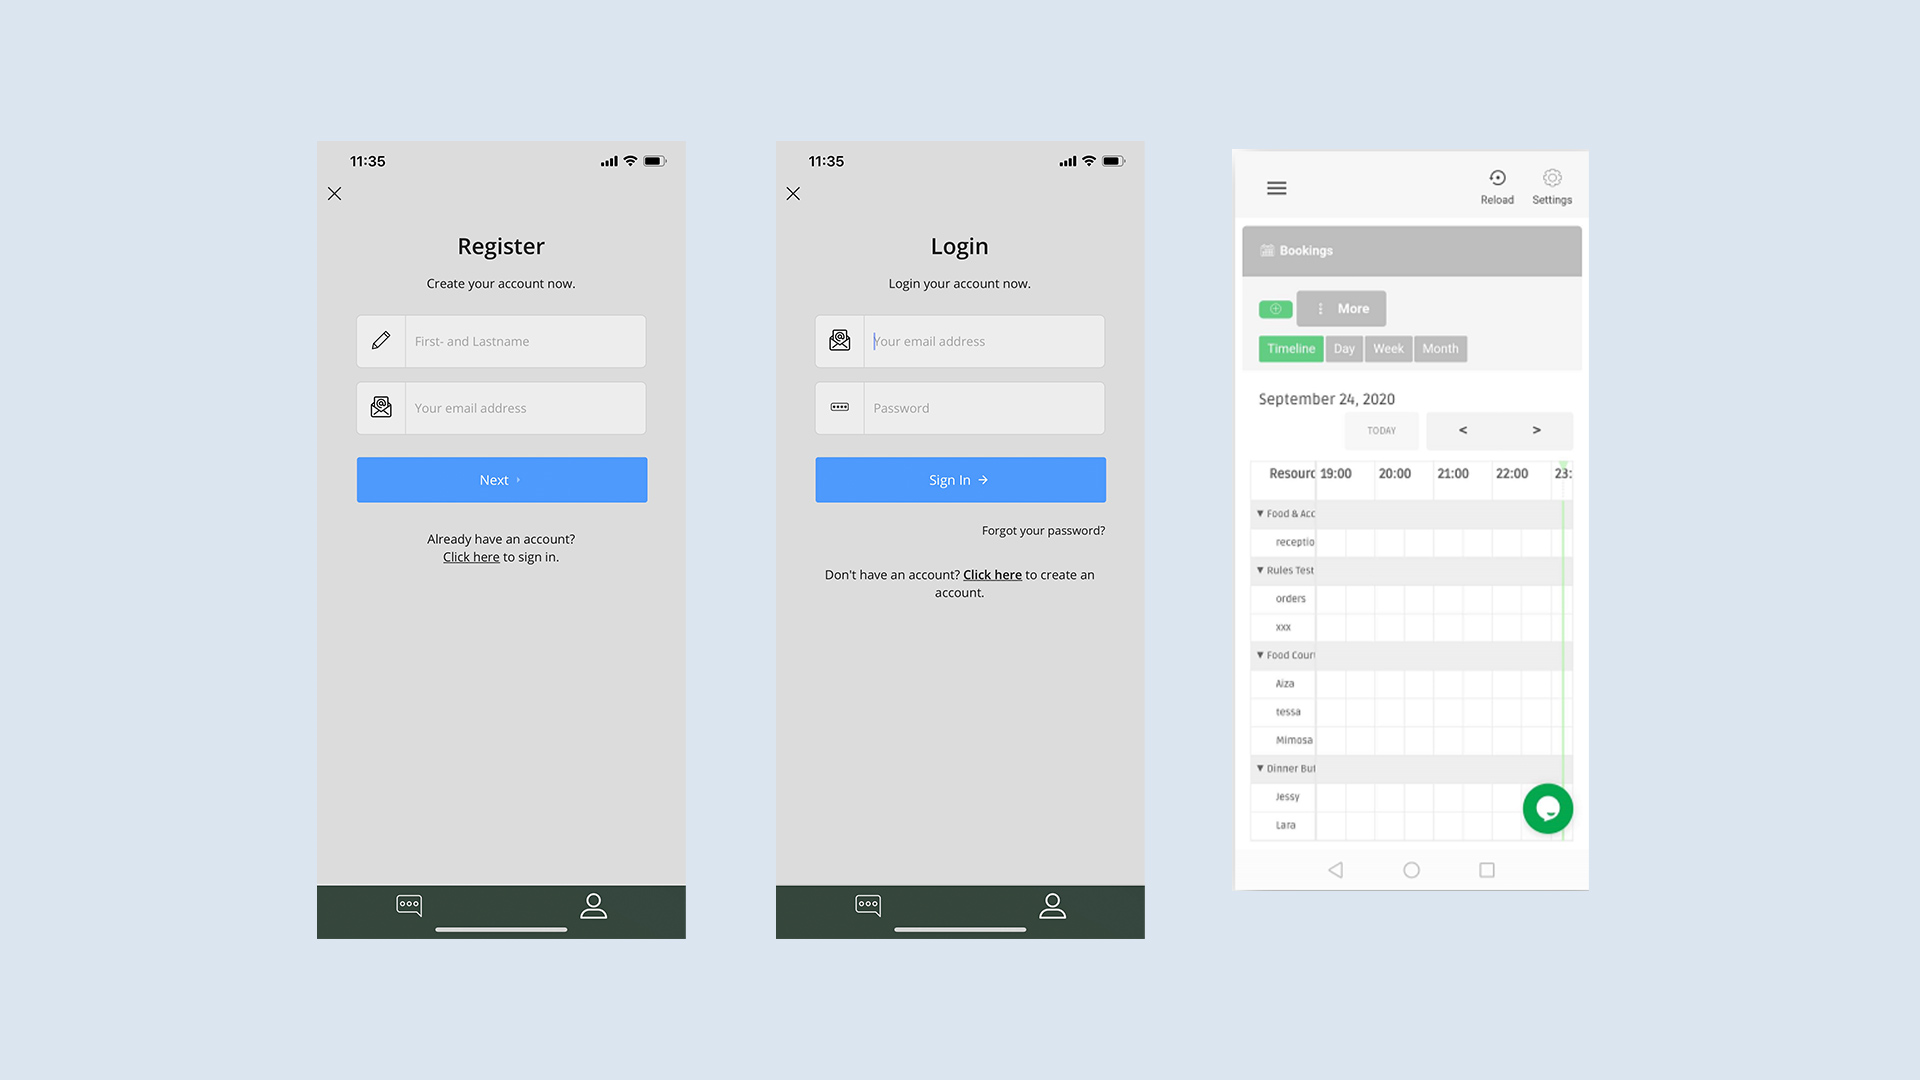
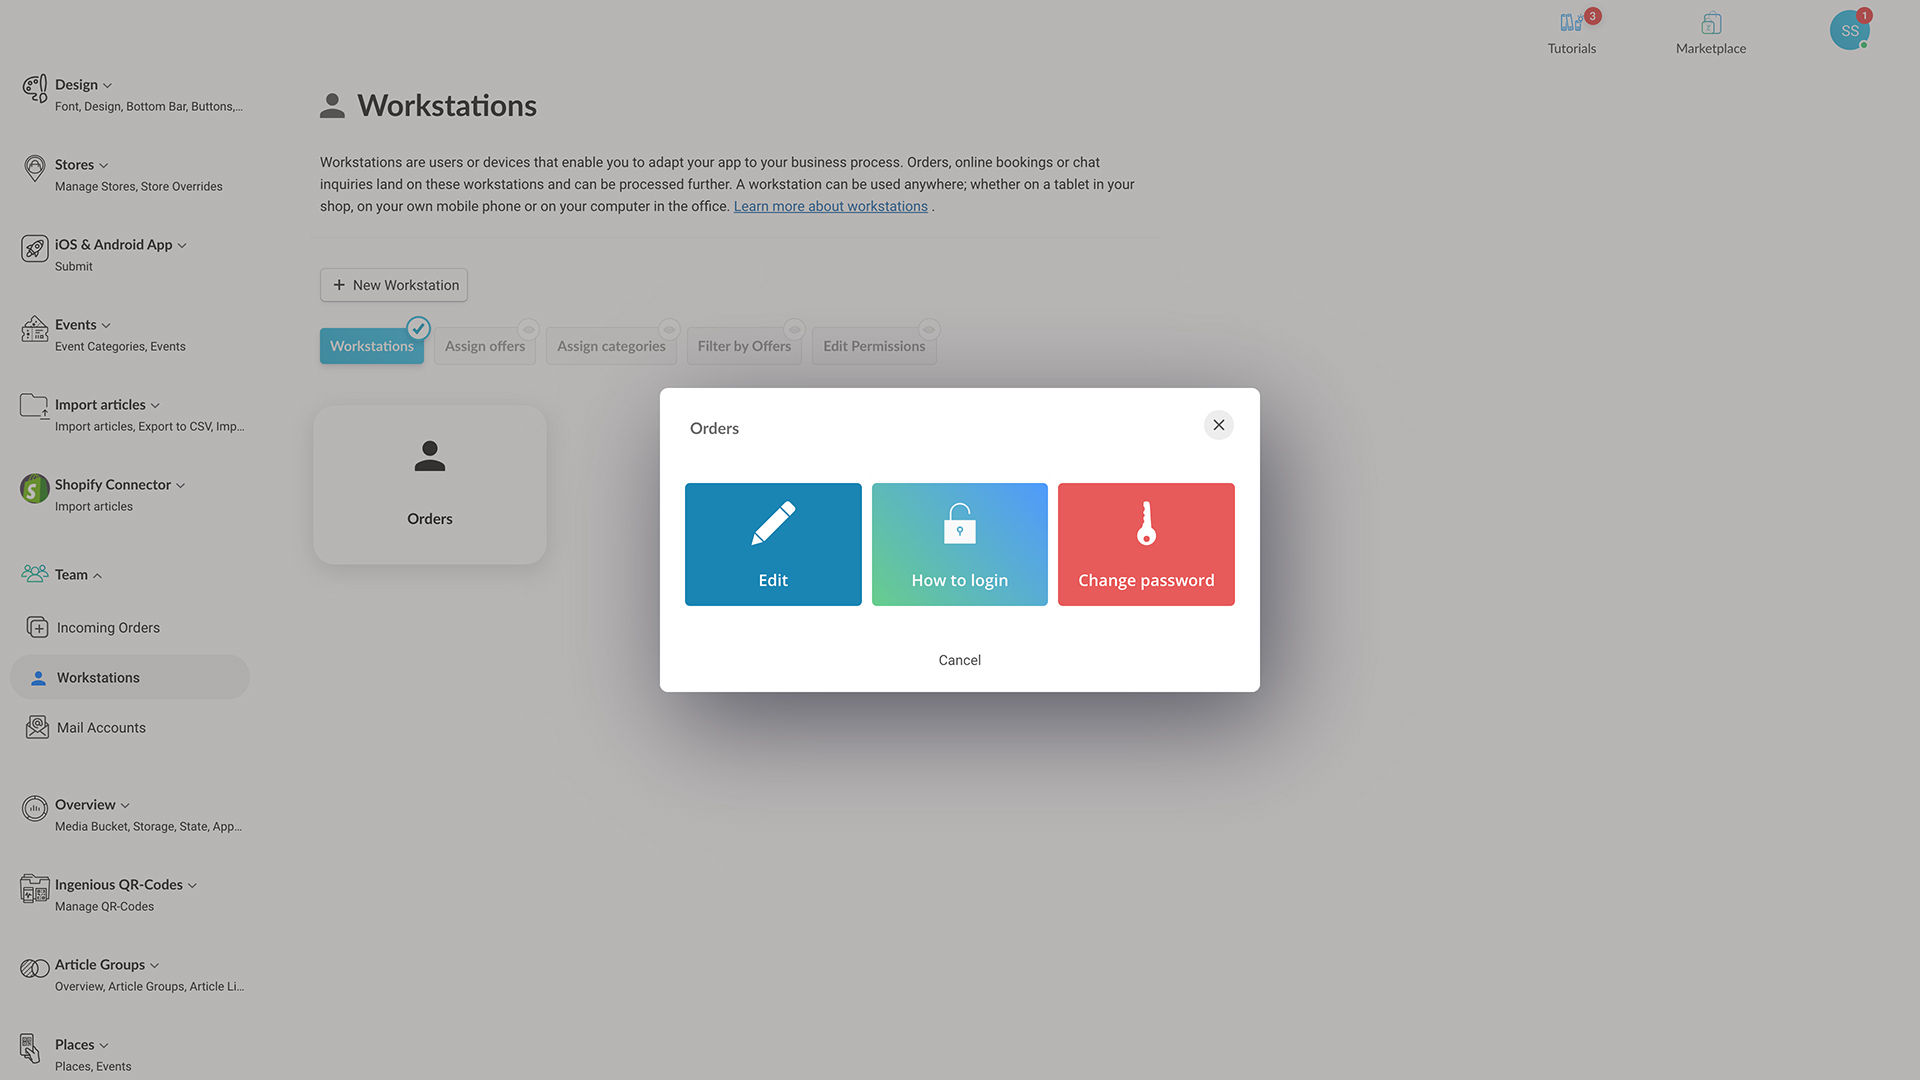
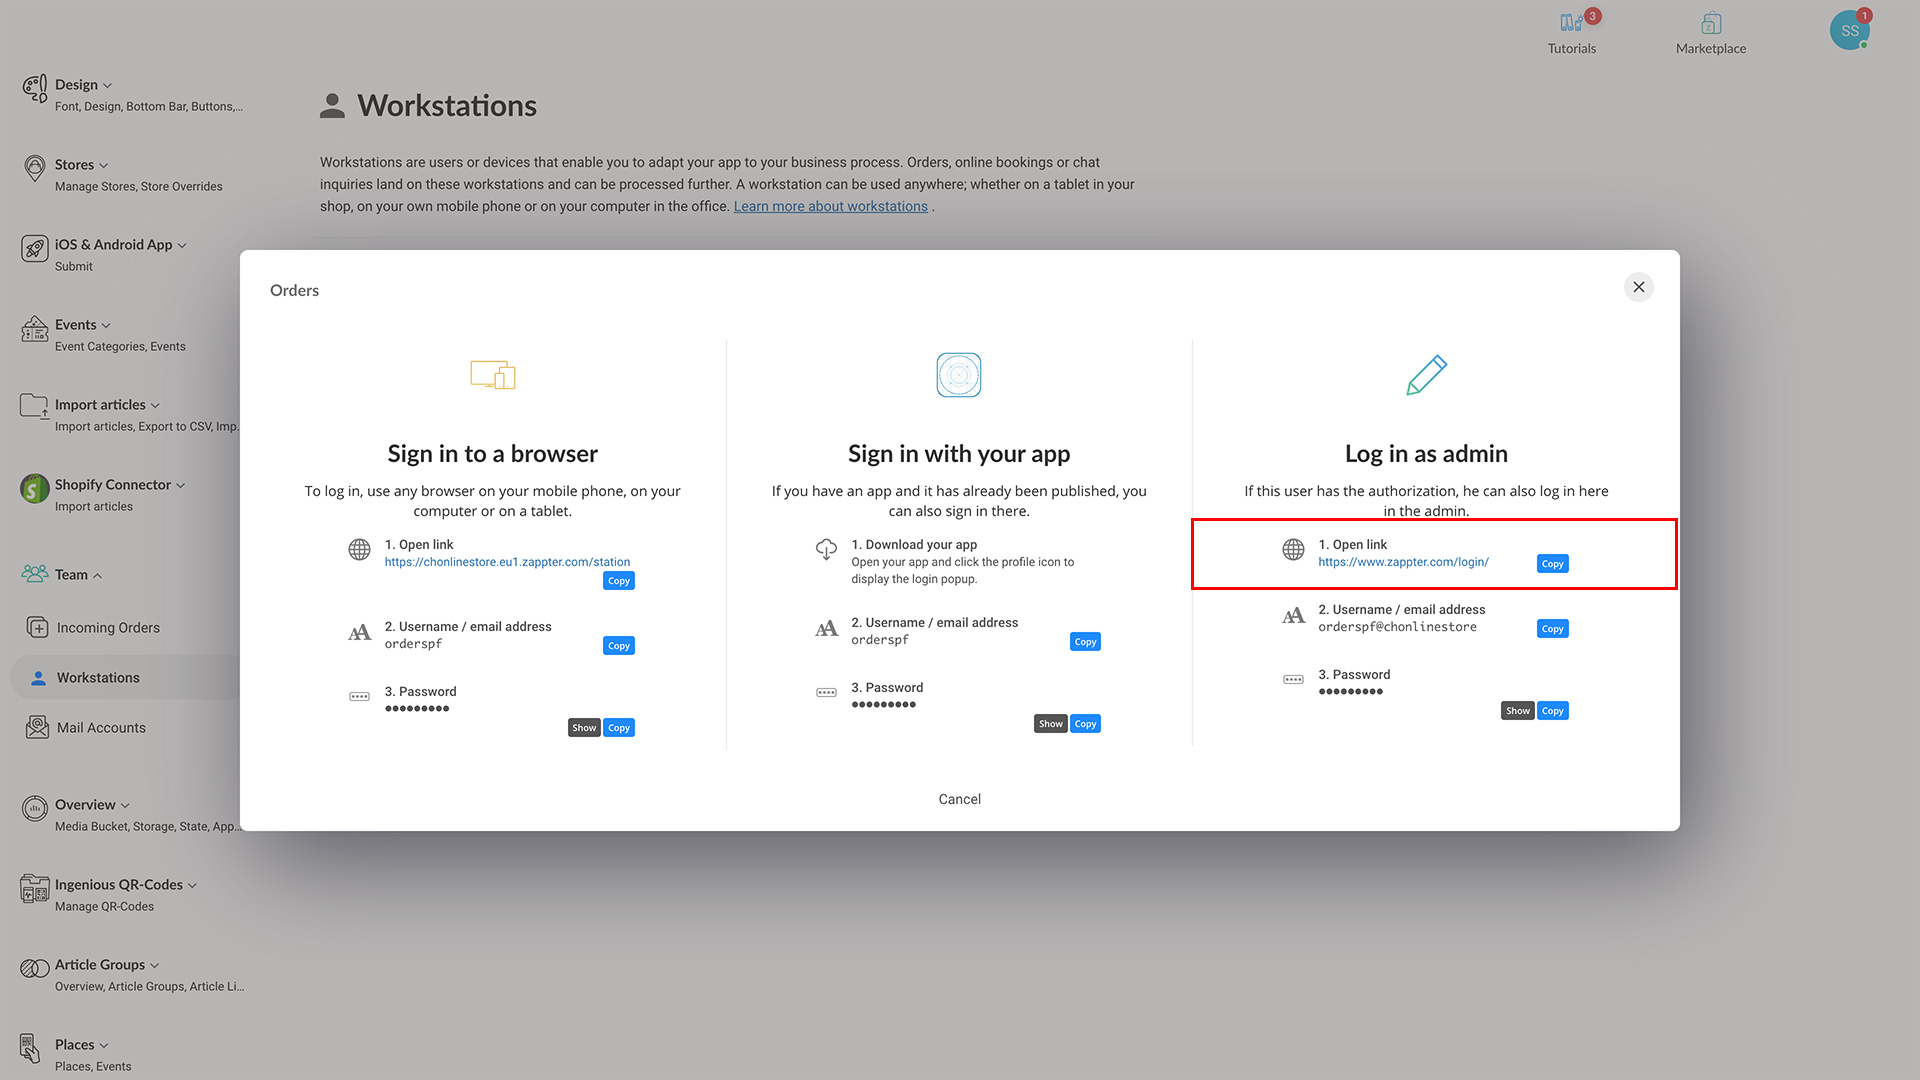
You can create any number of workstations as your business demands. For example, create a workstation and link it to your content. And, your articles, bookings, requests, and chat requests on that content will start sending orders to that workstation. However, you have an option to change the workstation on each article, booking, request, and chat to suit your requirement too. It is how you override a workstation setup. 
Workstation Operations:
 
  1. You can link a workstation to your content. So, articles, booking, etc., inside the content automatically have  (inherit) that workstation. 
  2. You can link a workstation to your article, booking, request, and chat directly. And workstations linked to the content is ignored in this case. It is overriding an inherited workstation setup.
  3. Your staff log in to their respective workstation to manage their day-to-day tasks. 
  4. Workstations receive the orders, bookings, requests, and chat messages in the workstations. 
  5. Your staff manage the orders, bookings and requests using different functions in the workstations. 

Creating workstations

Follow the steps to create your workstations.
1. Admin > Team > Workstations. Click on the 'New Workstation.'
image.png 231.86 KB
2. New Station screen comes up.  Provide relevant detail as required. 
image.png 427.63 KB
Tabs:
  • General: Name, email, and password to login to the workstation
  • Photo: Upload an image for workstation
  • Security: Select if you want to allow login to the workstation from multiple devices concurrently
  • E-Mail:  Every order received at this workstation will be sent with an email. Define 'to' and 'cc' email here
  • Orders: In this tab, you can 1. Enable/disable chat on the workstation 2. Reject orders 3. Disable comments
  • Edit: Allow workstation to edit offers that are connected to this workstation
  • Push: Allow sending push and set promotions from the workstation
  • Statistics: Allow access to stats and charts
  • App Users: If you disable social users, the workstation will reject orders from social users 
  • Advanced: Enable/disable chat, comments, and social user access to workstations
3. Create it.

Granting permissions

Follow the steps to grant your workstation employees the required permission on the workstation you created.
1. Admin > Team > Workstations. Click on the 'Edit Permissions' button.
image.png 283.7 KB
2. Scroll through the list of permissions, and grant/revoke permissions to the workstation based on your requirement.
Permissions:

Reject orders 
Block social users
Edit content 
Access to statistics and charts
Plan promotion
Send push notifications
Disable chat
Disable comment
Access to Social Users
Your changes are saved immediately.

Assigning workstations

  • Assigning workstation to article, reservation, request, or chat overrides any other assignments (assigned at content or category)
  • Assigning workstation to category overrides workstation assignments on the content.  This is for articles, booking, etc., inside the category
Assign workstations to content
1. Admin > Customize > Content. Click to edit the app. 
image.png 532.39 KB
2. Advanced > Workstations.
image.png 522.31 KB
3. Tick all the workstations this content will be connected to. 
image.png 563.38 KB
 You can create a new workstation from here by clicking on ‘+ New.’ 
4. Save.
Assigning workstations to categories
1. Admin > Customize > Content. Click to edit the app. 
image.png 532.39 KB
2. Select any Category, click on the 'Edit.' 
image.png 482.2 KB
3. Click on the ‘More options.’ 
image.png 473.34 KB
4. Select the ‘Station’ tab on the next screen. 
image.png 561.79 KB
5. The message says you have assigned workstations to the content. Click to override and choose the workstation to link to this category. 
6. Save.
Assign to articles, reservations, requests & chat 
1. Admin > Customize > Content. Click to edit the app. 
image.png 532.39 KB
2. When in the content editor, select the article [or, reservation, request, chat].
image.png 523.1 KB
3. Select 'More options.'
image.png 482.42 KB
4. In the ‘Station’ tab, click on ‘Choose the station’ to link a workstation on this article [or, reservation, requests, or chat] 
 From now on, any workstations set on content or category is ignored. 
image.png 516.98 KB
image.png 589.13 KB
5. Save.

Logging into workstations

This section discusses various ways you workstation staff can log in to your workstations to manage their daily assigned tasks.
Log in using a browser
1. Admin > Team > Workstations. Click on any workstation.   
Three options come up: 
image.png 440.65 KB
  • Edit button if you want to edit the workstation
  • 'How to login' to log in to the workstation
  • 'Change password' to change the password of the workstation
2. Select 'How to login.'
image.png 441.45 KB
3. The login details display with the below options. Select 'Sign in to a browser,' for example. Click on the link to login using the username password shown. 
image.png 509.22 KB
 Workstation login screen: 
image.png 171.84 KB
 You're now logged into the workstation: 
image.png 140.67 KB
Log in to the app
1. Admin > Team > Workstations. Click on any workstation. 
 Three options come up: 
image.png 440.65 KB
  • Edit button if you want to edit the workstation
  • 'How to login' to log in to the workstation
  • 'Change password' to change the password of the workstation
2. Select 'How to login.'
image.png 441.73 KB
3. The login details display with the below options. Select 'Sign in with your app.' 
image.png 510.01 KB
App login:
image.png 272.48 KB
Log in as admin
1. Admin > Team > Workstations. Click on any workstation. 
 Three options come up: 
image.png 440.65 KB
  • Edit button if you want to edit the workstation
  • 'How to login' to log in to the workstation
  • 'Change password' to change the password of the workstation
2. Select 'How to login.'
image.png 442 KB
3. The login details display with the below options. Select 'Login as admin.' 
image.png 513.76 KB
4. Use the URL with username and passwords to log in as admin. You're logged in as admin. 
Last updated at 06.07.2022 00:12