The below steps guide you through adding an audio player to your content.
1. Admin > Customize > Content. Click to edit your app.
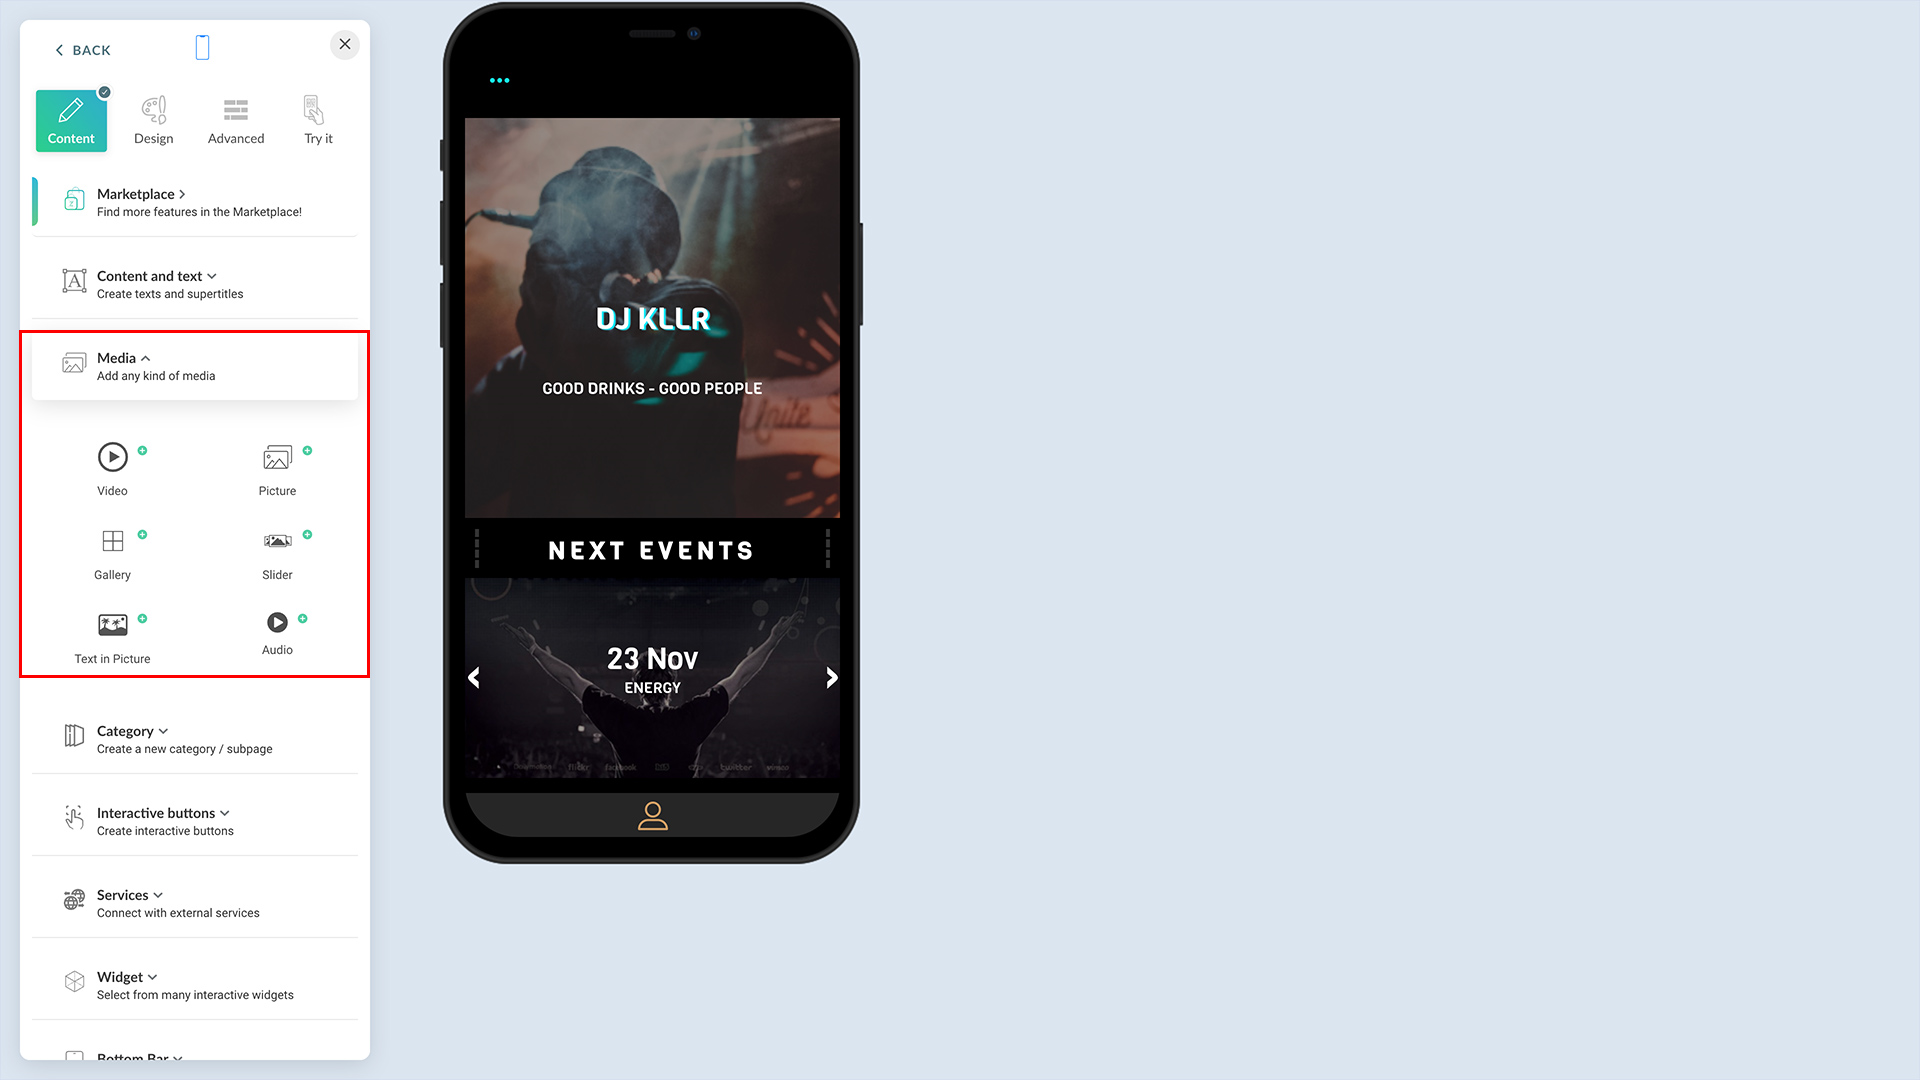
2. In the app customization, expand the group, Media under Content. Click on the 'Audio.'
image.png565.01 KB
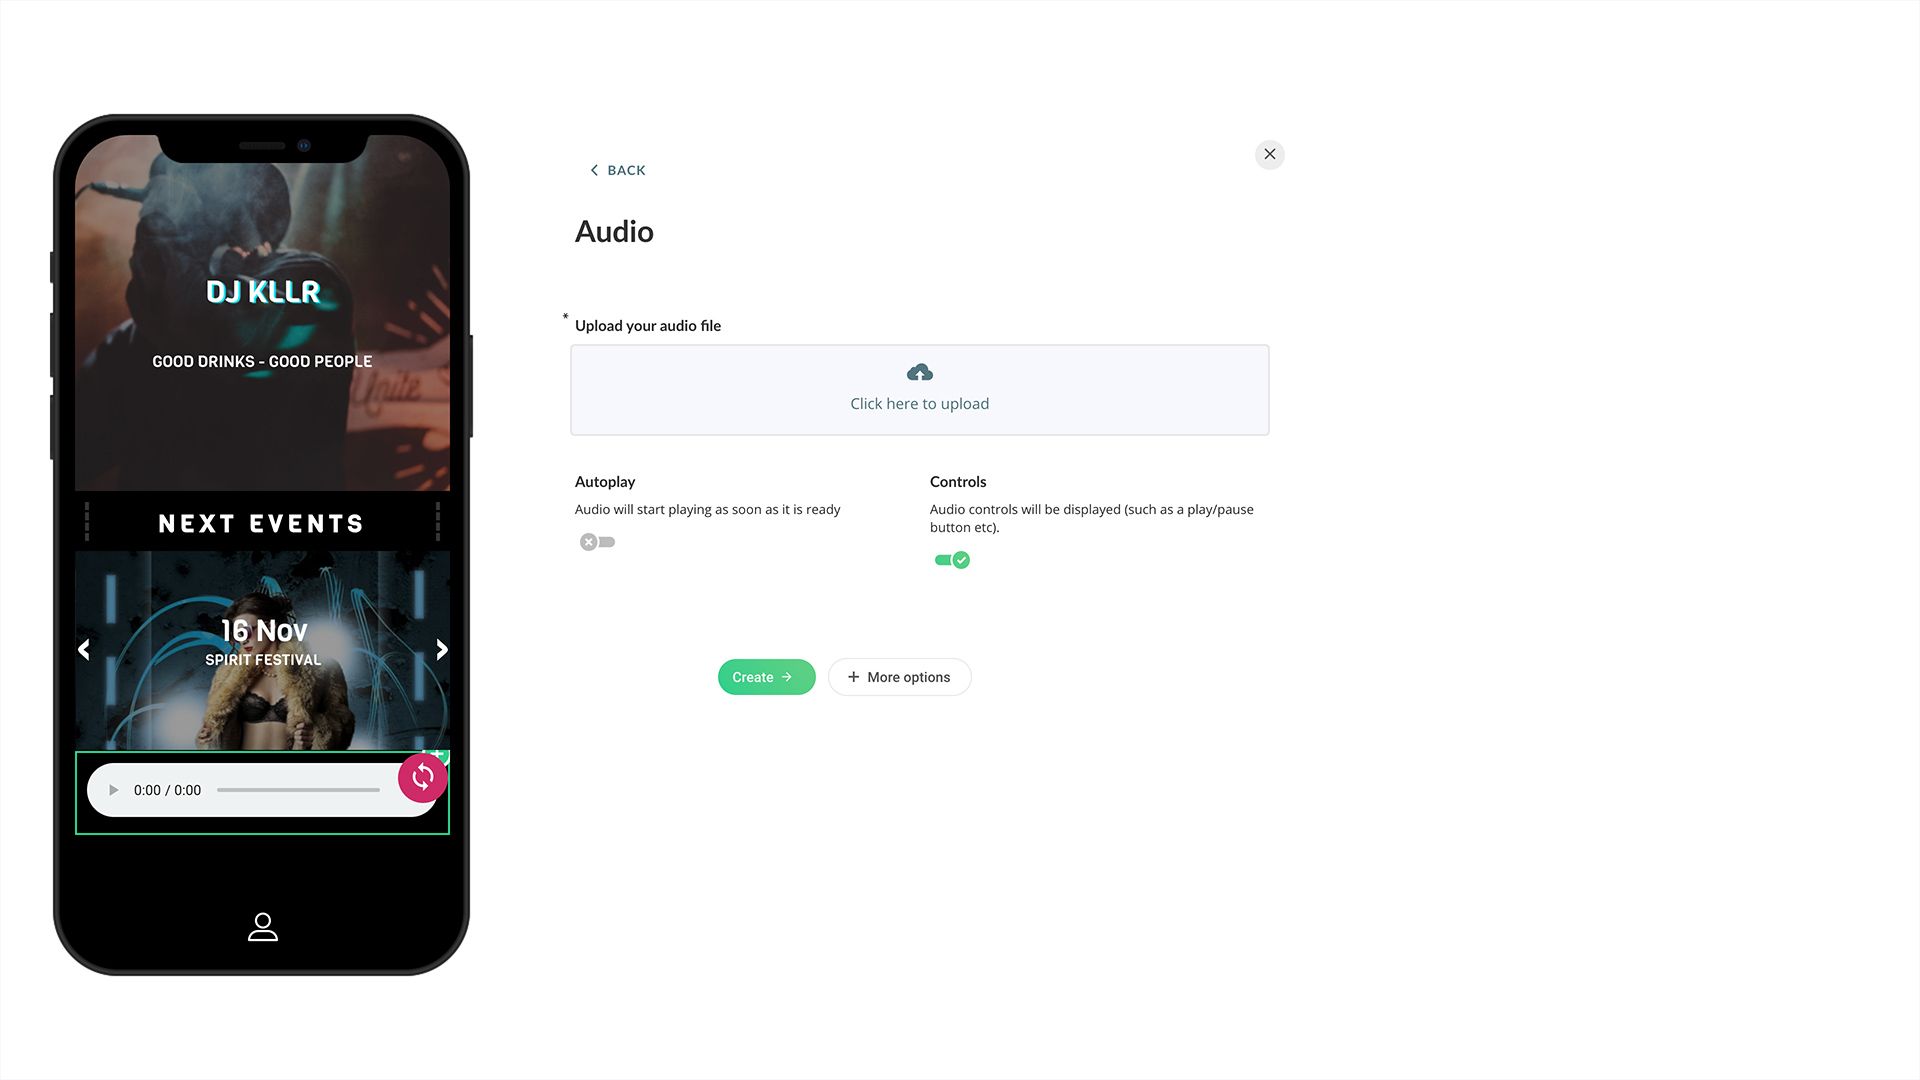
3. The audio player setup screen comes up. Upload the audio file and set the Mute, Loop and Autoplay options as required. There are few more controls under 'More option' as described later in the section.
image.png533.93 KB
Upload your audio file: Browse the computer to upload the file
Mute: Mute the audio
Autoplay: Autoplay when the content loads
4. Click on the 'Create' button to complete adding the audio with the default settings. Or, move on to the next step to change settings described under Additional tasks.
5. Change settings of your audio:
Additional tasks:
You can customize audio settings by click on the 'More options' button when creating or editing an audio. More options > Settings:
image.png486.26 KB
Mute: Mute the audio
Loop: Play continuously
Autoplay: Autoplay when the content loads
Controls: Show video controls like play, pause, etc.
When all set, click on the 'Create' or 'Save' to complete.
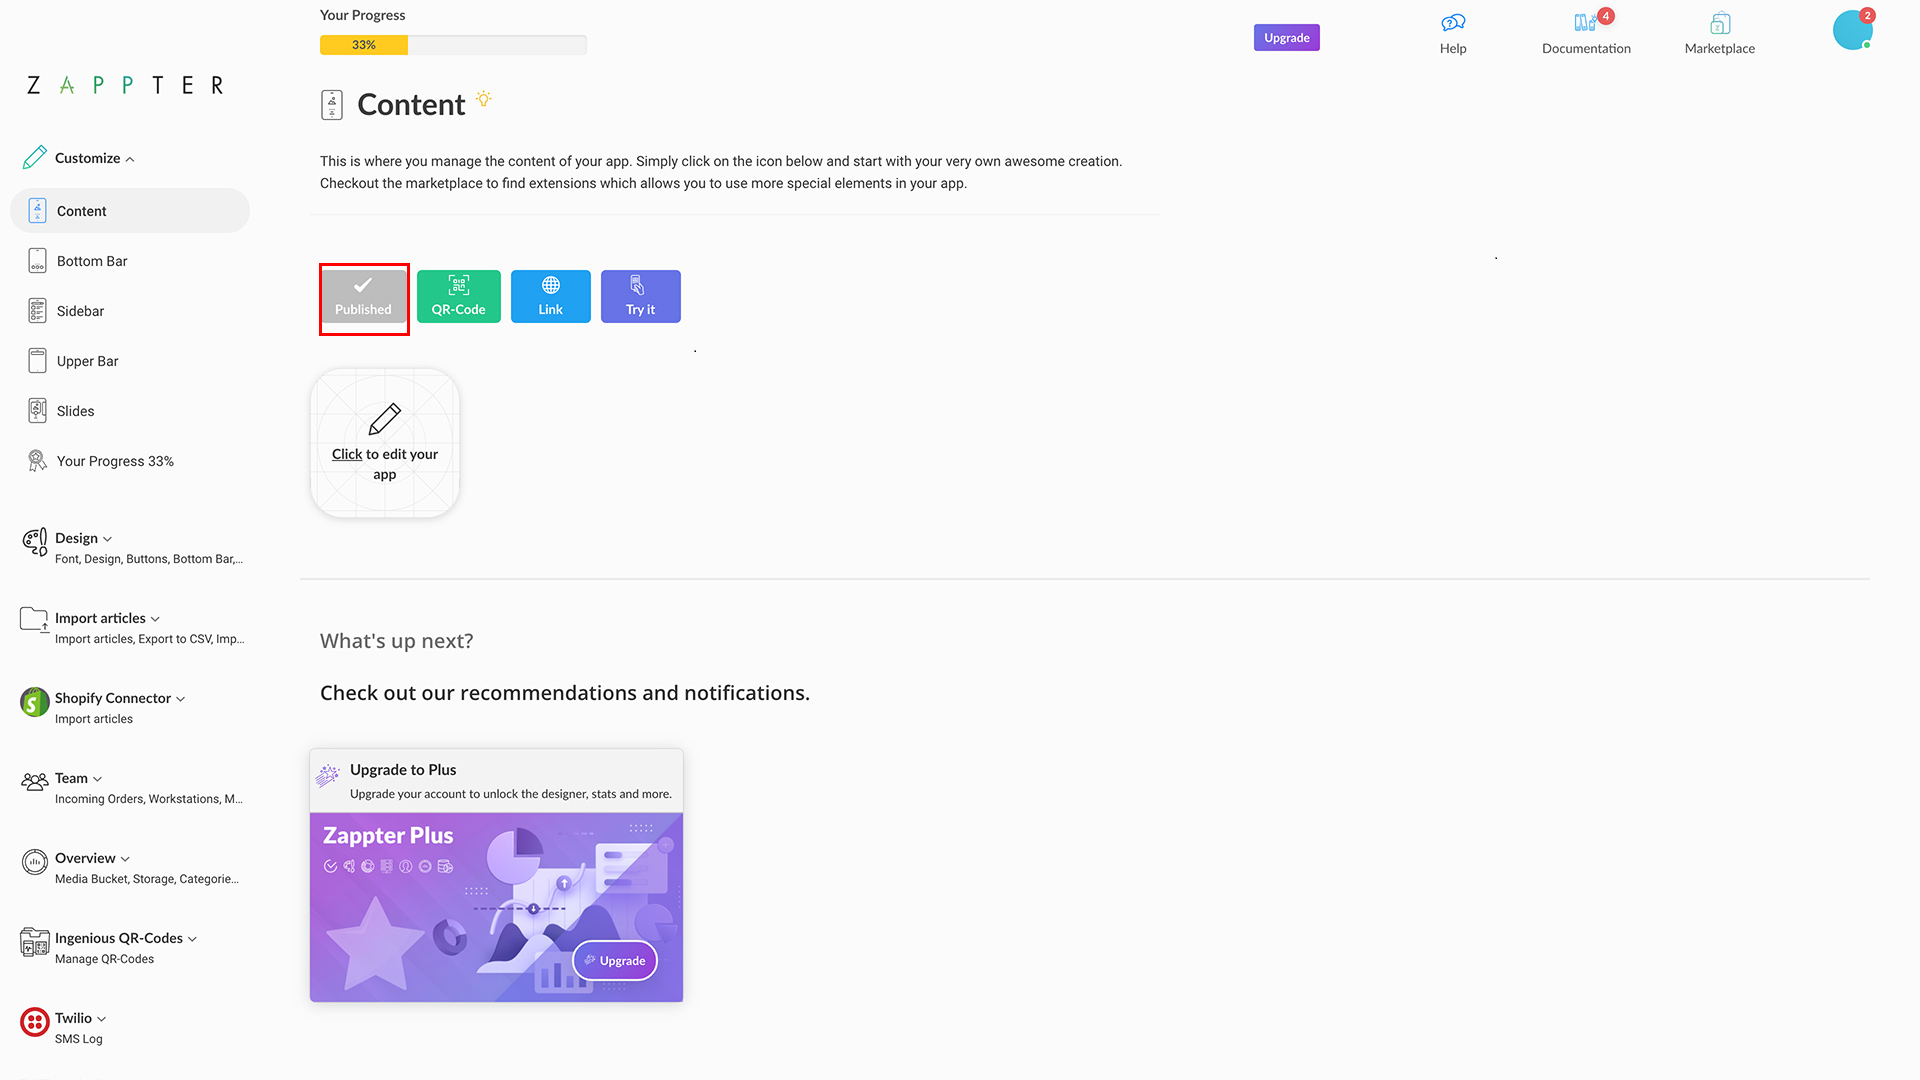
6. 'Put online' to publish your audio so that it will appear on your users' devices. The button's caption changes from 'Put online' to 'Published' once the changes have been applied successfully.