Navigate to Products in your Shopify Admin Panel and choose 'Export'
Select which product you want to export. Leave the file format as is - 'CSV for Excel, Numbers, or other spreadsheet programs'
Click on 'Export products'
You will receive an email from Shopify with your CSV file attached. Download this file to your computer
If you export more than 51 products, the CSV file is emailed to the store owner. Or, the file is downloaded right away. Disclaimer: Above steps and the information on Shopify are provided to assist you only, and subject to change by the vendor without prior notice.
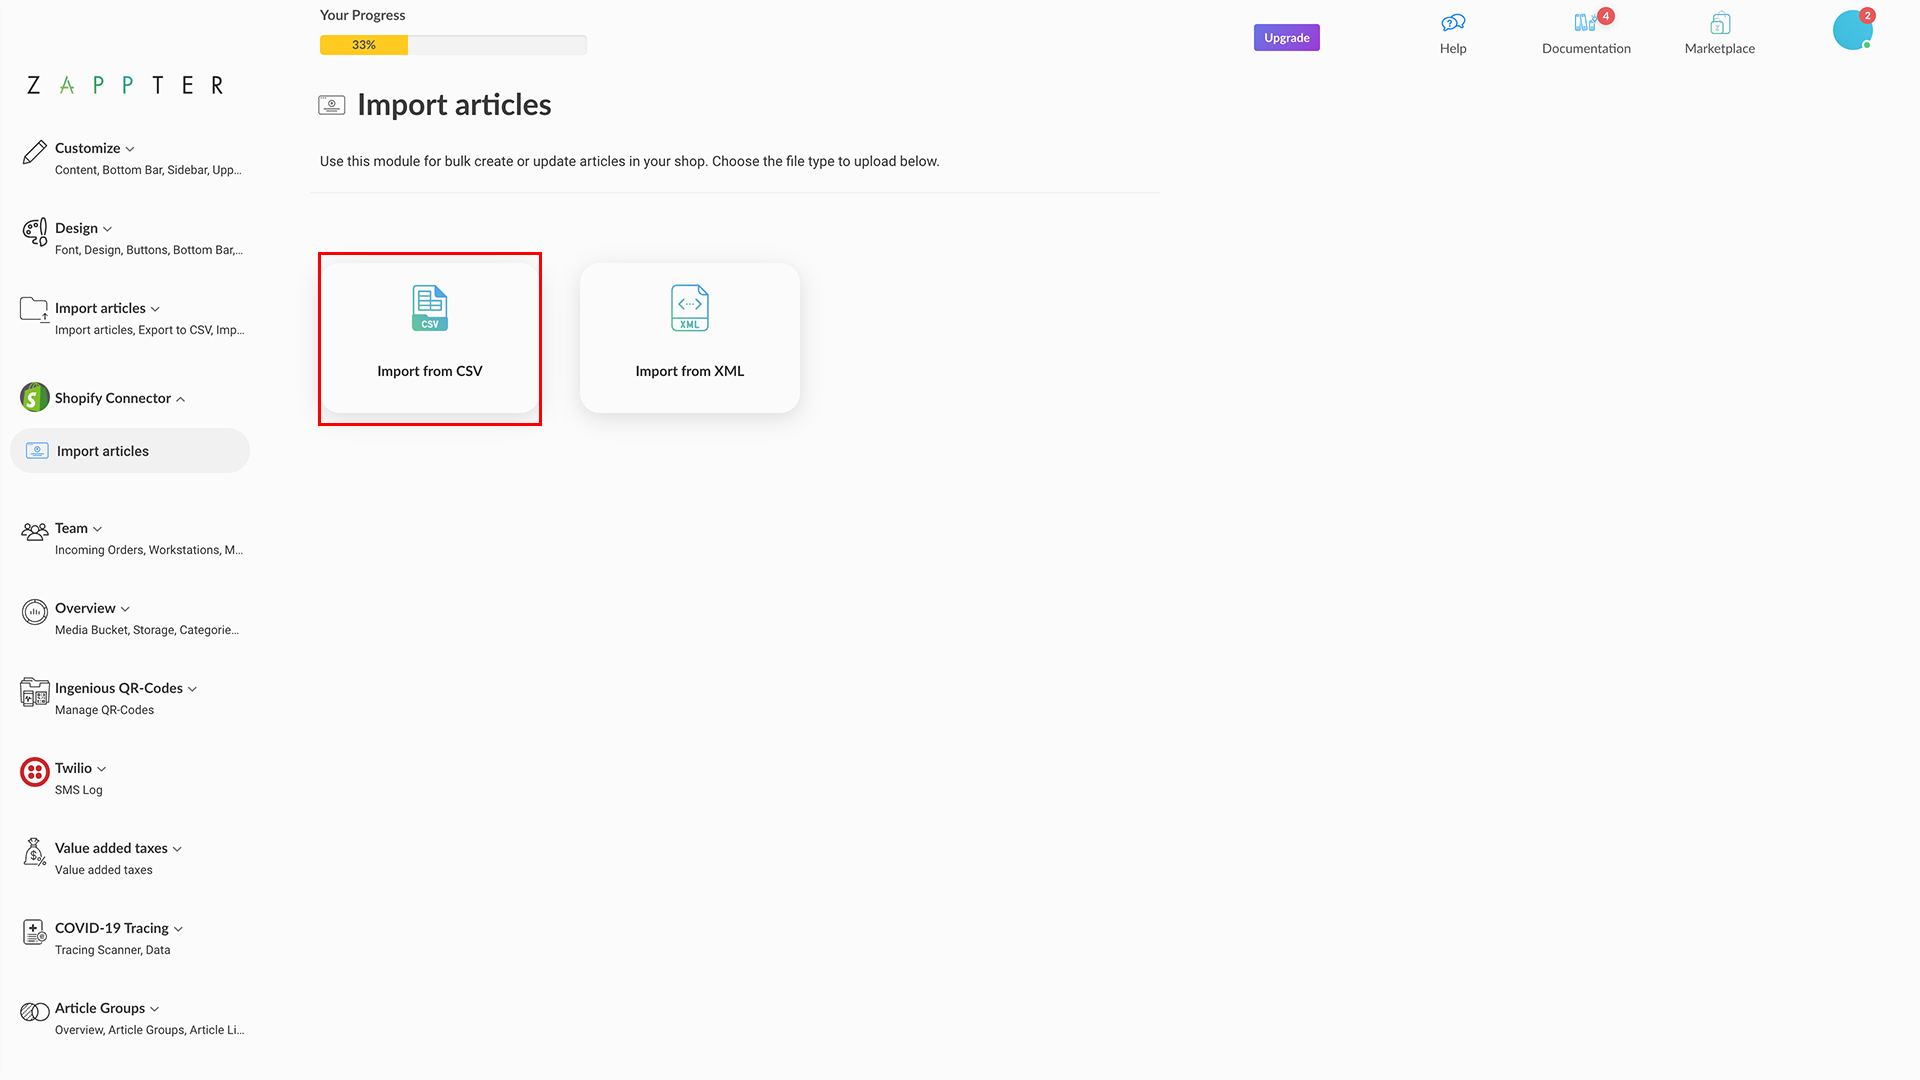
Onetime CSV imports
Import your Shopify data in CSV (comma separated value) format to create articles in your app to keep your Shopify store and app in sync. The below steps guide you through setting up one-time imports without scheduling.
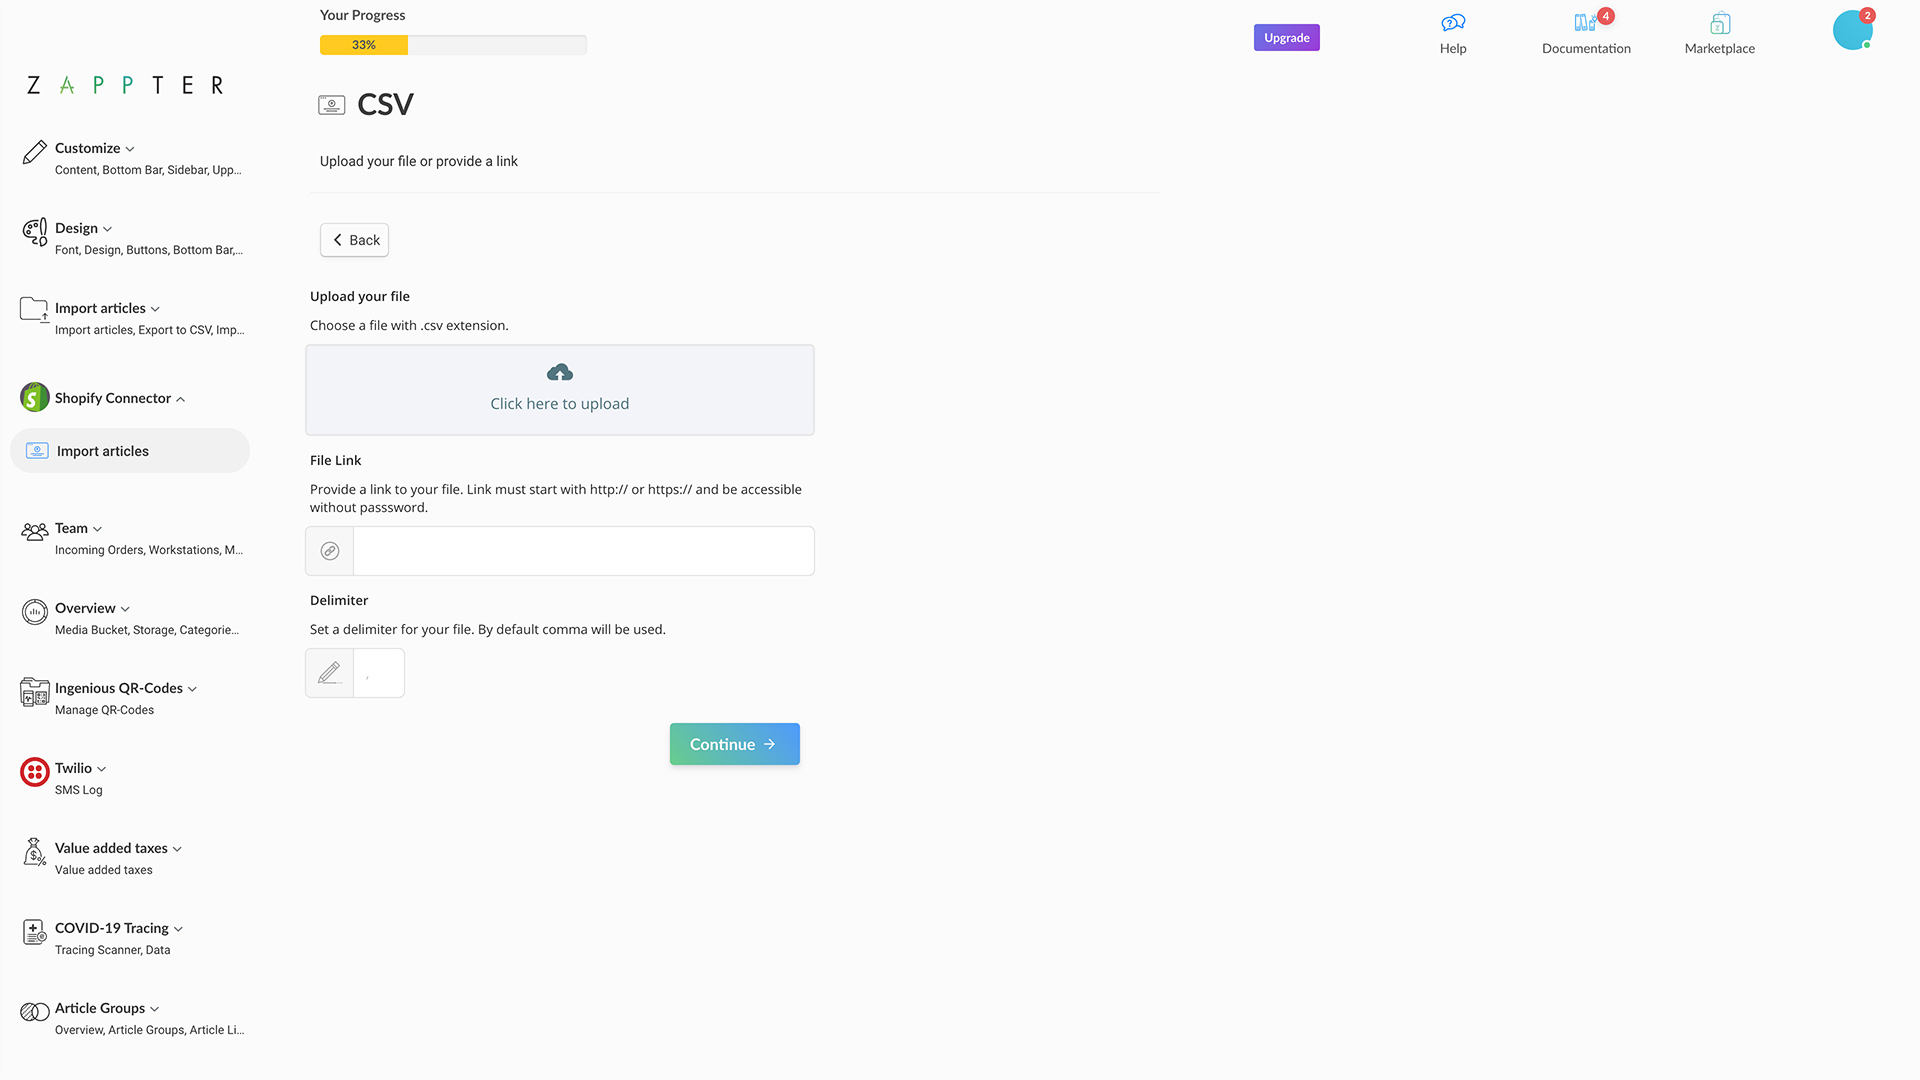
2. Upload your Shopify CSV here, or provide an import file link.
image.png268.73 KB
When you upload a CSV, you're performing a one-time upload. For scheduled regular updates, you must provide a 'file link'
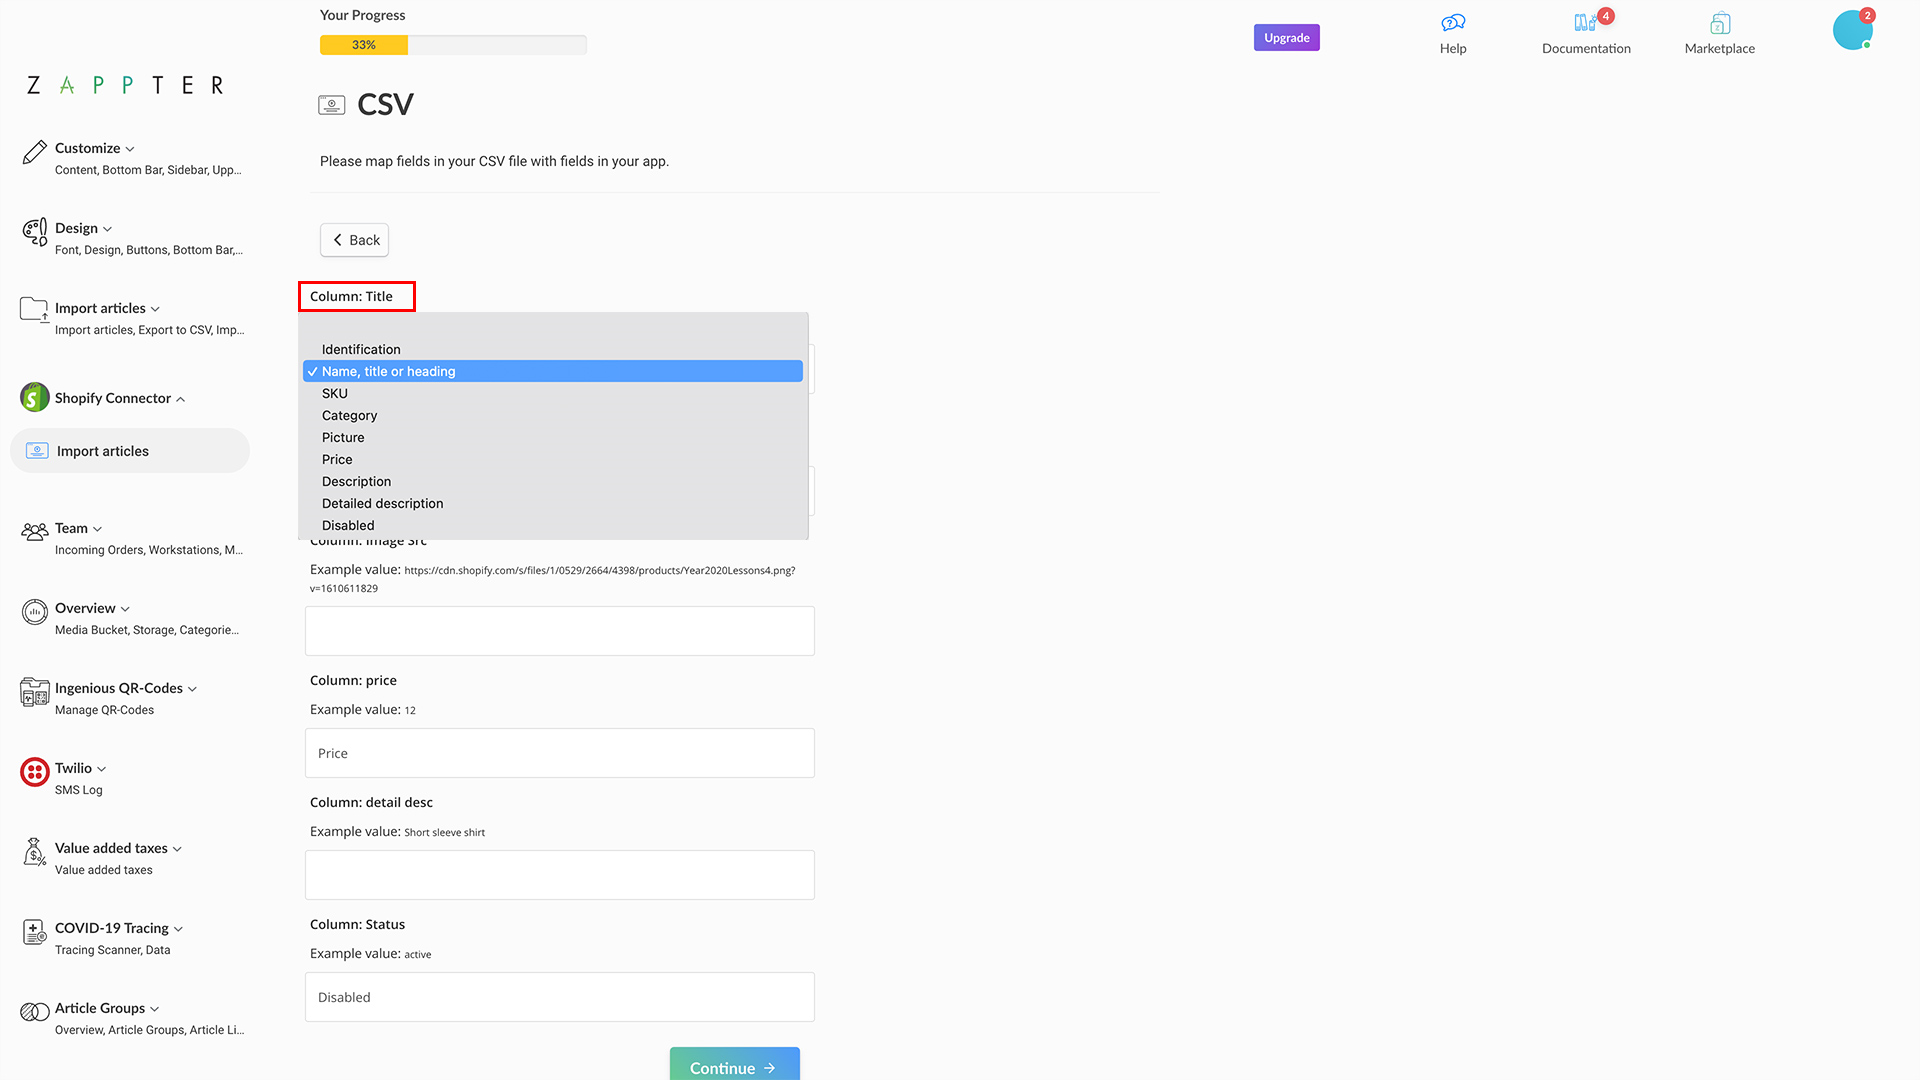
3. Next choose the right mappings for your upload settings.
Mapping is where you inform the connector, which Shopify field goes where in Zappter to create articles.
Mapping example:
CSV file headers: ID, Title, SKU...
Zappter fields: Identification, Name, title or heading...
When complete it should look like below:
image.png298.42 KB
The import plugin will try to guess some popular mappings, but you can change it so it suits your needs.
When the mapping is complete, click on the 'Continue.'
image.png278.57 KB
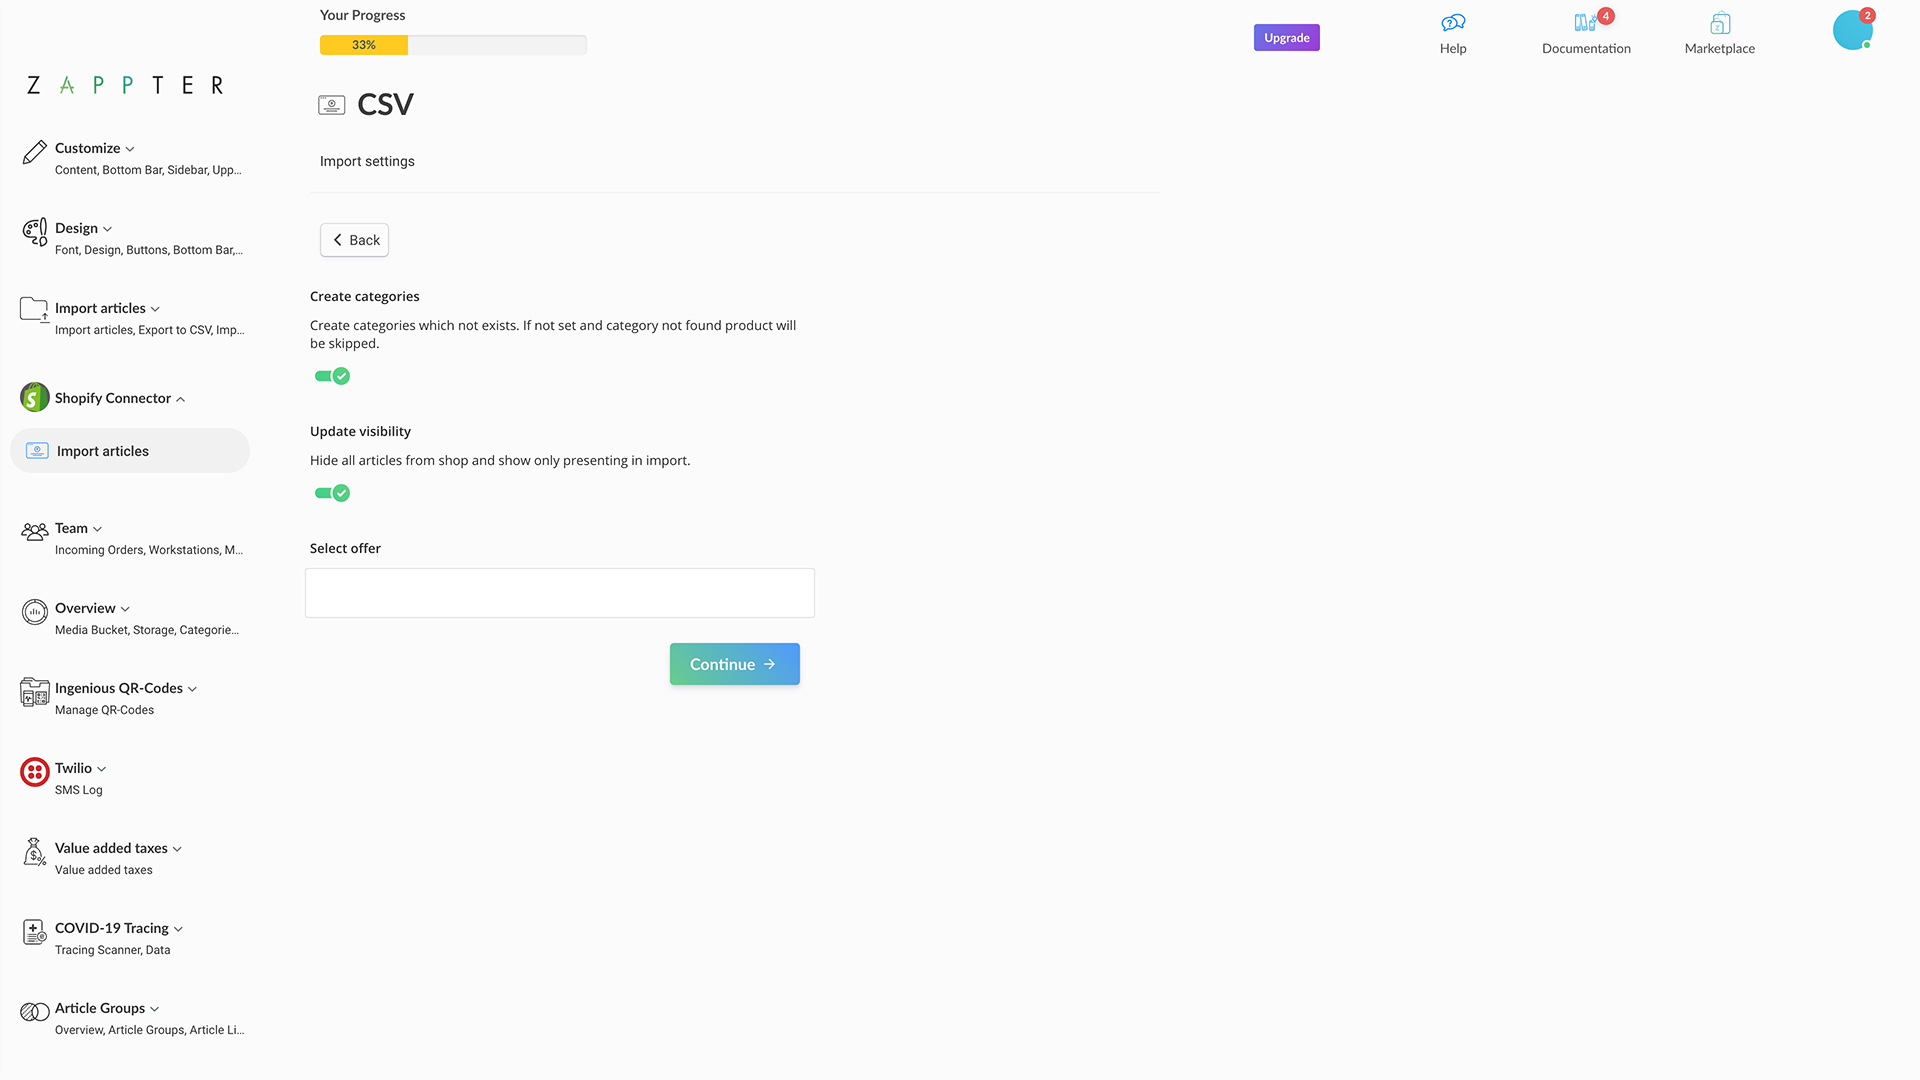
4. Complete additional settings. Click on the 'Continue' button when settings are updated.
image.png252.3 KB
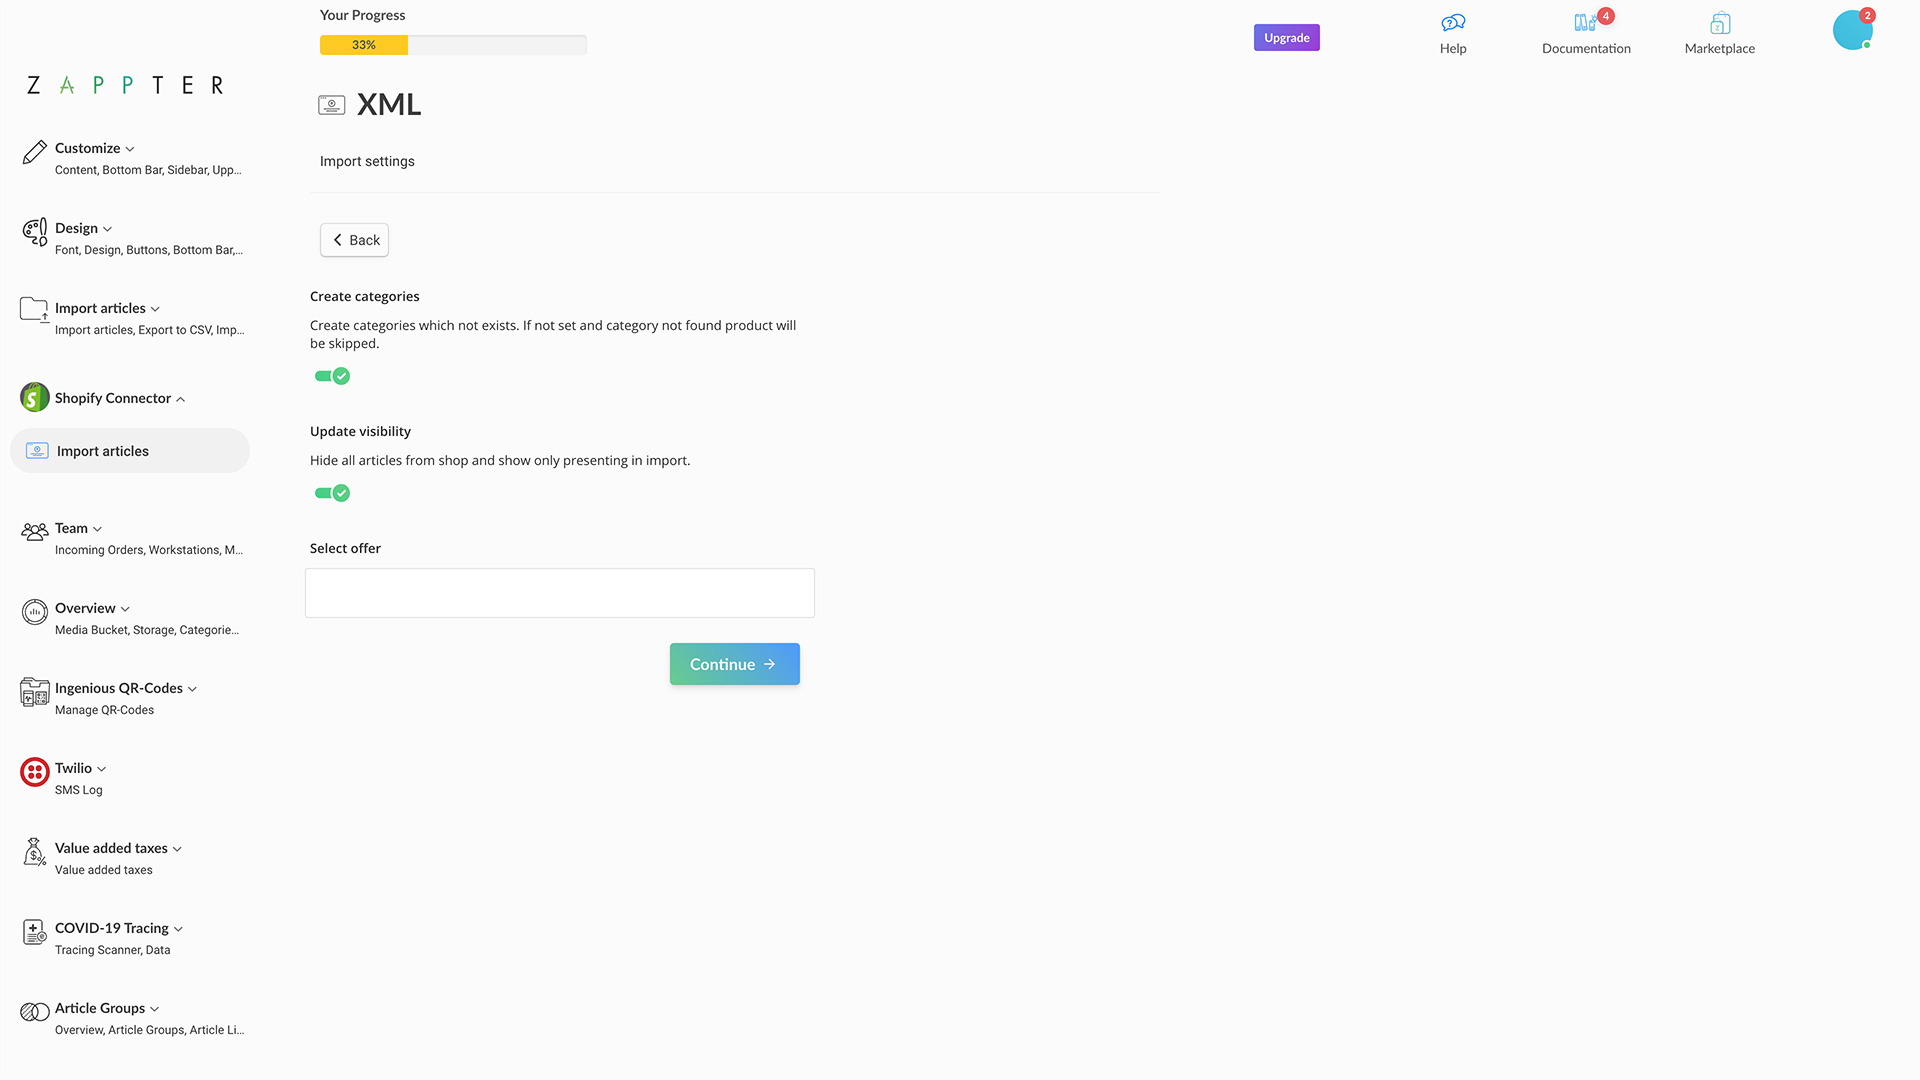
Create categories: When a category is not found in Zappter, the connector creates it, if enabled
Update visibility: Visibility from the shop
Current store only: Import into the current store only when you have the stores plugin installed
5. When ready, click on the 'Run Import.'
image.png284.69 KB
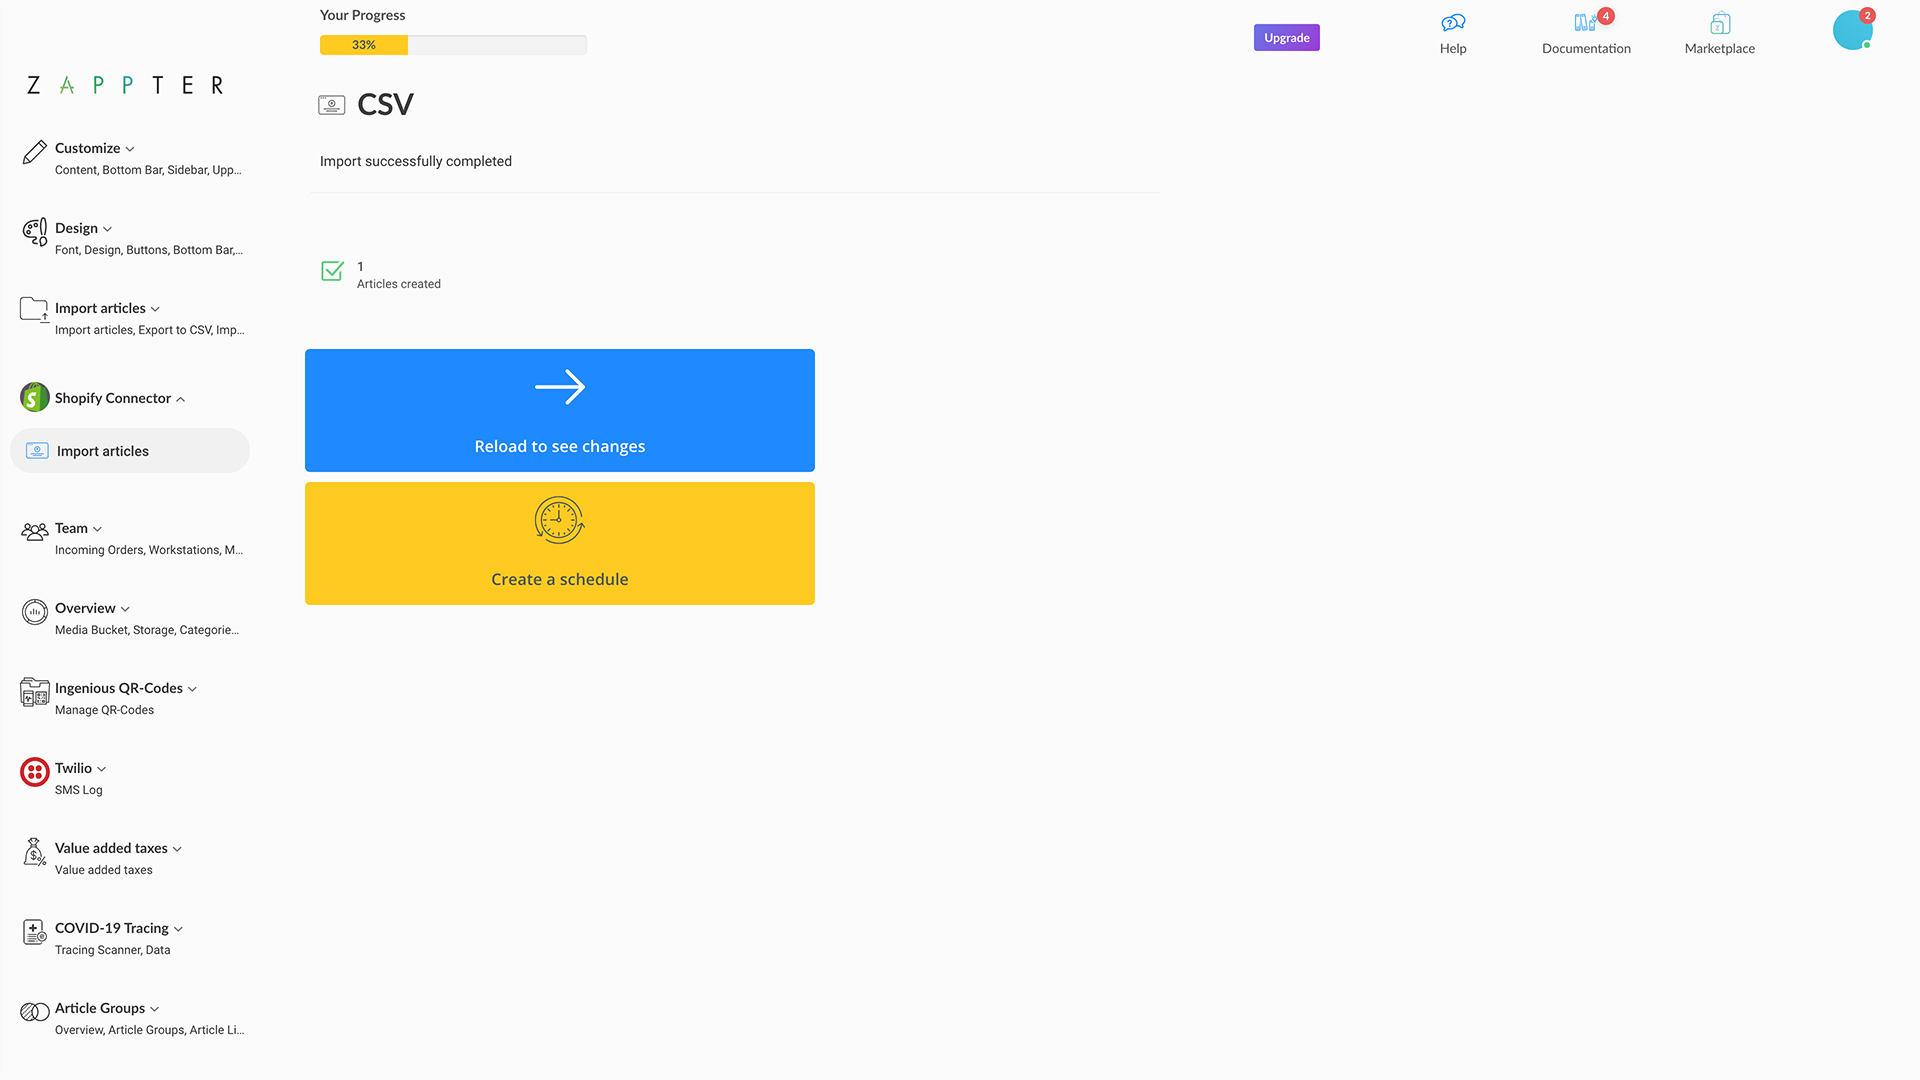
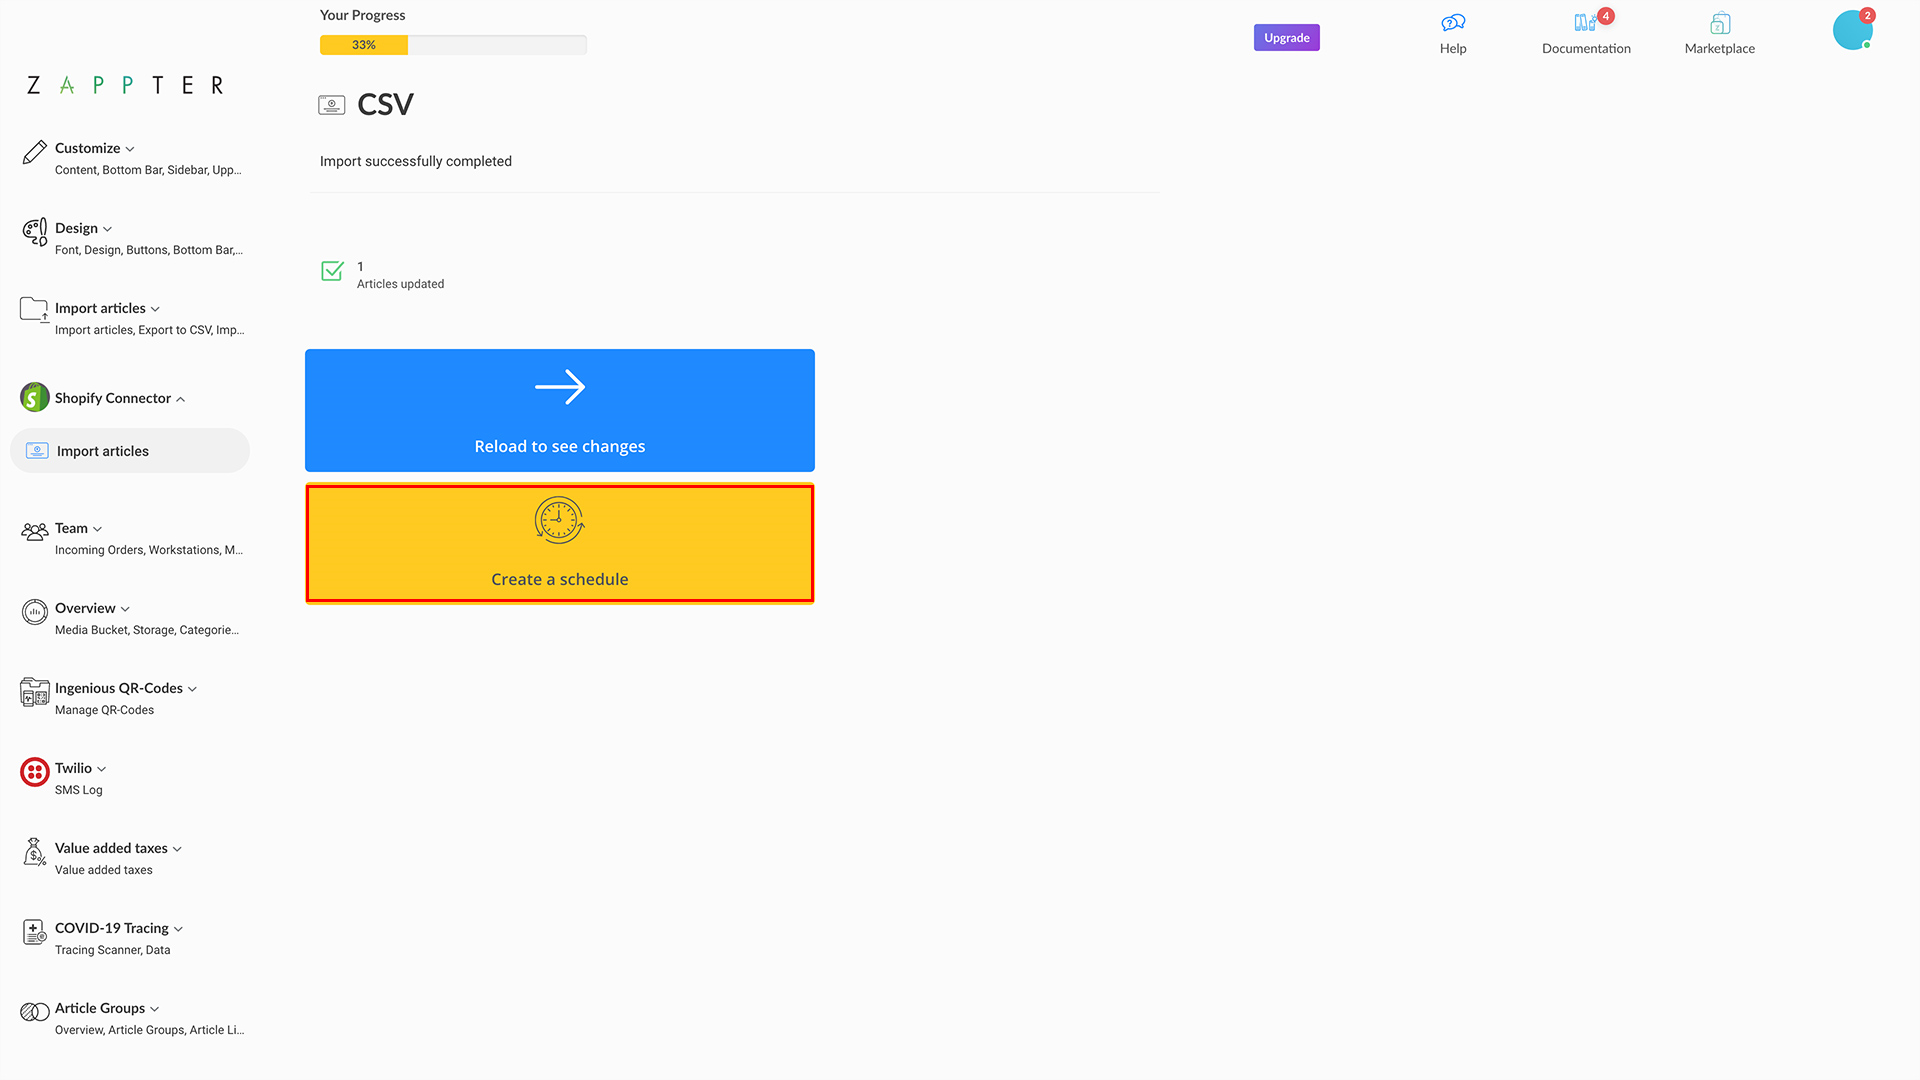
6. Import completes.
image.png243.01 KB
After the import is completed you will see some import statistics: how many articles were created, how many were updated, and how many were skipped with some info on why they were skipped.
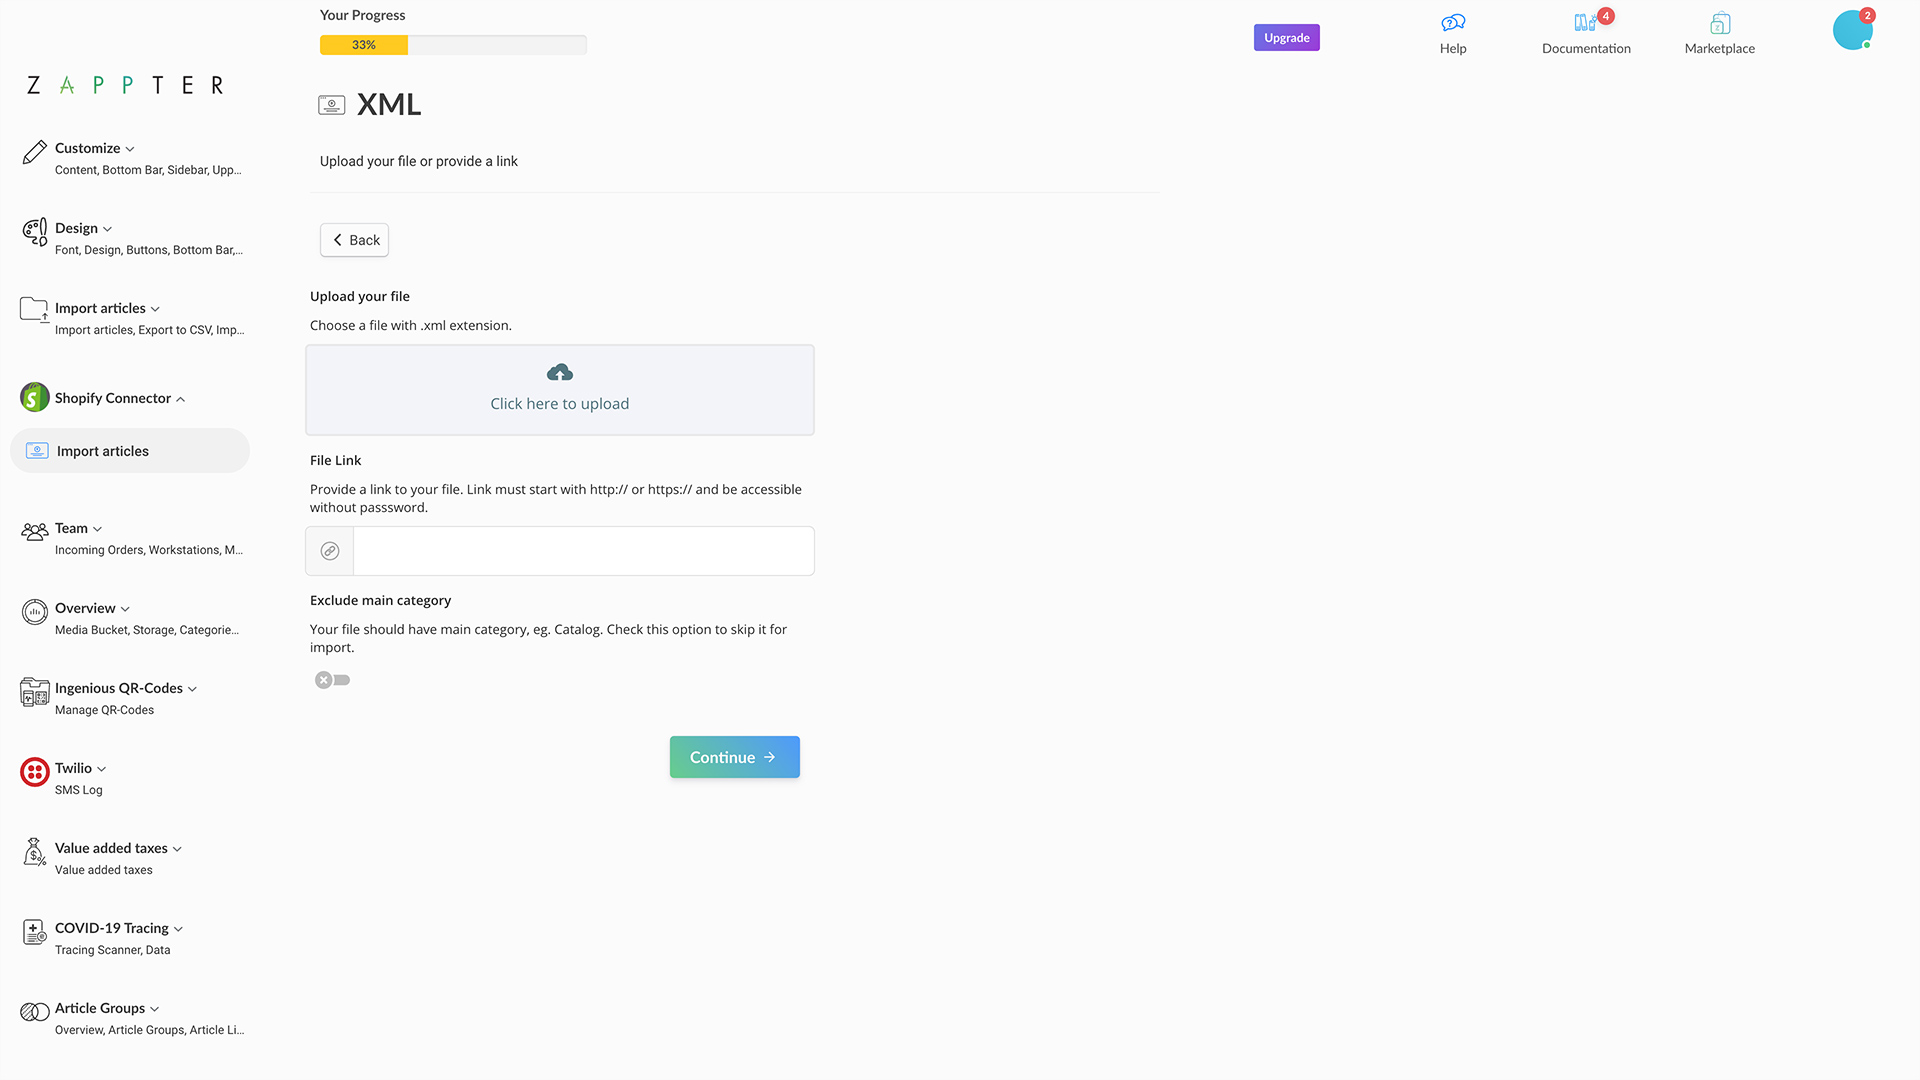
Onetime XML imports
Import your Shopify data in XML (extensible markup language) format to create articles in your app to keep your Shopify store and app in sync. The below steps guide you through setting up one-time imports without scheduling.
2. Upload your Shopify XML here, or provide an import file link.
When you upload an XML, you're performing a one-time upload. For scheduled regular updates, you must provide a 'file link'
image.png273.96 KB
3. Define your upload settings. Click on the 'Continue' button when the settings are updated.
image.png252.45 KB
With XML mapping step is not shown.
4. When ready, click on the 'Run Import' as shown in the CSV section.
5. Import completes as shown in the CSV section.
Automated imports - CSV & XML
Import your Shopify data in either CSV or XML (comma separated value or extensible markup language) formats to create articles in your app or update existing articles in your app with changes in Shopify to keep your Shopify store and app in sync. The below steps guide you through setting up automated or scheduled imports.
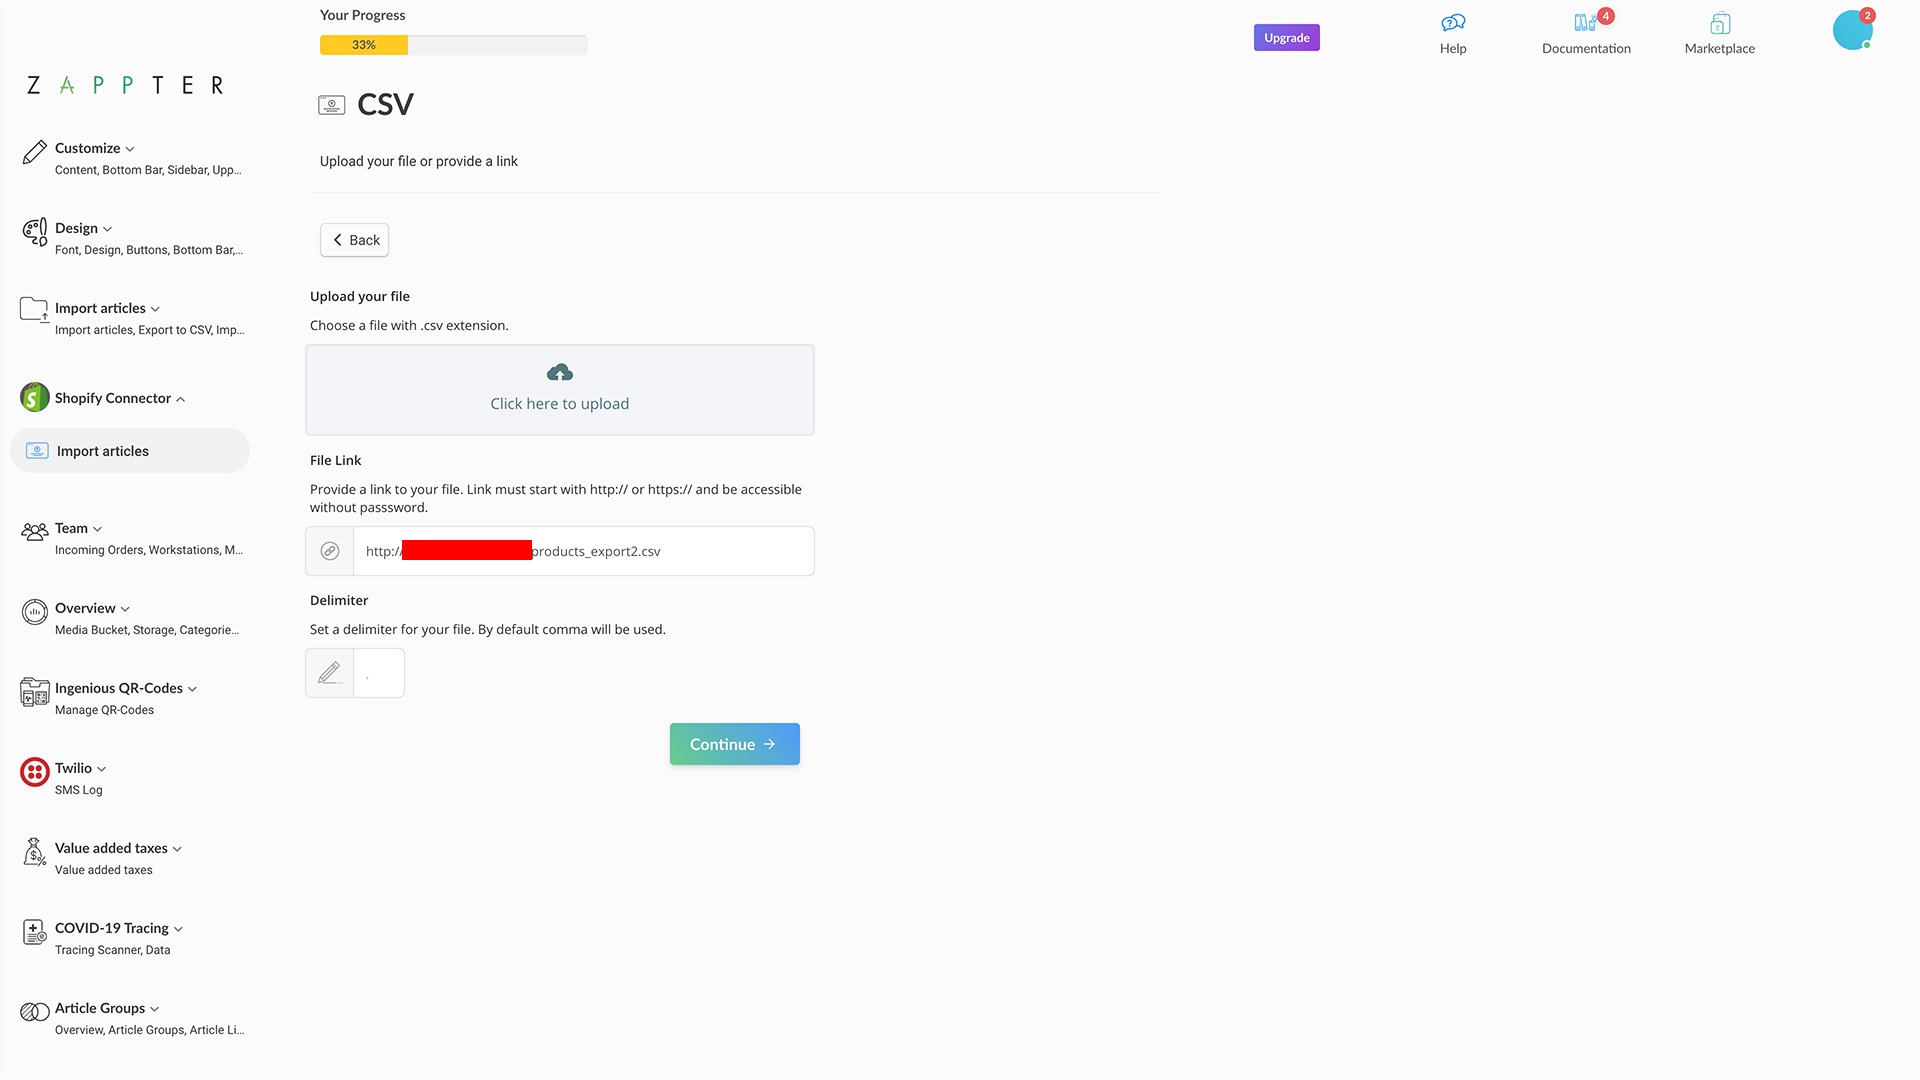
2. Provide an import file link of CSV or XML. If it's CSV, select 'comma' for the delimiter.
For scheduled regular updates, you must provide a 'file link'
image.png272.65 KB
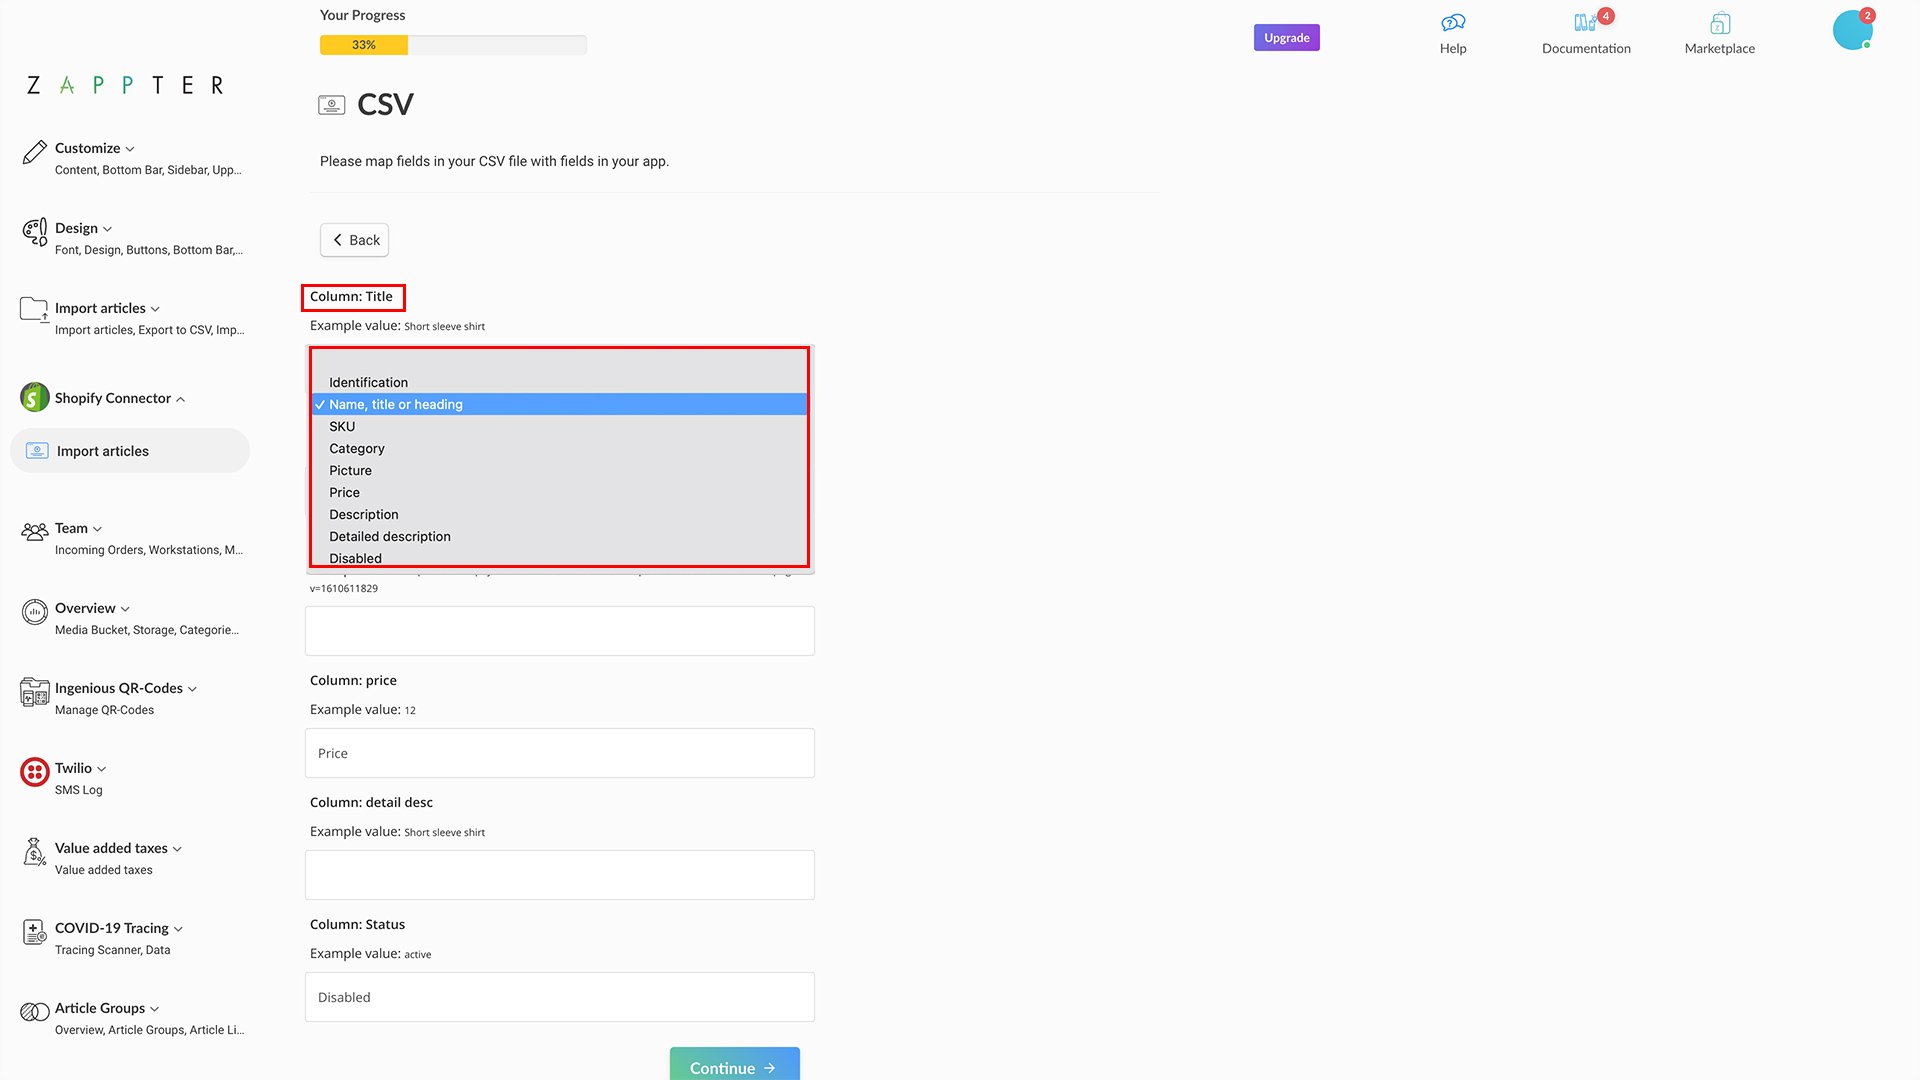
3. Next choose the right mappings for your upload settings.
Mapping example:
CSV file headers: ID, Title, SKU...
Zappter fields: Identification, Name, title or heading...
When complete it should look like below:
image.png295.01 KB
The import plugin will try to guess some popular mappings, but you can change it so it suits your needs.
If you provide an XML file link, no mapping is needed.
When the mapping is complete, click on the 'Continue.'
4. Complete additional settings. Click on the 'Continue' button when settings are updated.
image.png252.3 KB
Create categories: When a category is not found in Zappter, the connector creates it, if enabled
Update visibility: Visibility from the shop
Current store only: Import into the current store only when you have the stores plugin installed
5. When ready, click on the 'Run Import.'
image.png284.69 KB
6. Import completes.
image.png243.01 KB
7. Click 'Create a new schedule for this import settings.' All your import settings like link, mappings, chosen setup will be stored and used in future imports.
image.png242.84 KB
If you need to change the settings simply remove the job from the schedule and create a new one via running a new import.
8. If you want to change schedule settings, click on the newly created schedule.
9. Move on to the 'Plan' tab, and set your preferred schedule.