Have a custom domain (yourdomain.com) or a subdomain with access to change its DNS entries at the domain registrar
Map your custom domain, yourdomain.com, or subdomain, app.yourdomain.com to your app's FQDN in CNAME or A record of DNA settings of the domain registrar
When the above mapping is saved, the plugin gives the DNS entries to update in your Zappter admin to your custom domain as discussed above
Finally, confirm your domain changes by updating your DNS entries (in the Zappter admin)
Wait for DNS probation
Steps to changing your web app with a custom domain:
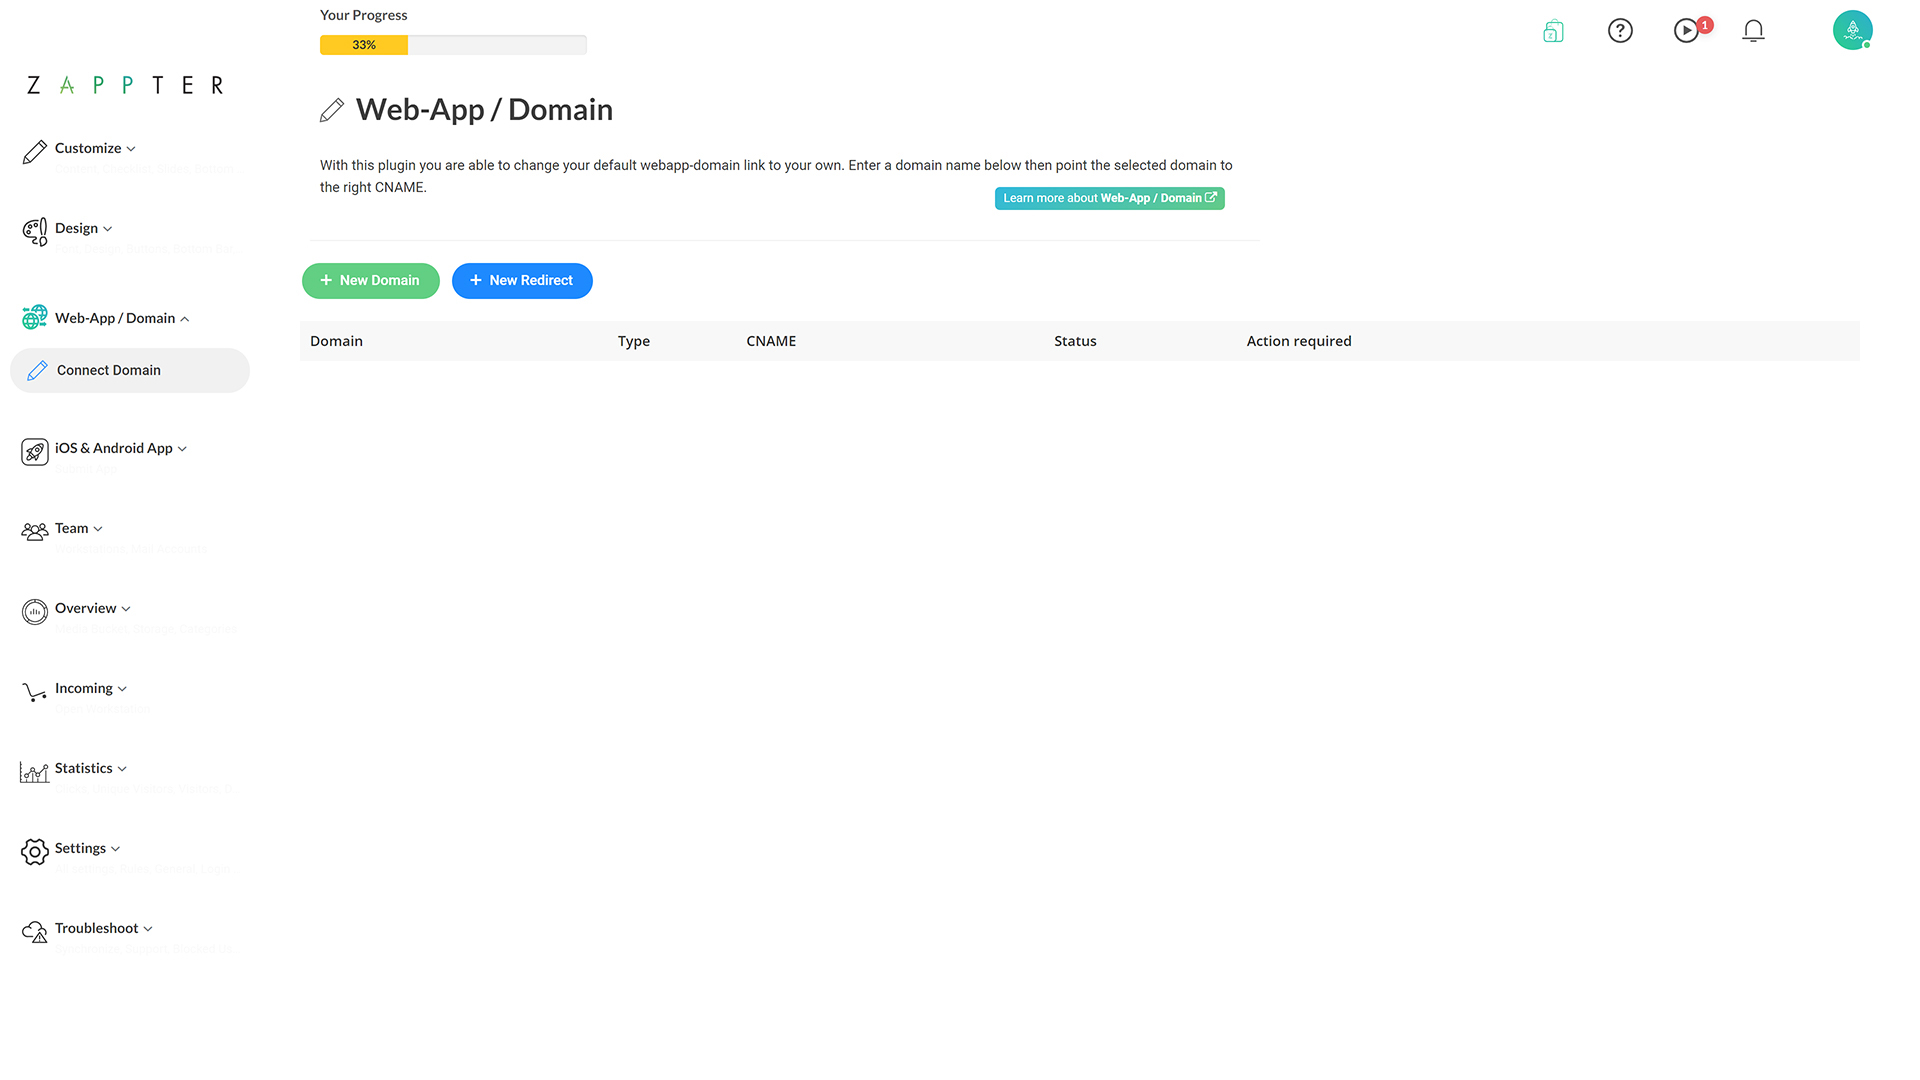
1. Admin > Web-App/Domain > Connect Domain. Click on the '+New Domain' button.
image.png230.04 KB
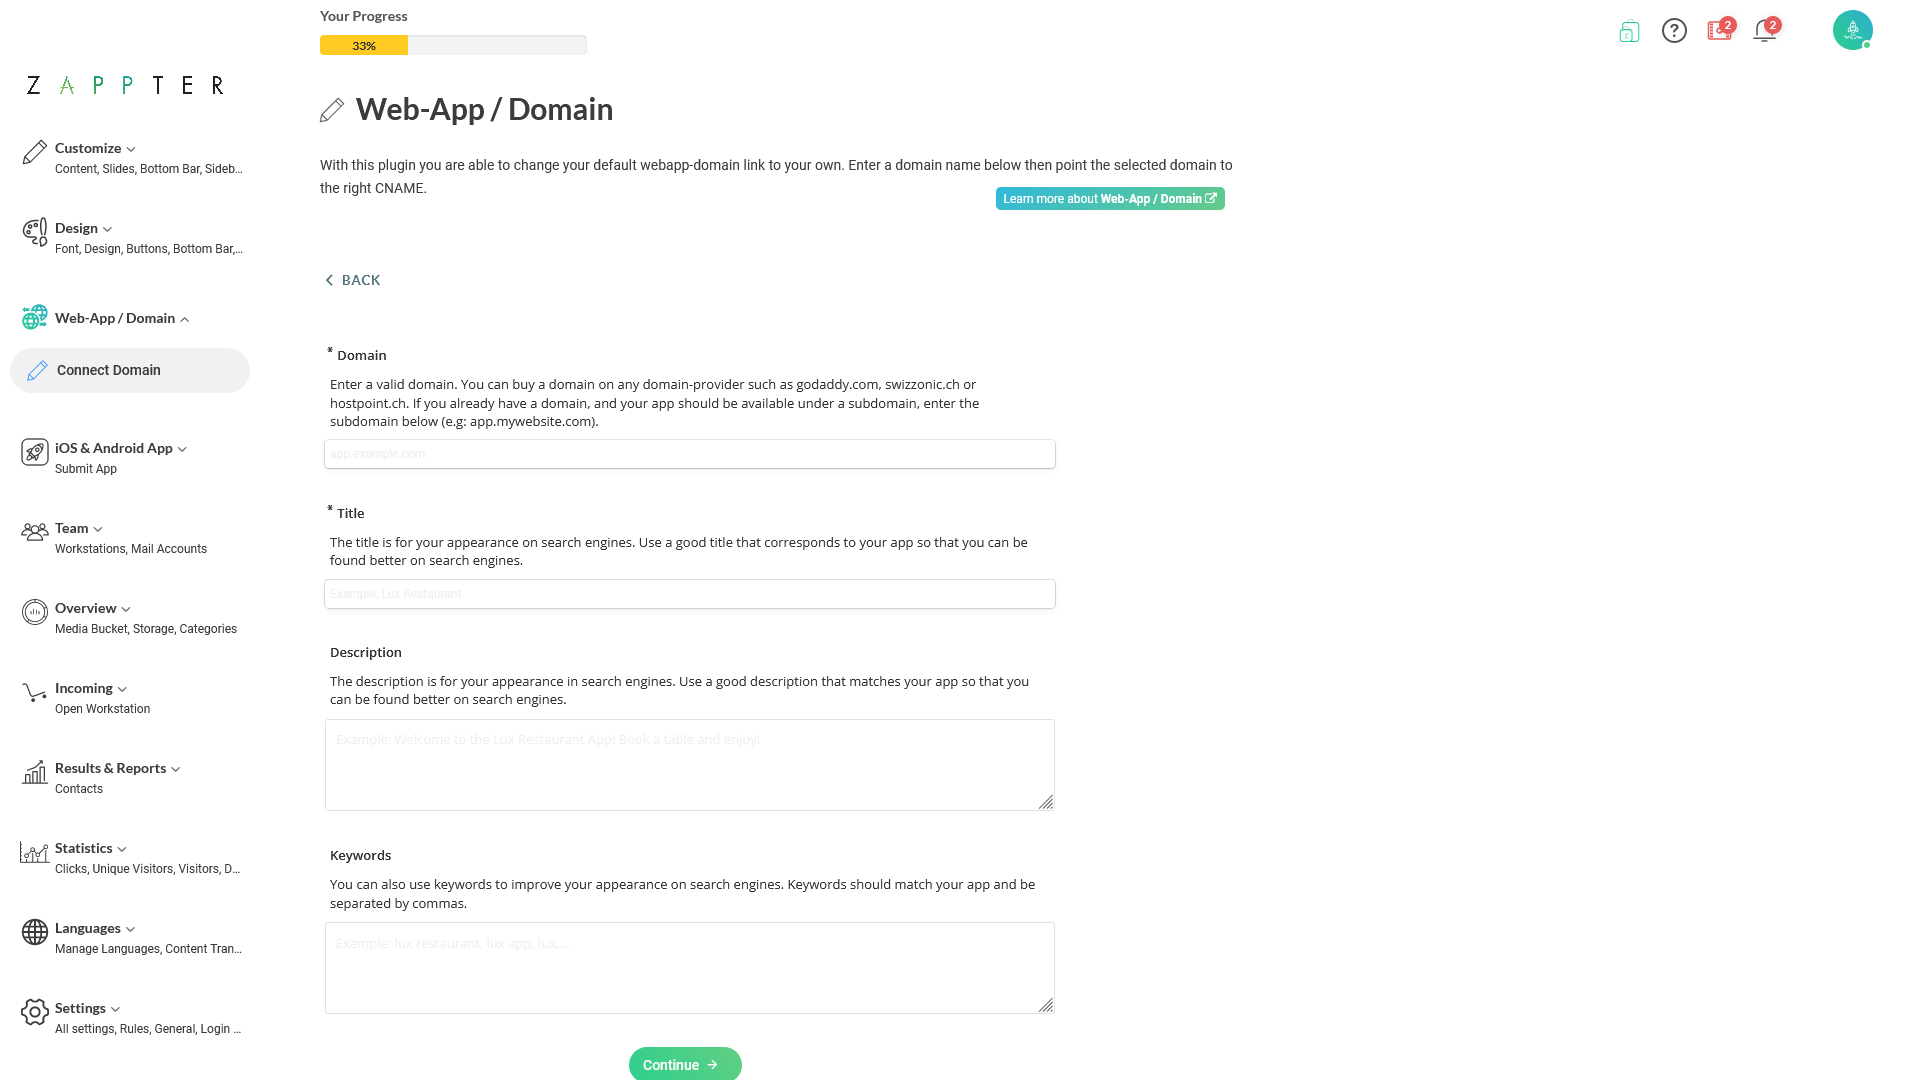
2. Enter below details.
image.png212.66 KB
Domain: Enter your new domain or subdomain name. It is the field that maps your app to your domain from the Zappter app
Title: Enter an SEO-friendly title here. It is the title that appears on SERP result pages (search engineer results)
Description: Enter SEO page description. It is the brief info about your app that search engine results display
Keywords: SEO keywords
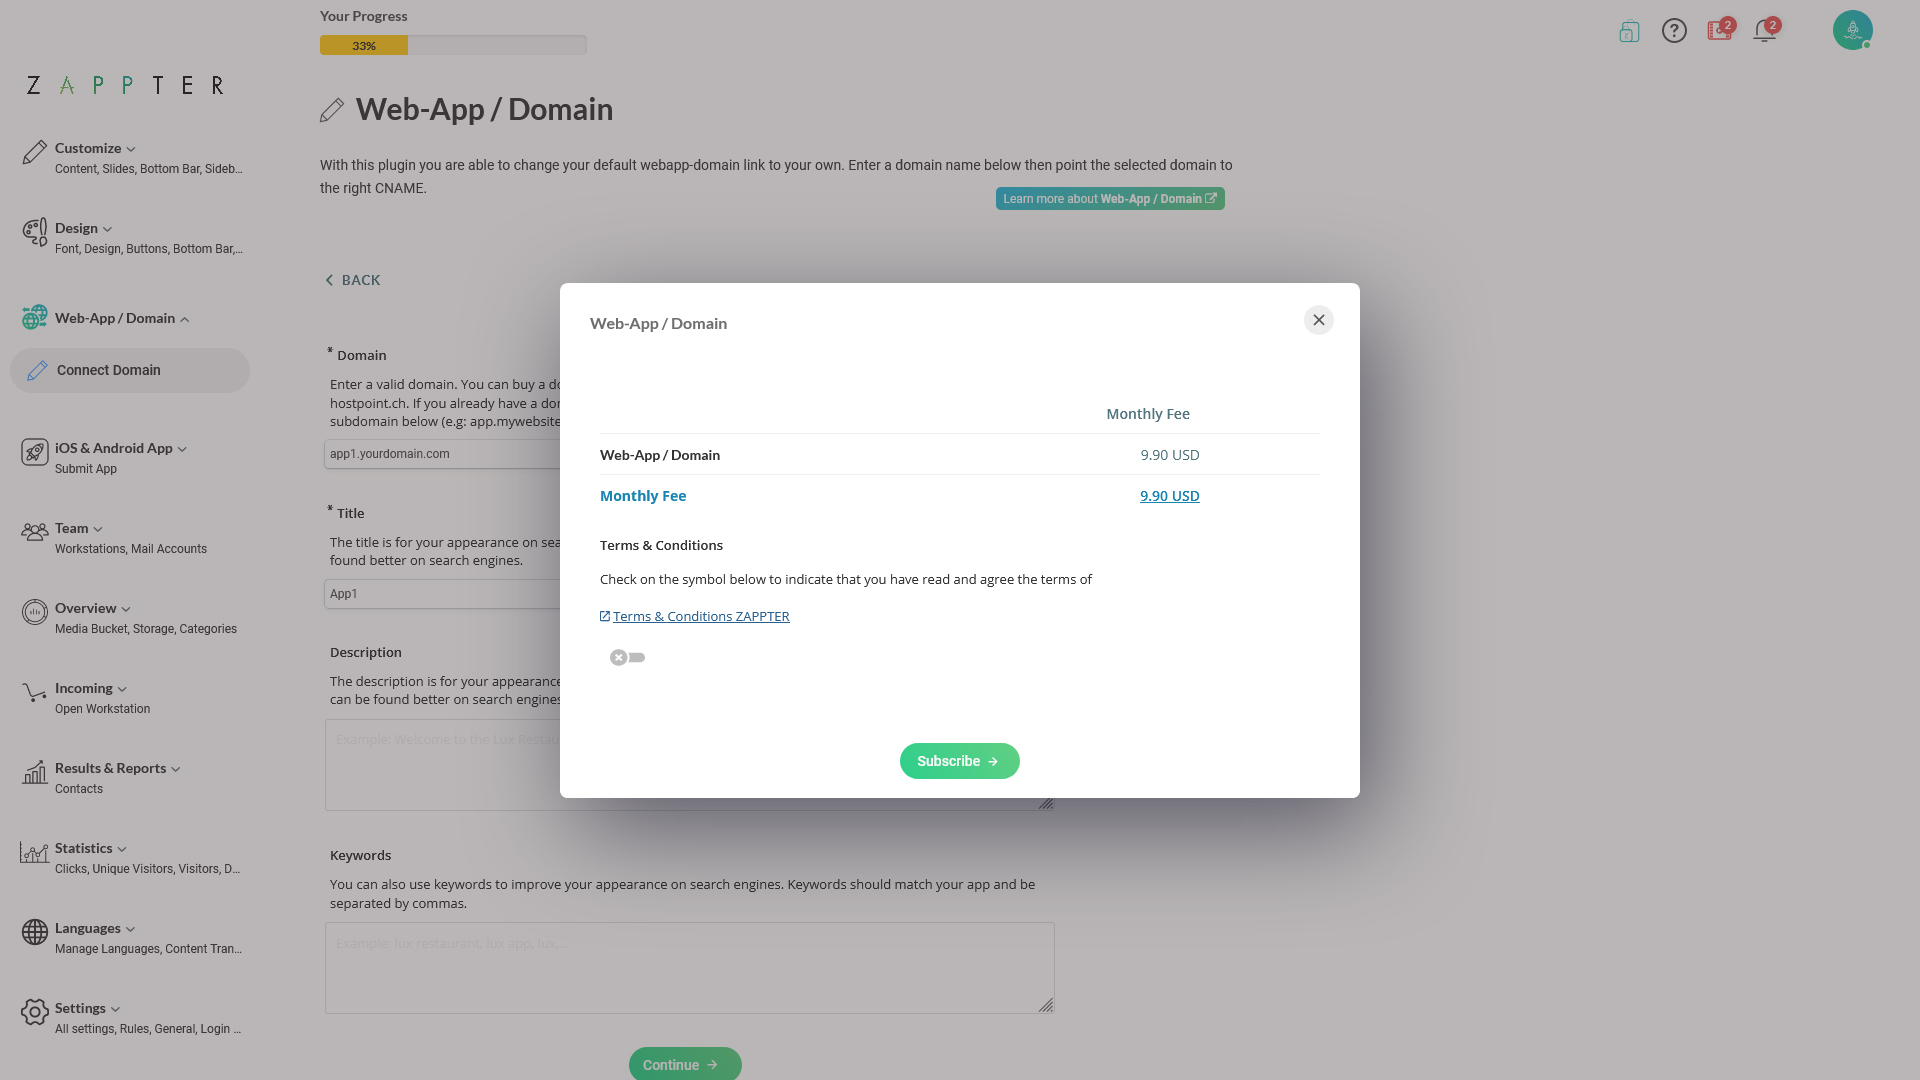
3. Click on the 'Continue' button to proceed, If you haven't subscribed to the plugin, Zappter prompts you for payment or the below screen comes up.
When you haven't subscribed, the payment prompt comes up as soon as you click on the 'Continue' button:
image.png358.53 KB
image.png261.27 KB
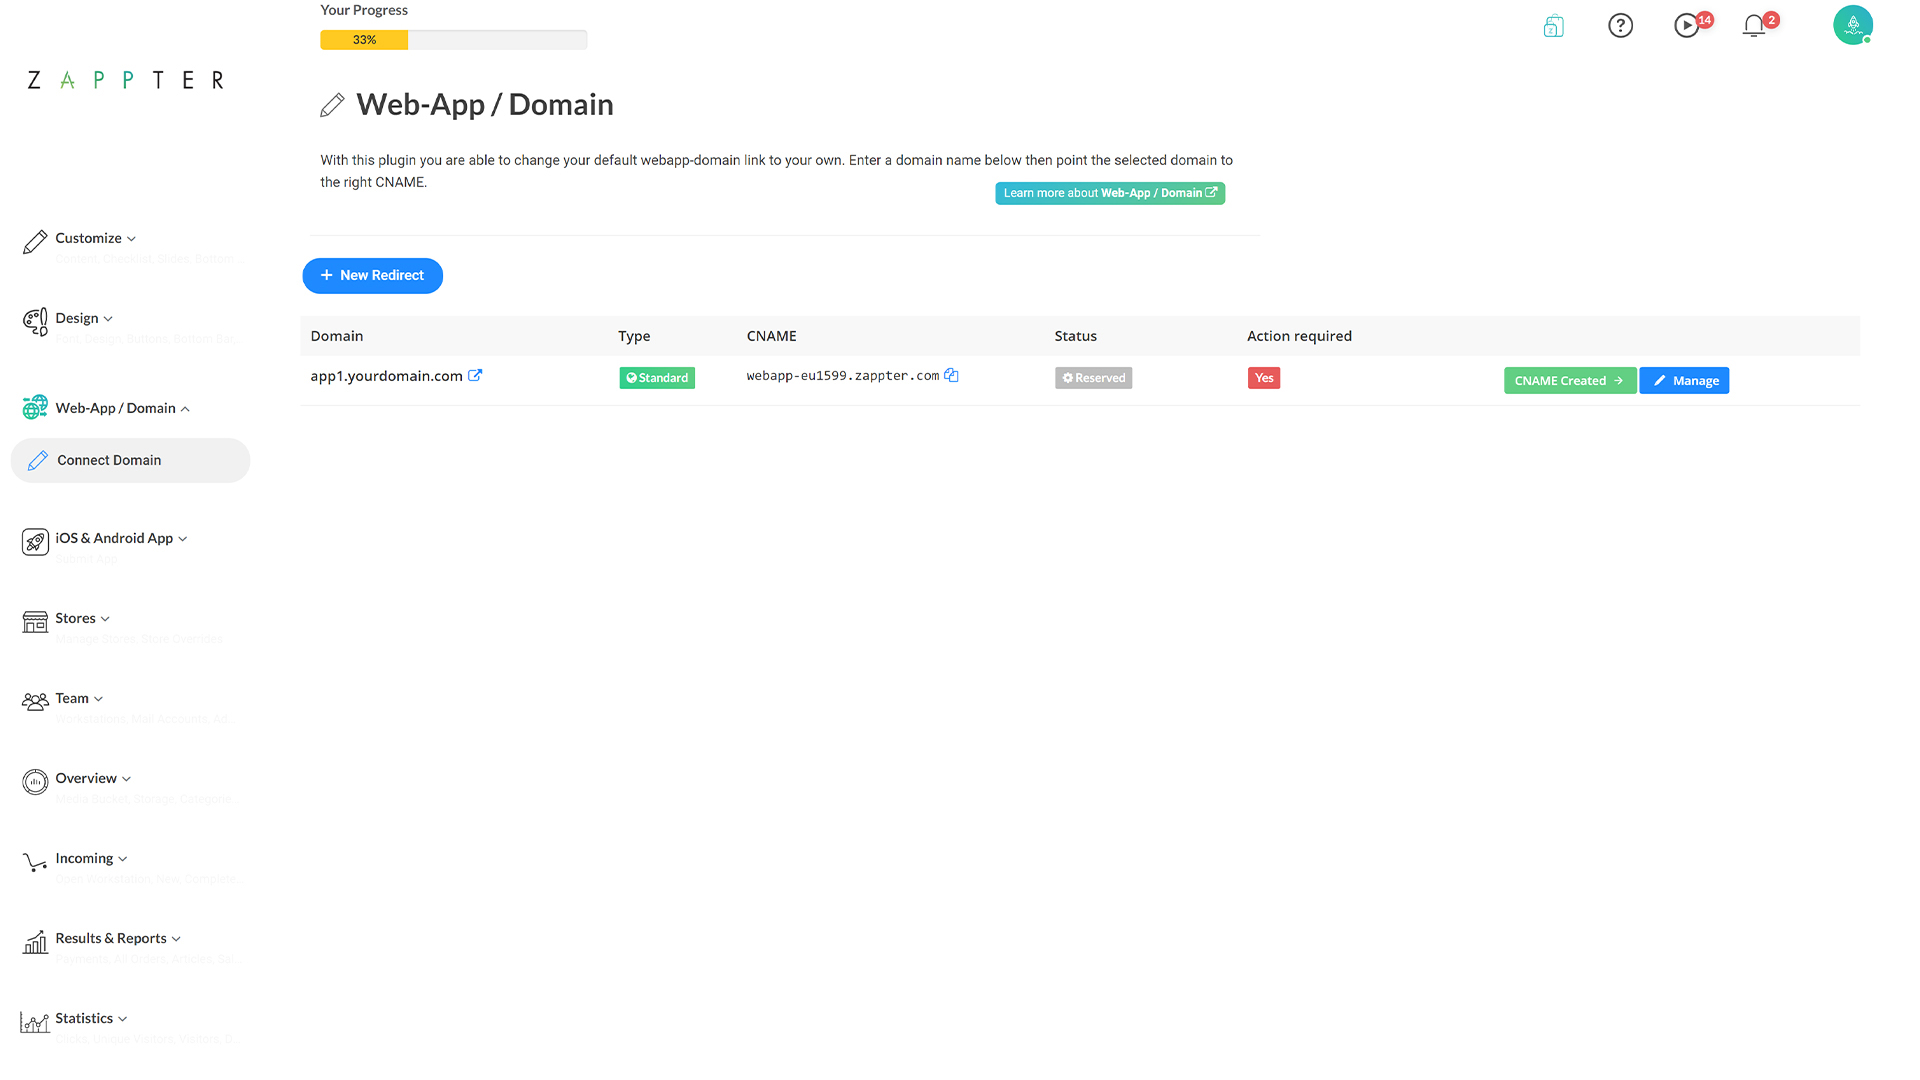
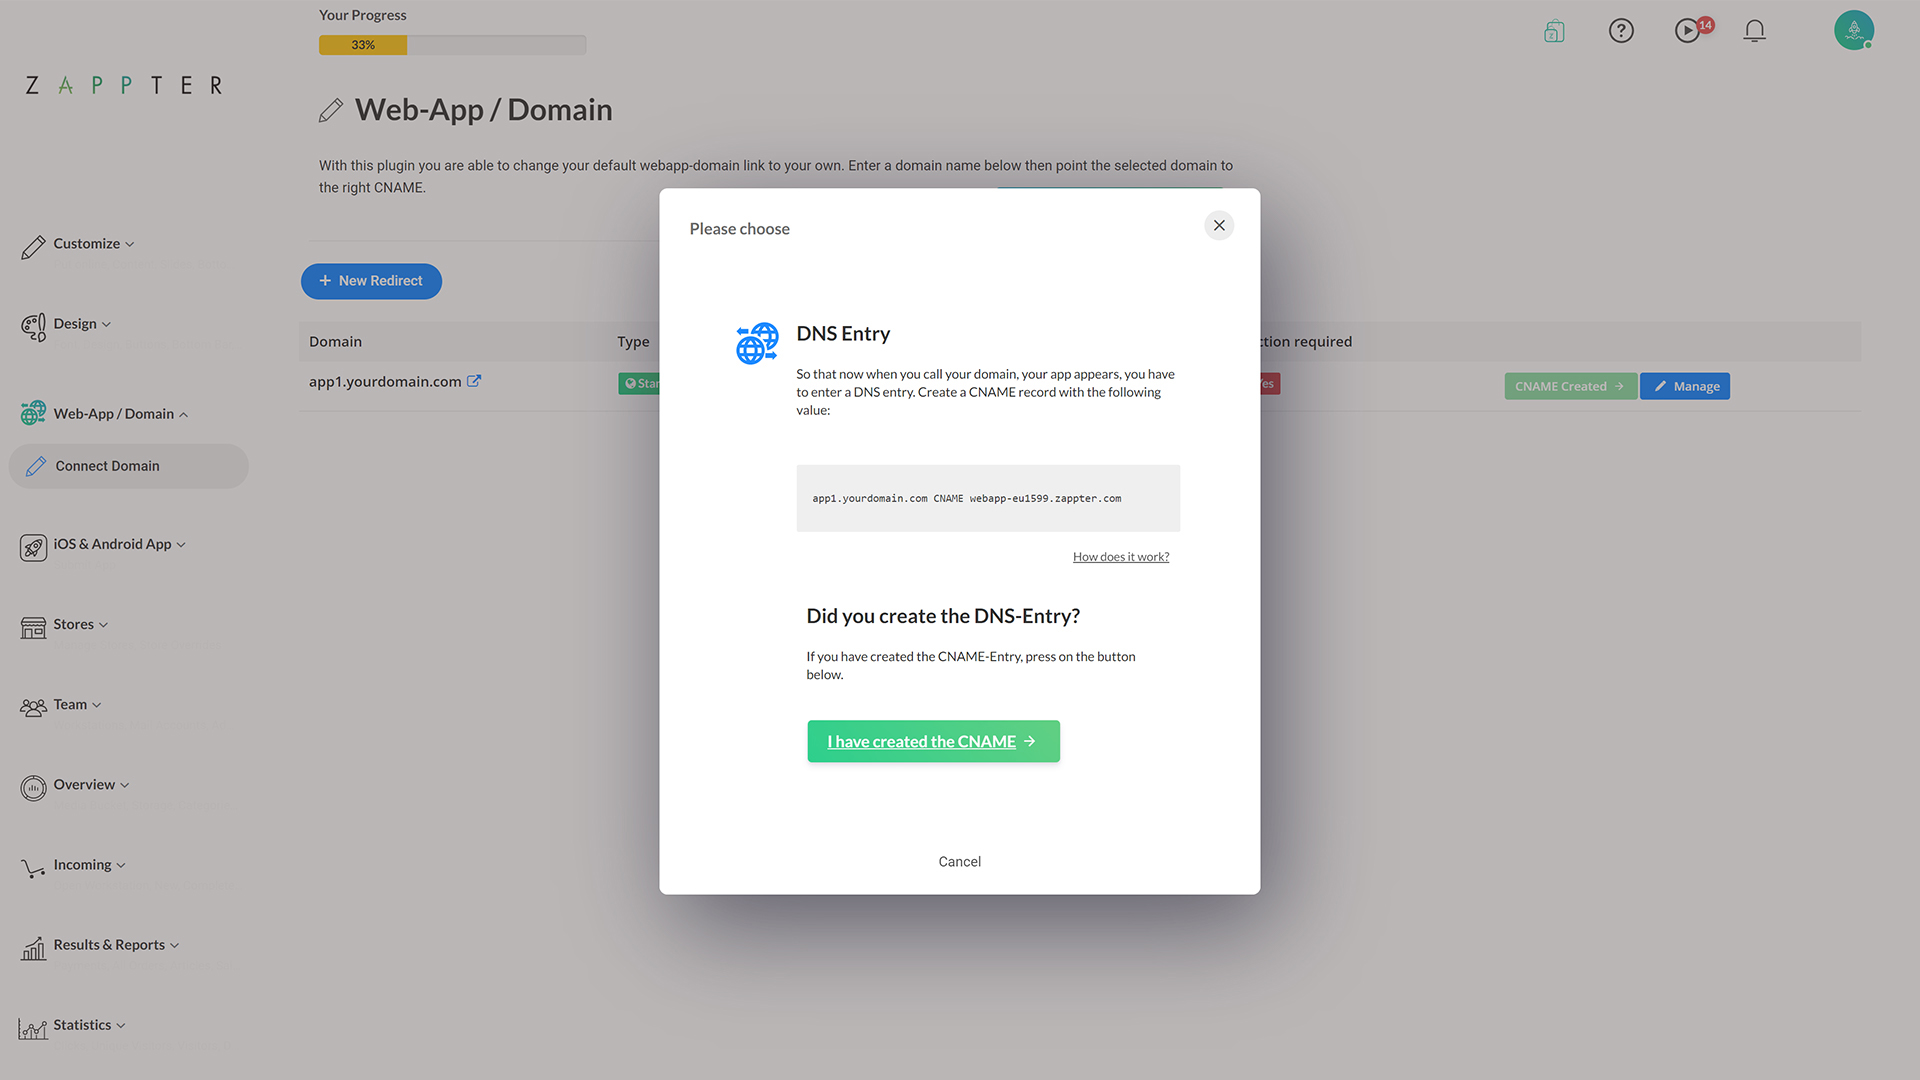
4. Click on the 'CNAME Created' green button to confirm that you have updated the DNS settings as discussed at the beginning. If not, complete DNS settings as discussed above and get back to click on this option.
If you are unsure how to manage your DNS settings, please contact your domain provider for help.
5. Finally, confirm the prompt by clicking on 'I have created the CNAME.'
image.png498.14 KB
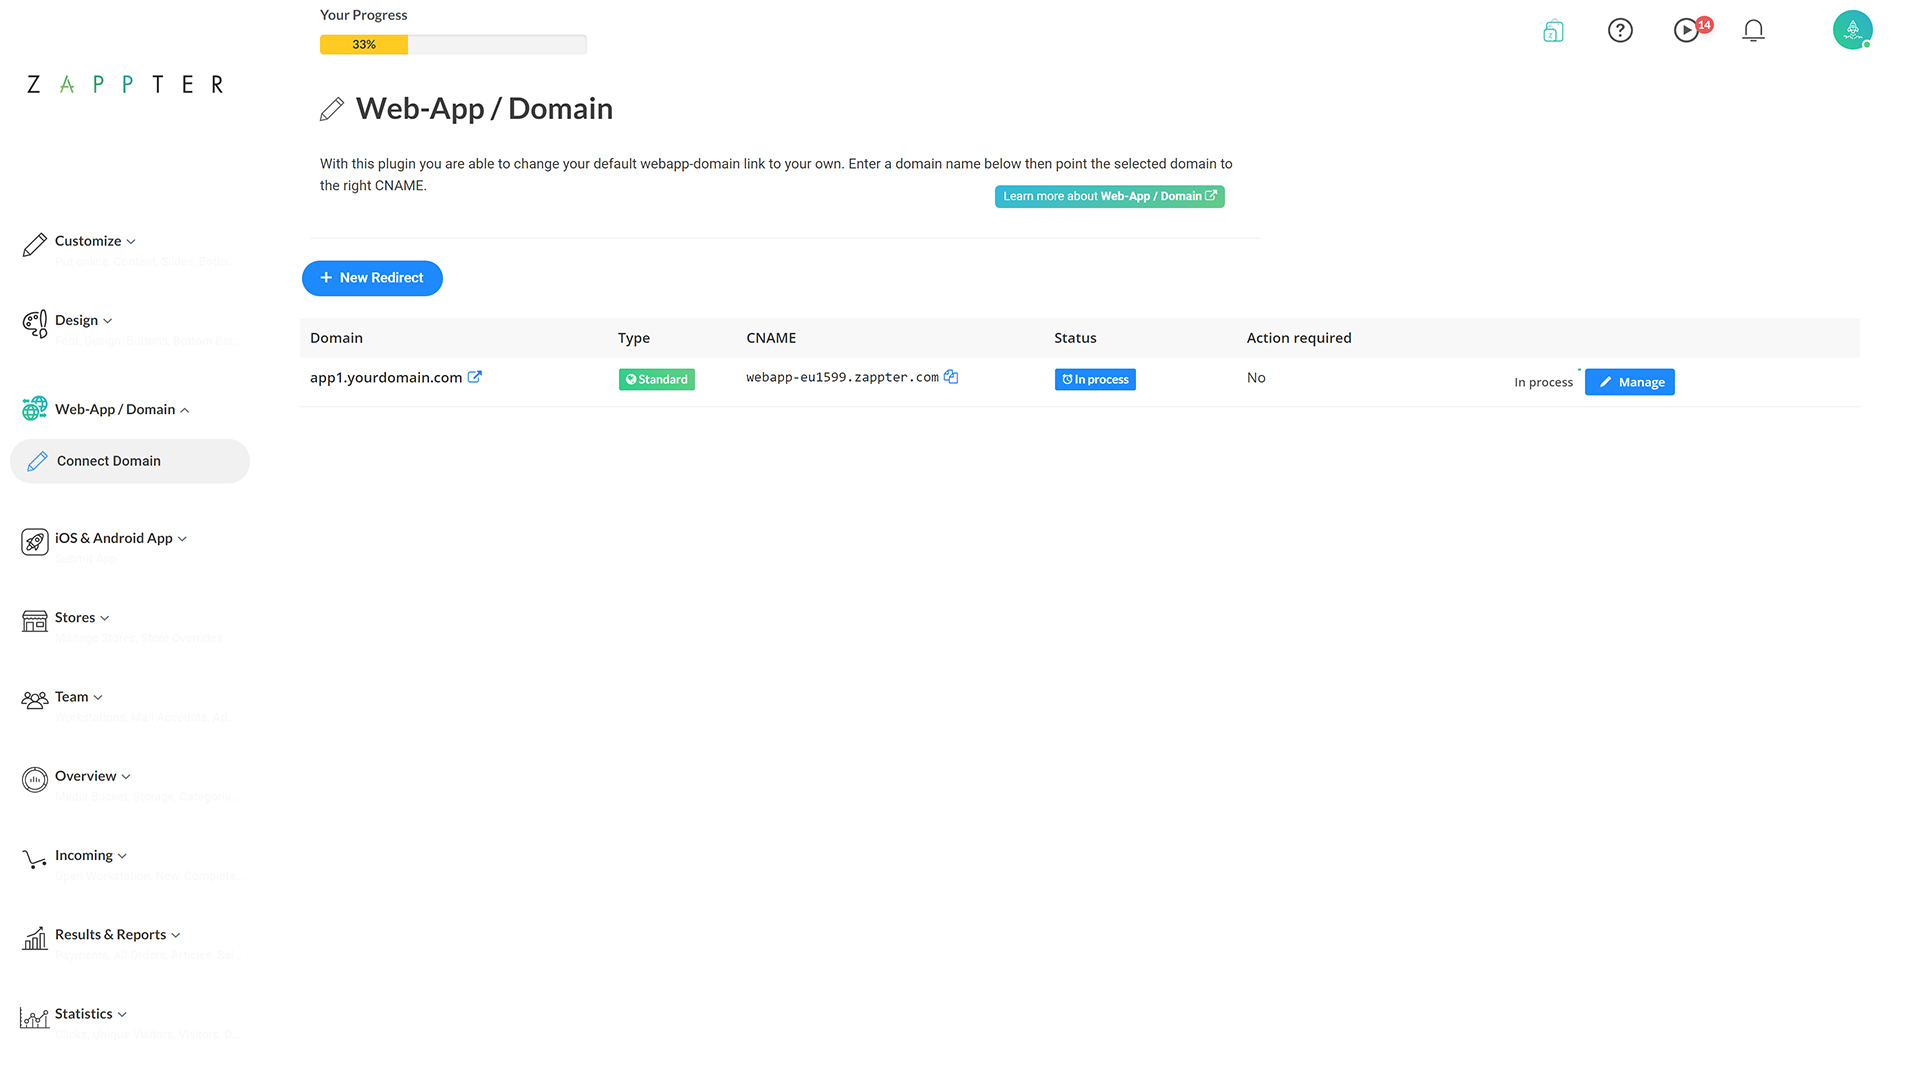
Your domain change has been initiated and the status is 'In progress.'
Note: In the event that you need to cancel your domain change after you have initiated, you need to make a support ticket request with Zappter to cancel the domain change.
image.png255.84 KB
DNS change propagation can take up to 48 hours maximum.