Follow the below steps to create a page on your app.
1. Admin > Customize > Content. Click to edit your app.
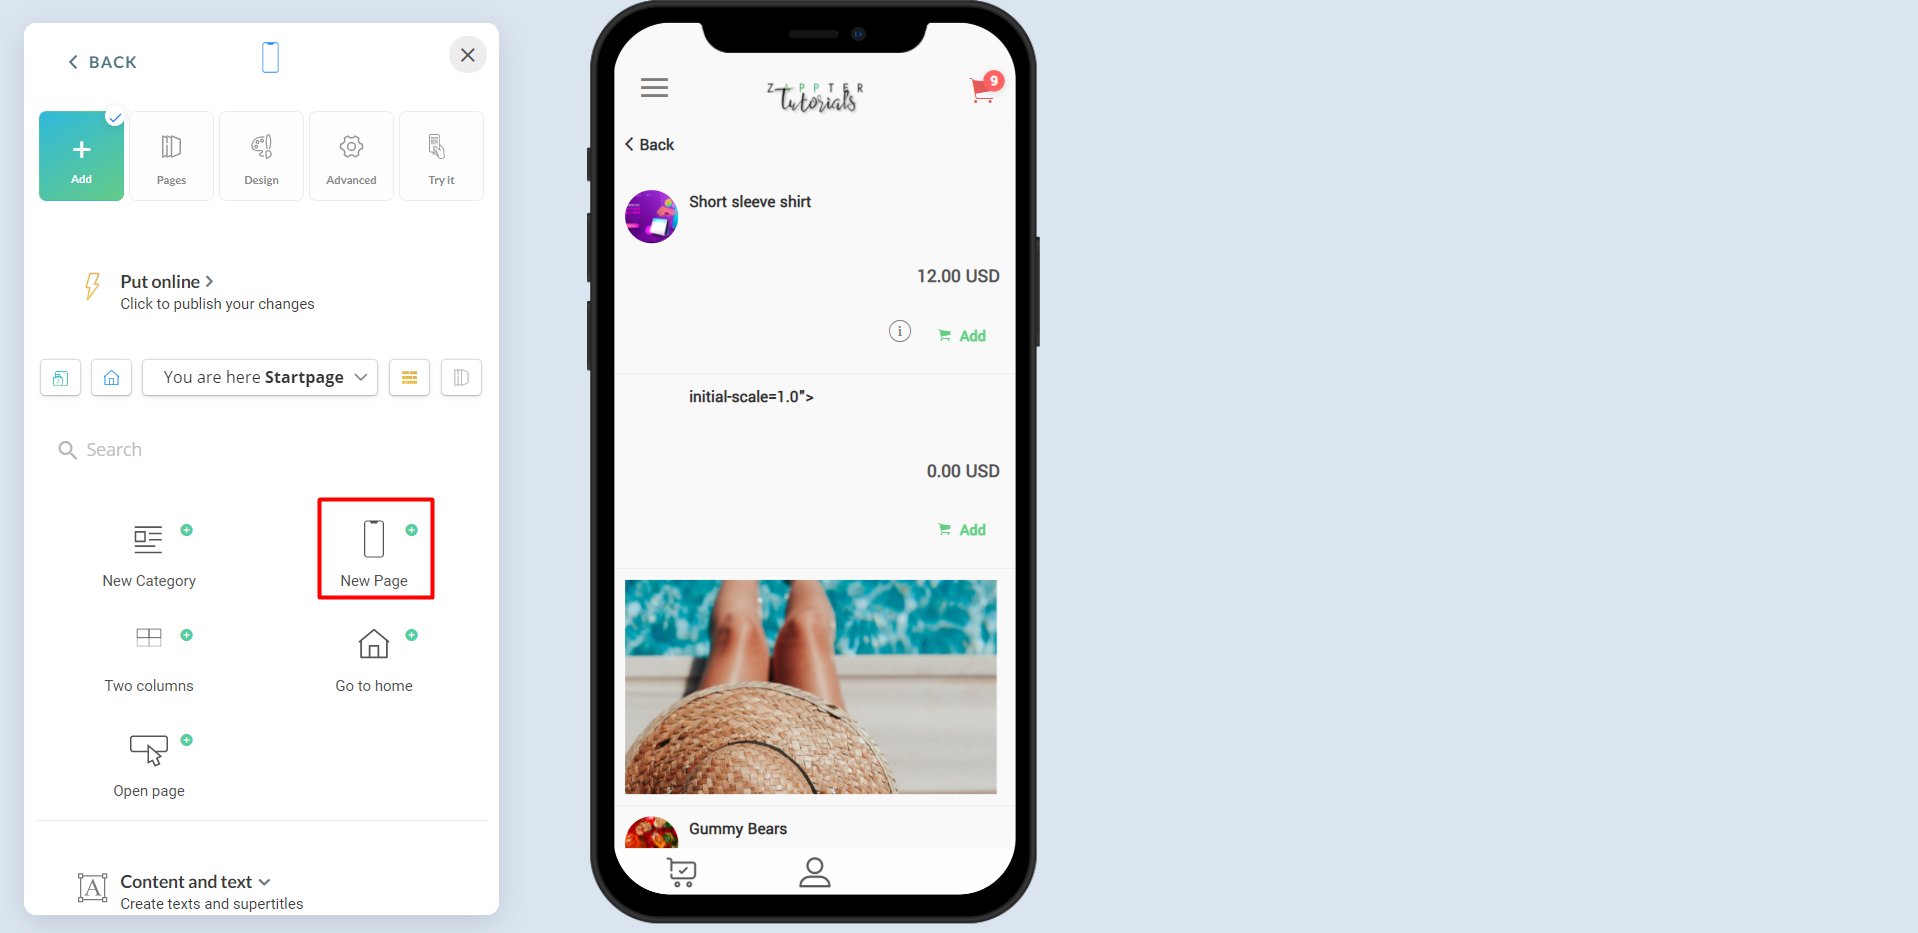
2. In the app customization, click on the 'New Page.'
image.png359.81 KB
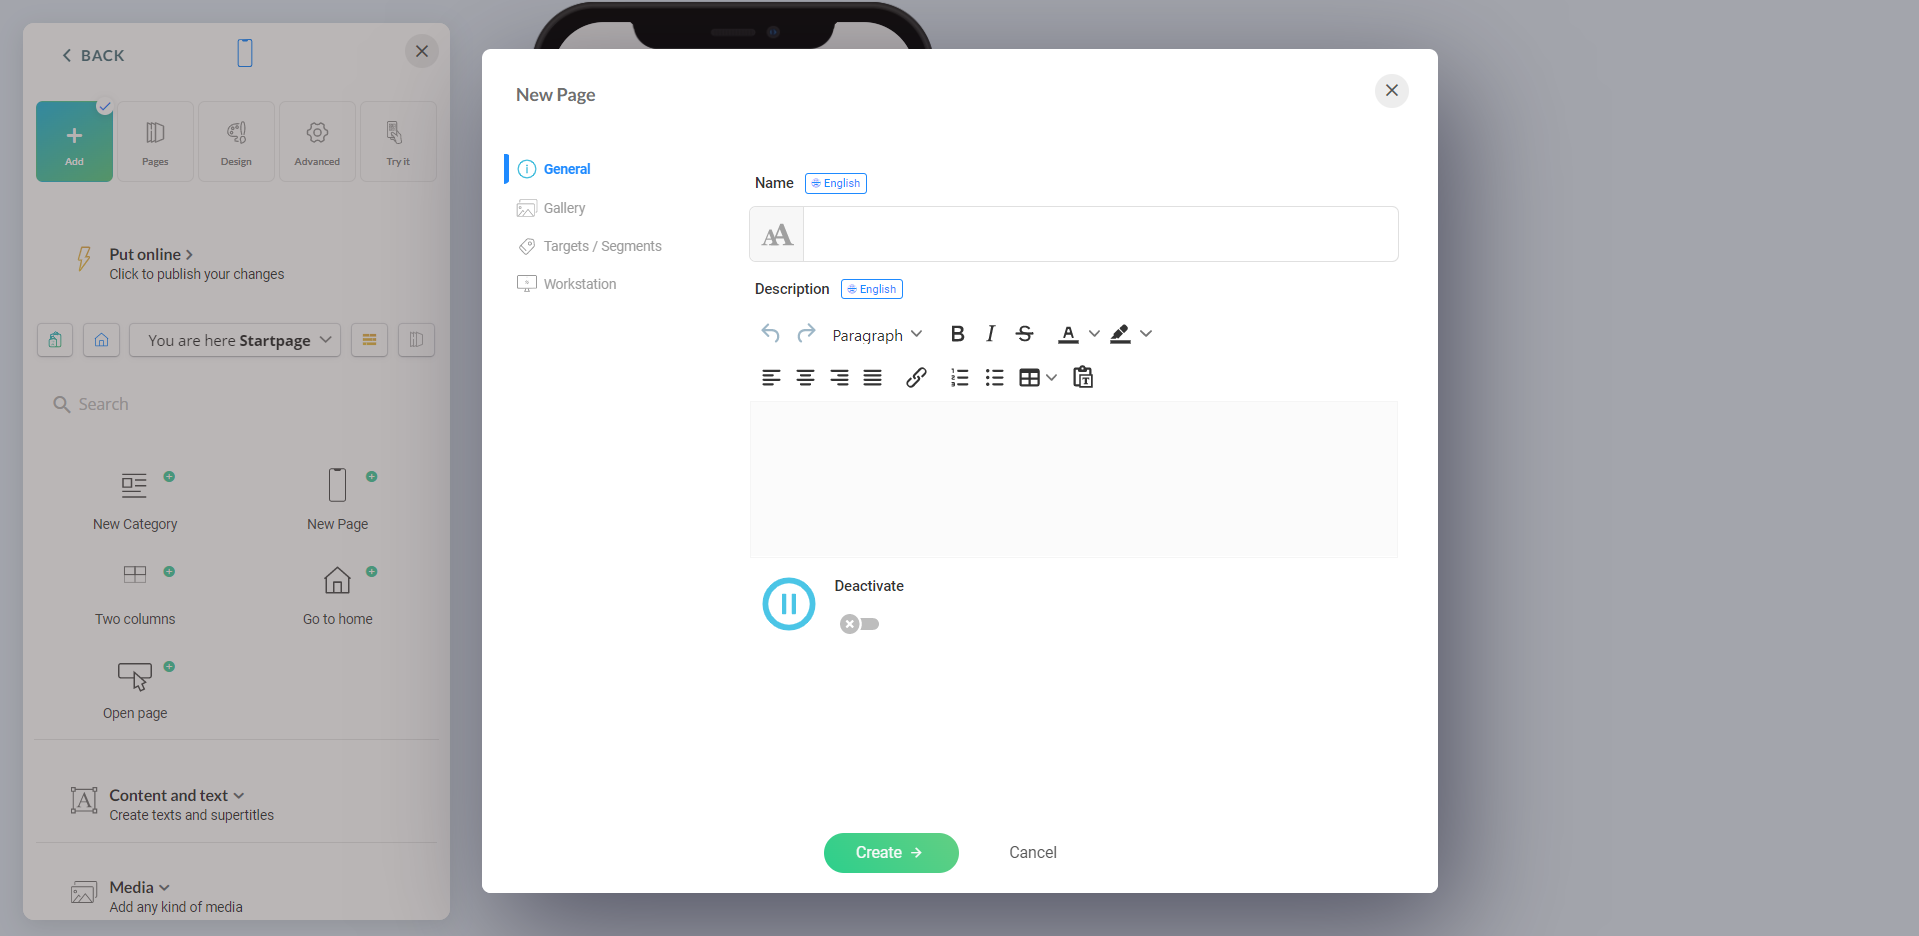
3. Set up your new page.
image.png184.05 KB
Name: Give a descriptive name for the page, and it is mandatory
Description: Short description about the page
4. Move onto the 'Gallery' tab to pick an image for the page.
image.png212.5 KB
Picture: Select a picture that will show up on the mobile app for this page
Picture Dimension: This setting is mainly aimed at showing images on different devices. If you select the 'Device optimized' option, it makes sure to pick the center area of the image and works its way diagonally until the device's display size. If you select the 'Square' option, it simply minimizes the entire image to support the device display size.
Using the Gallery tab, a user can insert an image from the computer, use an image already saved in the gallery or pick a free image from the Unsplash or Pixel sites.
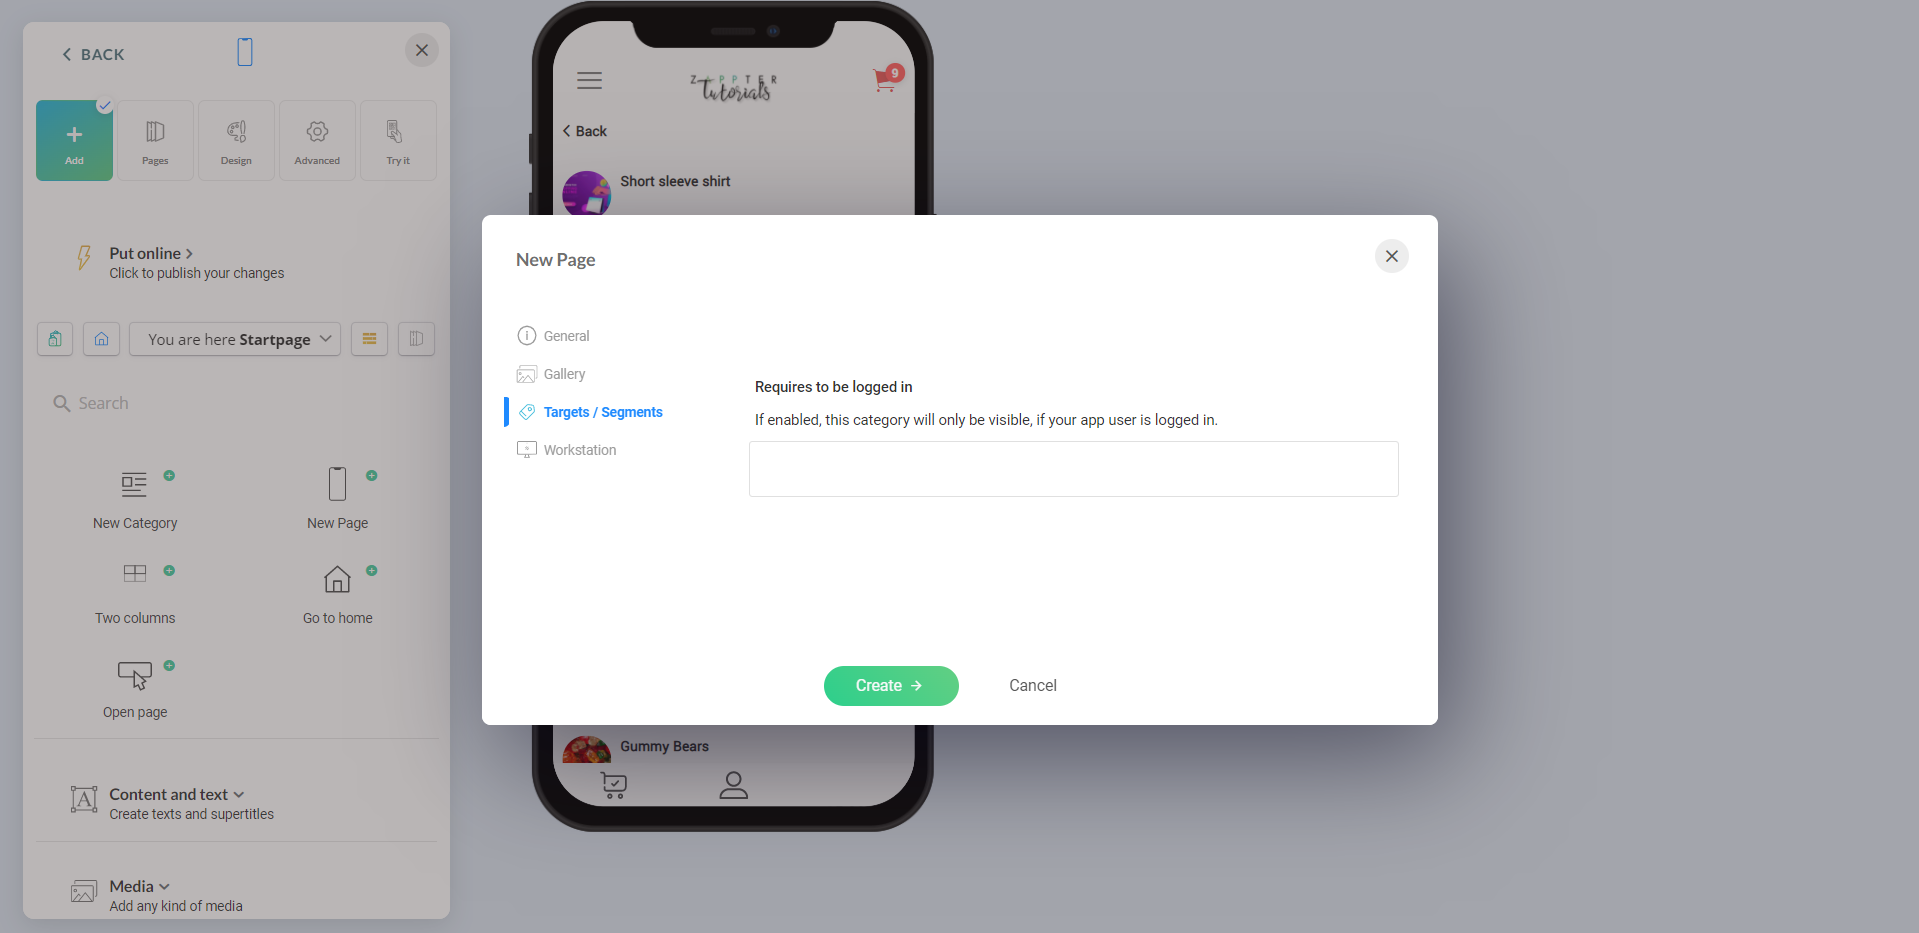
5. Move onto 'Targets / Segments' tab to enable category visible only to registered users.
image.png220.8 KB
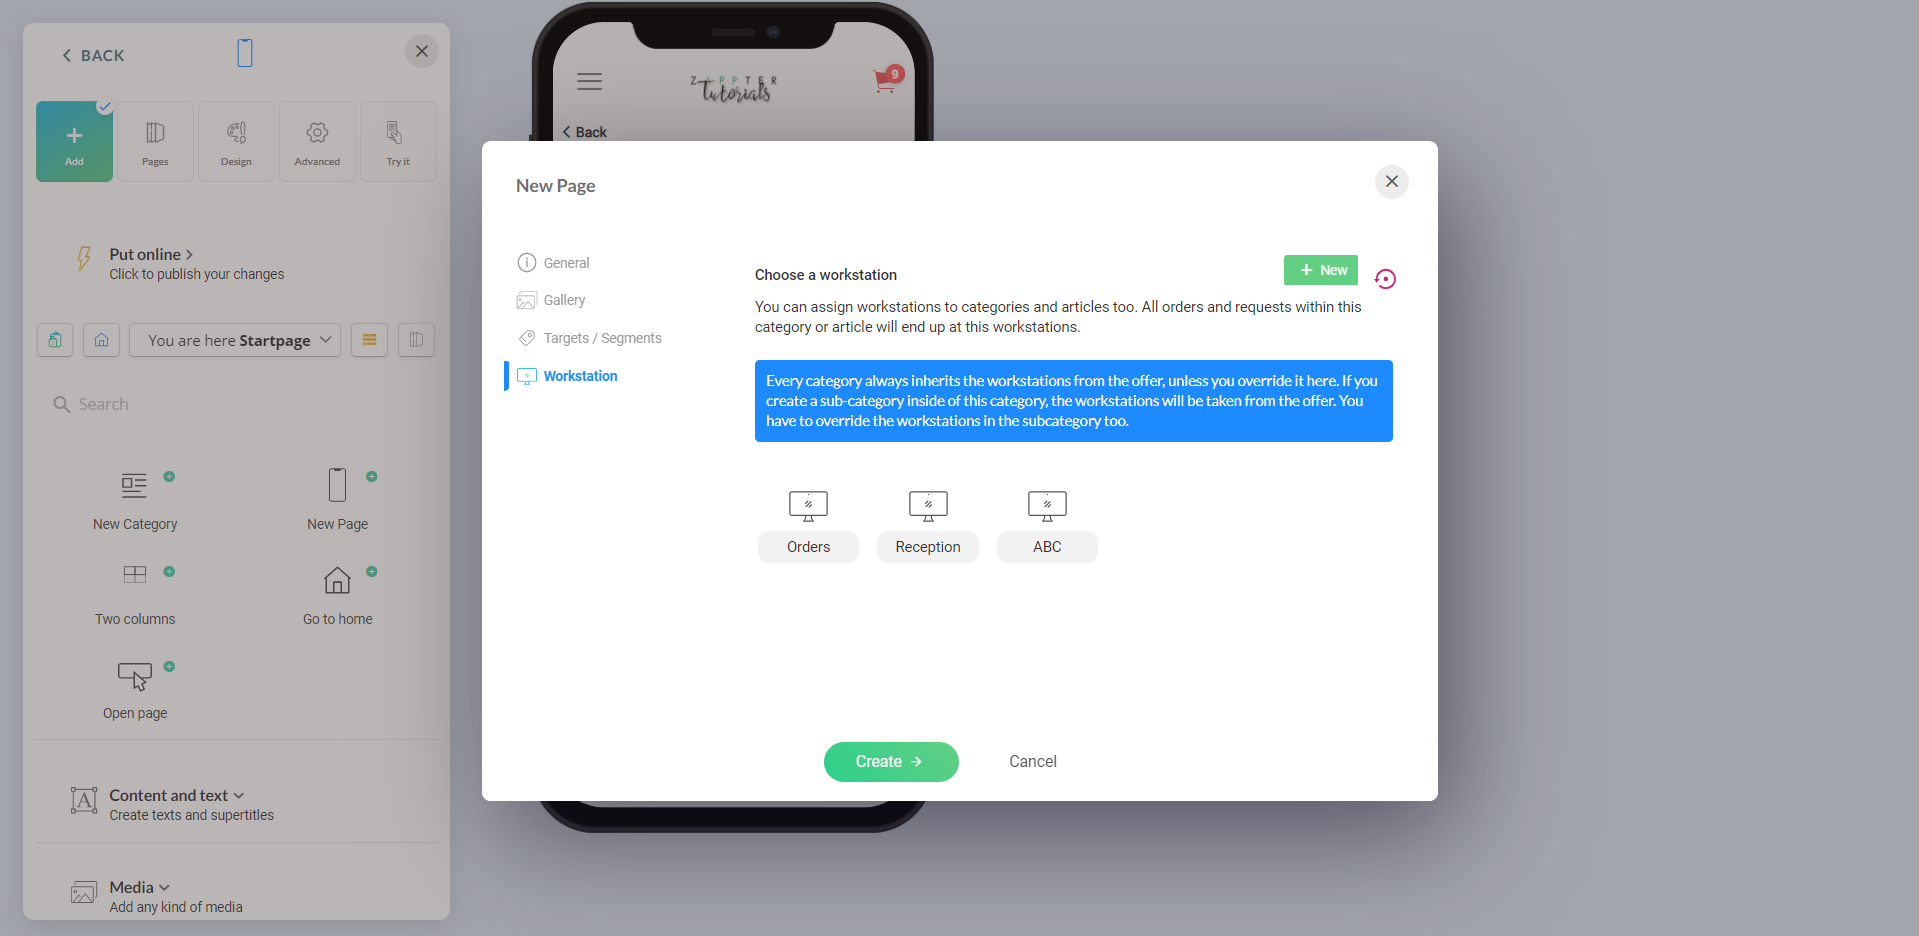
6. Move onto 'Workstation' tab to assign workstation to your page.
image.png220.86 KB
Workstation: Workstations are inherited from the app content settings (offer settings). However, you can override with a different workstation at this section by clicking on the '+New' so that this page and everything under this page will have the newly assigned workstation
7. Click on the 'Create' ('Save' when you edit a category/page)button to complete creating the new page.
8. 'Put online' to publish your changes on your users' devices. The button's caption changes from 'Put online' to 'Published' once the changes have been applied successfully.